I never thought I’d fall head over heels for a cookie that looks like it belongs in a cartoon, but here we are. These Big Blue Monster Stuffed Cookies have completely transformed my perspective on what dessert can be – they’re not just treats, they’re edible works of art that bring pure joy to everyone who sees them.
When I first encountered the concept of monster cookies, I was skeptical. Could something so visually striking actually taste good? The answer, my friends, is a resounding yes. These cookies combine the nostalgic charm of Cookie Monster with sophisticated baking techniques that create a texture and flavor experience unlike anything else in my recipe collection.
The magic happens in the stuffing – imagine biting into what appears to be a regular (albeit brilliantly blue) cookie, only to discover a molten center of white chocolate, mini chocolate chips, or even cookie dough. It’s like unwrapping a present with every bite, and the surprise never gets old.
Understanding the Monster Cookie Phenomenon
Monster Cookies: Large, colorful cookies typically associated with childhood favorites, often featuring multiple mix-ins and bold colors that create a playful, oversized appearance.
Stuffed Cookies: A baking technique where one dough encases a filling, creating a surprise center that remains hidden until the first bite.
Food Coloring Mastery: The art of achieving vibrant, even colors in baked goods without compromising texture or taste.
The beauty of these cookies lies in their versatility. I’ve made them for children’s birthday parties where they were the absolute star of the dessert table, but I’ve also served them at adult gatherings where they sparked conversations and brought out everyone’s inner child. There’s something universally appealing about the combination of nostalgia and innovation that these cookies represent.
Essential Ingredients and Their Roles
Creating the perfect Big Blue Monster Stuffed Cookies requires understanding how each ingredient contributes to the final product. I’ve spent countless hours perfecting this recipe, and every component serves a specific purpose.
| Ingredient | Quantity | Primary Function | Secondary Benefits |
|---|---|---|---|
| All-purpose flour | 2¾ cups | Structure and stability | Provides chewiness |
| Butter (unsalted) | 1 cup | Fat for tenderness | Flavor carrier |
| Brown sugar | ¾ cup | Moisture and chewiness | Caramel notes |
| Granulated sugar | ½ cup | Sweetness and spread | Crispy edges |
| Large eggs | 2 | Binding and richness | Protein structure |
| Vanilla extract | 2 tsp | Flavor enhancement | Aroma development |
| Baking soda | 1 tsp | Leavening agent | Color preservation |
| Salt | 1 tsp | Flavor balance | Gluten strengthening |
| Blue food coloring | 1-2 tsp | Signature monster color | Visual appeal |
| Mini chocolate chips | 1 cup | Texture contrast | Chocolate flavor |
| White chocolate chips | ½ cup | Stuffing component | Creamy sweetness |
The key to achieving that perfect monster blue lies in the food coloring technique. I’ve learned that gel food coloring works far better than liquid varieties because it doesn’t affect the dough’s consistency. The goal is to achieve a vibrant blue that’s reminiscent of Cookie Monster without looking artificial or overwhelming.
The Science Behind Perfect Stuffed Cookies
Understanding the science behind stuffed cookies has revolutionized my baking approach. The outer dough needs to be pliable enough to wrap around the filling without cracking, yet sturdy enough to maintain its shape during baking. This balance comes from the precise ratio of fats to flour and the temperature at which you work with the dough.
Dough Temperature Control: Keeping the dough slightly chilled makes it easier to handle while preventing the filling from melting prematurely.
Filling Selection: The ideal stuffing maintains its form during baking while creating that coveted “molten center” effect.
Baking Chemistry: The outer layer sets faster than the inner filling, creating the perfect textural contrast.
I discovered that the secret to preventing filling leakage lies in proper sealing techniques. When I wrap the dough around the stuffing, I ensure there are no air pockets and that all seams are thoroughly pressed together. This attention to detail makes the difference between cookies that hold their surprise and ones that reveal their secrets too early.
Step-by-Step Creation Process
Preparing the Base Dough
My journey with these cookies always begins with cream preparation. I cream the butter with both sugars until the mixture becomes light and fluffy – this typically takes about 4-5 minutes with an electric mixer. The transformation is remarkable: what starts as separate ingredients becomes a cohesive, airy foundation that will support all the other flavors.
The egg incorporation phase requires patience. I add them one at a time, ensuring each is fully integrated before adding the next. This prevents the mixture from curdling and ensures even distribution throughout the dough. The vanilla extract goes in with the final egg, creating an aromatic base that enhances every other flavor component.
Achieving the Perfect Blue
The coloring process is where artistry meets science. I start with a small amount of gel food coloring – usually about half a teaspoon – and gradually increase until I achieve the desired shade. The key insight I’ve gained is that the color deepens slightly during baking, so I aim for a shade that’s just slightly lighter than my target result.
Dry Ingredient Integration
The flour mixture requires gentle folding rather than aggressive mixing. I combine the flour, baking soda, and salt in a separate bowl before gradually incorporating it into the wet ingredients. Over-mixing at this stage develops too much gluten, resulting in tough cookies rather than the tender texture we’re seeking.
The mini chocolate chips get folded in last, and I’ve learned to toss them in a light dusting of flour before adding them. This prevents them from sinking to the bottom during baking and ensures even distribution throughout each cookie.
Stuffing Variations and Techniques
Classic White Chocolate Center
The traditional stuffing approach uses white chocolate chips or chunks as the surprise center. I form small balls of white chocolate – about a tablespoon’s worth – and ensure they’re compact enough to hold together but not so dense that they won’t melt appealingly during baking.
Cookie Dough Filling
For an extra indulgent version, I sometimes use edible cookie dough as the stuffing. This requires heat-treating the flour to eliminate any food safety concerns, but the result is absolutely worth the extra effort. The contrast between the baked outer cookie and the soft, raw-tasting center creates an extraordinary textural experience.
Cream Cheese Surprise
My personal favorite variation involves a sweetened cream cheese filling mixed with mini chocolate chips. The tanginess of the cream cheese balances the sweetness of the cookie dough beautifully, and it maintains a creamy consistency even after baking.
| Stuffing Type | Prep Time | Baking Behavior | Flavor Profile |
|---|---|---|---|
| White chocolate | 5 minutes | Melts completely | Sweet, creamy |
| Cookie dough | 15 minutes | Stays soft | Rich, indulgent |
| Cream cheese | 10 minutes | Sets softly | Tangy, balanced |
| Nutella | 2 minutes | Stays gooey | Hazelnut, chocolate |
| Peanut butter | 5 minutes | Maintains consistency | Nutty, salty |
Assembly and Baking Mastery
The assembly process is where patience truly pays off. I portion the dough into generous portions – these are monster cookies, after all – and create a well in each portion for the filling. The wrapping technique I’ve perfected involves stretching the dough gently around the filling, then rolling it between my palms to create a smooth, seamless surface.
Spacing on the baking sheet is crucial because these cookies spread significantly. I leave at least 3 inches between each cookie, and I’ve learned that using parchment paper prevents sticking while promoting even browning on the bottom.
The baking temperature and timing require careful attention. I bake at 350°F for 10-12 minutes, watching for the edges to set while keeping the centers slightly soft. The cookies continue cooking on the hot pan after removal from the oven, so slight under-baking prevents the dreaded over-done texture that can ruin the stuffed cookie experience.
Troubleshooting Common Challenges
Color Consistency Issues
Achieving uniform blue coloring throughout the dough sometimes presents challenges. I’ve found that adding the coloring to the butter-sugar mixture rather than at the end ensures better distribution. If streaking occurs, a few extra minutes of mixing usually resolves the issue.
Filling Leakage Prevention
Leaky stuffing plagued my early attempts until I mastered the sealing technique. The key is ensuring the dough completely encases the filling with no thin spots. I test each assembled cookie by gently rolling it – if I feel any soft spots, I add more dough to reinforce that area.
Texture Optimization
The perfect stuffed cookie has a tender exterior with a slight chew and a molten or soft center. Achieving this balance requires precise timing and temperature control. Under-baked cookies fall apart, while over-baked ones lose their textural contrast.
Nutritional Considerations and Modifications
While these cookies are undeniably indulgent, I’ve developed several modifications for different dietary needs and preferences. Understanding the nutritional impact helps make informed decisions about when and how to enjoy these treats.
| Component | Standard Recipe | Reduced Sugar | Gluten-Free | Vegan Option |
|---|---|---|---|---|
| Calories per cookie | 285 | 245 | 290 | 270 |
| Sugar content | 18g | 12g | 18g | 16g |
| Fat content | 12g | 11g | 13g | 11g |
| Protein | 4g | 4g | 3g | 3g |
| Fiber | 1g | 2g | 2g | 2g |
Healthier Alternatives
For those seeking lighter versions, I’ve successfully substituted applesauce for half the butter, reducing the fat content while maintaining moisture. Whole wheat pastry flour can replace up to one-third of the all-purpose flour without significantly impacting texture.
Sugar reduction works well with these cookies because the stuffing provides concentrated sweetness. I’ve reduced the sugar by up to 25% without noticeable flavor loss, especially when using sweeter fillings like white chocolate or Nutella.
Storage and Serving Suggestions
Proper storage maintains the cookies’ textural integrity and prevents the stuffing from hardening. Room temperature storage in an airtight container keeps them perfect for up to five days. For longer storage, freezing works excellently – I wrap individual cookies in plastic wrap before placing them in freezer bags.
Presentation Ideas
These cookies shine as centerpieces for dessert tables. I often arrange them on colorful plates with complementary treats like vanilla ice cream or fresh berries. The visual impact of their bright blue color makes them conversation starters at any gathering.
For special occasions, I’ve created cookie towers using different sized Big Blue Monster Stuffed Cookies, creating an impressive display that’s as fun to look at as it is to eat.
Serving Temperature Considerations
While delicious at room temperature, these cookies reach their full potential when served slightly warm. A 10-15 second microwave warming melts the stuffing just enough to recreate that fresh-from-the-oven experience. However, I caution against overheating, which can make the filling too hot and potentially cause burns.
Creative Variations and Seasonal Adaptations
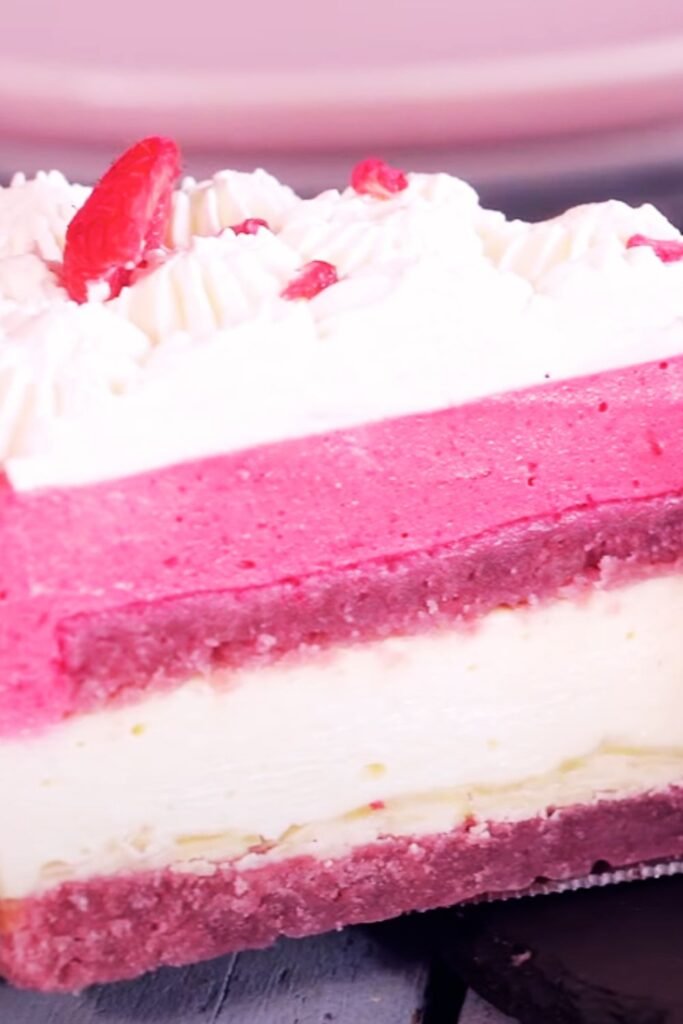
The basic Big Blue Monster concept adapts beautifully to different themes and seasons. I’ve created Halloween versions with orange coloring and pumpkin spice filling, Christmas editions with red and green colors, and even Valentine’s Day pink versions with strawberry centers.
Holiday Modifications
Halloween: Orange dough with chocolate-orange filling Christmas: Red or green dough with peppermint filling
Valentine’s Day: Pink dough with strawberry cream filling Easter: Pastel colors with lemon curd centers
Each variation maintains the core appeal of the surprise center while adapting the flavor profile to match seasonal preferences. The techniques remain consistent, making it easy to experiment with different combinations.
Frequently Asked Questions
Q: How do I prevent the blue food coloring from staining my hands during mixing?
I always wear disposable gloves when working with heavily colored dough. This prevents staining and makes cleanup much easier. If you don’t have gloves available, coating your hands lightly with cooking oil before handling the dough helps prevent color transfer.
Q: Can I make the dough ahead of time and stuff the cookies later?
Absolutely! The dough actually benefits from chilling for at least an hour before assembly. I often make the dough the night before, wrap it tightly, and refrigerate it. Just let it come to room temperature for about 15 minutes before attempting to stuff and shape the cookies.
Q: What’s the best way to ensure the stuffing stays centered during baking?
The key is making sure your dough portion is large enough to completely encase the filling with some overlap. I aim for about 2 tablespoons of dough per cookie, which provides enough material to seal properly. Also, placing the seam-side down on the baking sheet helps maintain the shape.
Q: My cookies spread too much during baking. How can I fix this?
Excessive spreading usually indicates the dough is too warm or the butter was over-softened. Try chilling the assembled cookies for 15-30 minutes before baking. Also, ensure your baking sheet isn’t too warm from previous batches – I always use cool pans for each new batch.
Q: Can I freeze the unbaked stuffed cookies?
Yes! This is actually one of my favorite meal prep strategies. I assemble the cookies, place them on baking sheets, freeze until solid, then transfer to freezer bags. They can be baked directly from frozen – just add 2-3 extra minutes to the baking time.
Q: The stuffing melted out of some of my cookies. What went wrong?
This usually happens when the dough wrapping is too thin in spots or when the sealing isn’t complete. Make sure you’re using enough dough to create a thick shell around the filling, and pay special attention to pressing all seams together firmly. Also, avoid overfilling – less is often more with stuffed cookies.
Q: How can I make the blue color more vibrant?
Gel food coloring produces much more vibrant results than liquid coloring. Start with a small amount and gradually add more until you reach the desired shade. Keep in mind that the color may fade slightly during baking, so aim for a slightly more intense blue than your target result.
Q: What other flavors work well with the blue monster theme?
While chocolate is classic, I’ve had great success with vanilla cream filling, cookie butter, caramel, and even blue-tinted white chocolate. The key is choosing fillings that maintain their consistency during baking and complement rather than compete with the cookie base flavor.
These Big Blue Monster Stuffed Cookies represent more than just a dessert recipe – they’re an invitation to play with your food in the best possible way. Every time I make them, I’m reminded of the joy that comes from creating something that surprises and delights people. The combination of visual appeal, textural contrast, and nostalgic charm makes them a standout addition to any baker’s repertoire.
The journey from simple cookie dough to these elaborate creations has taught me patience, precision, and the importance of not taking dessert too seriously. Sometimes the most memorable treats are the ones that make us smile before we even take a bite.