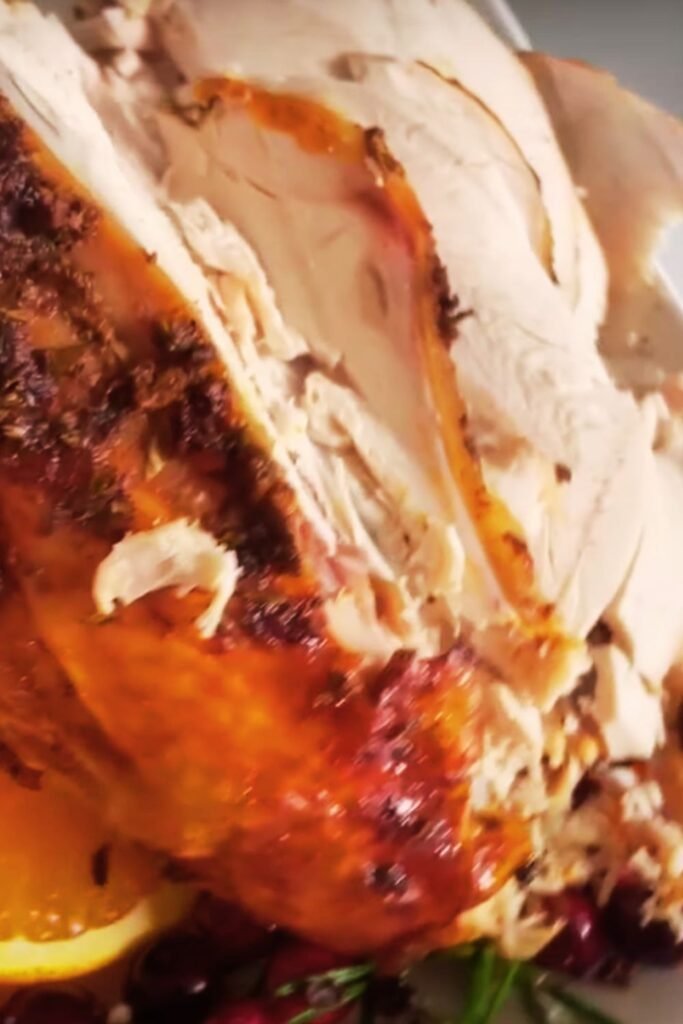
There’s something magical about the aroma of roasted turkey wafting through my kitchen, especially when it’s enhanced with the rich, savory notes of garlic herb butter. I’ve been perfecting this recipe for years, and I can confidently say it’s become my go-to centerpiece for both intimate family dinners and larger gatherings. The beauty of this dish lies not just in its impressive presentation, but in how surprisingly simple it is to execute while delivering restaurant-quality results.
When I first started cooking turkey breast, I was intimidated by the prospect of dry, flavorless meat. However, I’ve discovered that the secret lies in proper preparation, the right temperature control, and most importantly, that incredible garlic herb butter that infuses every bite with moisture and flavor. This recipe has never failed me, and I’m excited to share every detail with you.
Understanding Turkey Breast Cuts
Before diving into the cooking process, I want to help you understand the different types of turkey breast cuts available, as this knowledge will significantly impact your cooking approach.
Bone-in Turkey Breast : A cut that includes the breastbone and ribcage, typically weighing 4-8 pounds. This cut retains more moisture during cooking and offers superior flavor due to the bone’s contribution.
Boneless Turkey Breast : Breast meat with all bones removed, usually weighing 2-4 pounds. While more convenient to carve, it requires extra attention to prevent drying out.
Split Turkey Breast : Half of a whole turkey breast, bone-in, weighing 2-4 pounds. Perfect for smaller gatherings and cooks more evenly than larger cuts.
Turkey Breast Roast : Boneless breast meat that’s been rolled and tied, sometimes stuffed with seasonings. Cooks quickly but needs careful monitoring.
Essential Ingredients for Perfect Garlic Herb Butter
The garlic herb butter is truly the star of this recipe. I’ve experimented with countless combinations, and this blend consistently delivers the most aromatic and flavorful results.
Primary Butter Base
- 1/2 cup unsalted butter, softened to room temperature
- 6 cloves fresh garlic, minced finely
- 2 tablespoons fresh rosemary, chopped
- 2 tablespoons fresh sage, chopped
- 1 tablespoon fresh thyme leaves
- 1 teaspoon kosher salt
- 1/2 teaspoon freshly ground black pepper
Additional Flavor Enhancers
- 1 tablespoon fresh lemon zest
- 1 teaspoon dried oregano
- 1/2 teaspoon smoked paprika
- 1/4 teaspoon red pepper flakes (optional)

Step-by-Step Preparation Method
My approach to this recipe focuses on building layers of flavor while ensuring the meat stays incredibly moist. Here’s my tried-and-tested method:
Preparing the Garlic Herb Butter
- Room Temperature Preparation: I always start by ensuring my butter is perfectly softened. This usually takes about 30 minutes at room temperature, but I can speed this up by cutting it into small cubes.
- Garlic Preparation: I mince the garlic as finely as possible. Sometimes I use a microplane grater to get an almost paste-like consistency, which distributes more evenly throughout the butter.
- Herb Integration: I fold in the fresh herbs gently, ensuring even distribution without overworking the butter mixture.
- Seasoning Balance: I taste the butter mixture and adjust seasonings as needed. The salt should enhance the herbs without overpowering them.
Turkey Breast Preparation
- Thawing: If using frozen turkey, I allow 24 hours of refrigerator thawing for every 4 pounds of meat.
- Brining (Optional but Recommended): I prepare a simple brine using 8 cups water, 1/2 cup kosher salt, and 1/4 cup brown sugar. The turkey soaks for 4-8 hours, resulting in incredibly moist meat.
- Pat Dry: I thoroughly pat the turkey dry with paper towels, as moisture on the surface prevents proper browning.
- Butter Application: Using my fingers, I carefully loosen the skin and spread half the garlic herb butter directly on the meat. The remaining butter goes under and over the skin.
Cooking Temperature and Timing Guide
Achieving the perfect roasted turkey breast requires precise temperature control and timing. I’ve developed this comprehensive guide based on years of experience:
| Turkey Breast Weight | Cooking Temperature | Approximate Time | Internal Temperature |
|---|---|---|---|
| 2-3 lbs (boneless) | 350°F (175°C) | 60-80 minutes | 165°F (74°C) |
| 3-4 lbs (boneless) | 350°F (175°C) | 80-100 minutes | 165°F (74°C) |
| 4-6 lbs (bone-in) | 325°F (163°C) | 90-120 minutes | 165°F (74°C) |
| 6-8 lbs (bone-in) | 325°F (163°C) | 120-150 minutes | 165°F (74°C) |
Temperature Monitoring Techniques
I rely on a digital probe thermometer for accuracy. The probe should be inserted into the thickest part of the breast, avoiding bone contact. I check the temperature at multiple points to ensure even cooking.
Advanced Cooking Techniques
Over the years, I’ve refined several techniques that elevate this dish from good to exceptional:
The Reverse Sear Method
- Low and Slow Start: I begin cooking at 275°F (135°C) for the first hour, allowing the meat to cook gently and evenly.
- Temperature Boost: When the internal temperature reaches 145°F (63°C), I increase the oven to 425°F (218°C) for the final 15-20 minutes to achieve golden-brown skin.
Aromatics and Vegetables
I create a bed of aromatic vegetables that not only flavor the turkey but also serve as an excellent side dish:
- 2 large onions, quartered
- 4 carrots, cut into 2-inch pieces
- 4 celery stalks, cut into 2-inch pieces
- 1 head of garlic, halved
- Fresh herb sprigs (rosemary, sage, thyme)
Nutritional Information and Health Benefits
Understanding the nutritional profile of this dish helps me make informed decisions about portion sizes and meal planning:
| Nutrient | Per 4 oz Serving | Daily Value % |
|---|---|---|
| Calories | 185 | 9% |
| Protein | 26g | 52% |
| Fat | 8g | 12% |
| Saturated Fat | 3g | 15% |
| Cholesterol | 75mg | 25% |
| Sodium | 320mg | 14% |
| Potassium | 285mg | 8% |
| Vitamin B6 | 0.5mg | 25% |
| Niacin | 11mg | 55% |
| Phosphorus | 200mg | 20% |
Turkey breast is an excellent source of lean protein and provides essential B vitamins that support energy metabolism and nervous system function.
Troubleshooting Common Issues
Through my cooking journey, I’ve encountered and solved numerous challenges. Here are the most common issues and my solutions:
Dry Turkey Breast
Problem: The most frequent complaint I hear about turkey breast is dryness.
Solutions:
- Use a meat thermometer to avoid overcooking
- Brine the turkey for 4-8 hours before cooking
- Baste every 30 minutes with pan juices
- Tent with foil if browning too quickly
- Let rest for 15-20 minutes before carving
Uneven Cooking
Problem: Parts of the turkey cook faster than others.
Solutions:
- Position the turkey breast-side up
- Rotate the pan halfway through cooking
- Use a lower temperature for larger cuts
- Consider spatchcocking for even cooking
Pale Skin
Problem: The skin doesn’t achieve the desired golden-brown color.
Solutions:
- Pat the skin completely dry before cooking
- Brush with melted butter before roasting
- Increase temperature for the last 15 minutes
- Use the broiler for 2-3 minutes at the end
Serving Suggestions and Pairings
I love creating complete meals that complement the rich flavors of the garlic herb butter turkey. Here are my favorite accompaniments:
Traditional Sides
- Creamy mashed potatoes with roasted garlic
- Green bean almondine with toasted almonds
- Cranberry sauce with orange zest
- Sage and onion stuffing
- Roasted Brussels sprouts with bacon
Lighter Options
- Mixed greens salad with pomegranate seeds
- Roasted butternut squash with herbs
- Steamed asparagus with lemon
- Wild rice pilaf with dried cranberries
- Honey-glazed carrots
Sauce Pairings
- Pan gravy made from drippings
- Cranberry-orange relish
- Herb butter sauce
- Mushroom gravy
- Apple cider reduction
Storage and Leftover Ideas
Proper storage ensures I can enjoy this delicious turkey for several days after the initial meal:
Storage Guidelines
| Storage Method | Duration | Temperature |
|---|---|---|
| Refrigerator | 3-4 days | 40°F (4°C) or below |
| Freezer | 2-3 months | 0°F (-18°C) or below |
| Room Temperature | 2 hours maximum | N/A |
Creative Leftover Recipes
- Turkey Sandwich Supreme: Sliced turkey with cranberry sauce and herb butter on crusty bread
- Turkey Salad: Diced turkey with celery, grapes, and herb mayonnaise
- Turkey Soup: Use bones and scraps for rich stock, add vegetables and noodles
- Turkey Pot Pie: Combine diced turkey with vegetables in a creamy sauce, top with pastry
- Turkey Fried Rice: Asian-inspired dish with rice, vegetables, and diced turkey
Seasonal Variations and Adaptations
I enjoy adapting this recipe throughout the year to reflect seasonal ingredients and occasions:
Fall Variation
- Add sage and apple stuffing under the skin
- Include roasted apples and pears as aromatics
- Use maple syrup in the herb butter
Spring Variation
- Incorporate fresh tarragon and chives
- Add lemon and fresh herbs to the cavity
- Serve with asparagus and new potatoes
Holiday Adaptation
- Increase herb quantities for more robust flavor
- Add dried fruits like cranberries to the aromatics
- Create a festive presentation with garnishes
Equipment and Tools
Having the right equipment makes this recipe much more manageable and ensures consistent results:
Essential Tools
- Digital probe thermometer
- Roasting pan with rack
- Sharp carving knife
- Cutting board with juice groove
- Aluminum foil
- Basting brush
Optional but Helpful
- Kitchen scale for precise measurements
- Instant-read thermometer for quick checks
- Meat injector for additional flavor
- Gravy separator for clean drippings
Frequently Asked Questions
Q: Can I make this recipe with a frozen turkey breast? I always recommend thawing the turkey completely before cooking. A frozen turkey breast will cook unevenly and may not reach safe internal temperatures. Allow 24 hours of refrigerator thawing for every 4 pounds.
Q: How do I know when the turkey is done without a thermometer? While I strongly recommend using a thermometer, you can check doneness by piercing the thickest part with a fork. The juices should run clear, not pink. However, this method is less reliable than temperature monitoring.
Q: Can I prepare the garlic herb butter ahead of time? Absolutely! I often make the herb butter up to 3 days in advance. Store it covered in the refrigerator and bring to room temperature before using. This actually improves the flavor as the herbs have more time to infuse.
Q: What’s the best way to carve the turkey breast? I let the turkey rest for 15-20 minutes after cooking, then carve against the grain in thin, even slices. For bone-in breasts, I remove the meat from the bone first, then slice. A sharp carving knife is essential for clean cuts.
Q: Can I use dried herbs instead of fresh? While fresh herbs provide the best flavor, you can substitute dried herbs using a 1:3 ratio (1 teaspoon dried for every 3 teaspoons fresh). Add dried herbs to the butter mixture and let it sit for 30 minutes before using.
Q: How can I prevent the skin from becoming too dark? If the skin browns too quickly, I tent the turkey with aluminum foil and reduce the oven temperature by 25°F. Remove the foil during the last 15 minutes to crisp the skin.
Q: Is it safe to stuff the turkey breast cavity? I don’t recommend stuffing the cavity of a turkey breast as it can lead to uneven cooking and food safety issues. Instead, I place aromatics like herbs, onions, and garlic in the cavity for flavor without the safety concerns.
Q: Can I cook this recipe in a slow cooker? While possible, I don’t recommend it for this recipe. The slow cooker won’t provide the crispy skin that makes this dish special. If you must use a slow cooker, sear the turkey first in a pan to develop some color.
This roasted turkey breast with garlic herb butter has become my signature dish for a reason. The combination of proper technique, quality ingredients, and attention to detail creates a meal that never fails to impress. Whether you’re cooking for a special occasion or simply want to elevate a weeknight dinner, this recipe delivers consistent, delicious results. The key is taking your time with each step and not rushing the process – the extra effort is always worth it when you see the satisfied faces around your table.