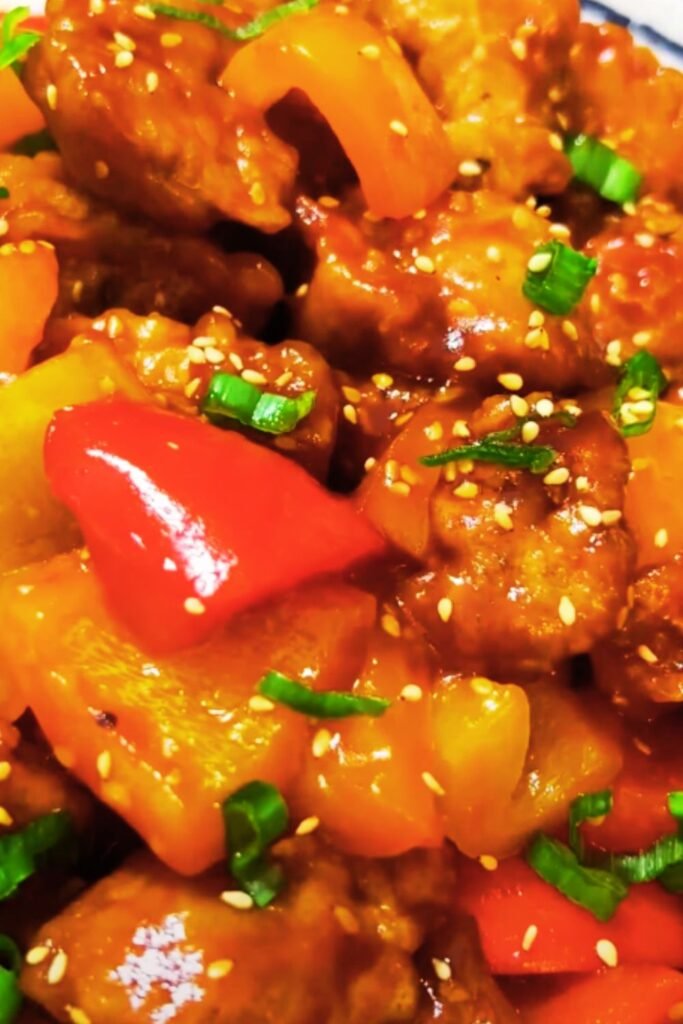
There’s something magical about the way sweet and sour flavors dance together on your palate, and nowhere is this more perfectly showcased than in a well-executed Sweet and Sour Chicken Stir-Fry. I’ve been perfecting this recipe for years, and I can confidently say it’s become one of my most requested dishes at family gatherings and dinner parties.
What sets this dish apart from the typical takeout version isn’t just the freshness of homemade cooking—it’s the careful balance of textures and flavors that create a symphony in every bite. The tender, juicy chicken paired with crisp vegetables, all coated in that glossy, tangy-sweet sauce that clings perfectly to each piece.
Understanding Sweet and Sour Cuisine
Sweet and Sour Cooking : A culinary technique that balances contrasting flavors to create harmony, originating from Chinese cuisine but adapted worldwide
Stir-Fry Method : A high-heat cooking technique that quickly cooks ingredients while maintaining their texture and nutritional value
Umami Balance : The savory fifth taste that complements sweet and sour elements, achieved through proper seasoning and sauce composition
The beauty of sweet and sour chicken lies not just in its flavor profile, but in its versatility. I’ve served this dish as a weeknight dinner for my family, dressed it up for entertaining guests, and even prepared it for meal prep sessions. Each time, it delivers that perfect balance of comfort and sophistication that makes everyone at the table smile.
Essential Ingredients Breakdown
Creating the perfect Sweet and Sour Chicken Stir-Fry starts with understanding each component’s role in the final dish. I’ve learned through countless iterations that ingredient quality makes an enormous difference in the outcome.
Protein Selection and Preparation
| Chicken Cut | Cooking Time | Texture Result | Best Use |
|---|---|---|---|
| Boneless Thighs | 4-5 minutes | Juicy, tender | Family dinners |
| Chicken Breast | 3-4 minutes | Lean, firm | Health-conscious meals |
| Chicken Tenders | 3-4 minutes | Very tender | Quick weeknight cooking |
| Mixed pieces | 4-6 minutes | Varied texture | Special occasions |
I personally prefer boneless chicken thighs for this recipe because they remain incredibly moist even if you accidentally overcook them slightly. The natural fat content adds richness that complements the sweet and sour sauce beautifully.
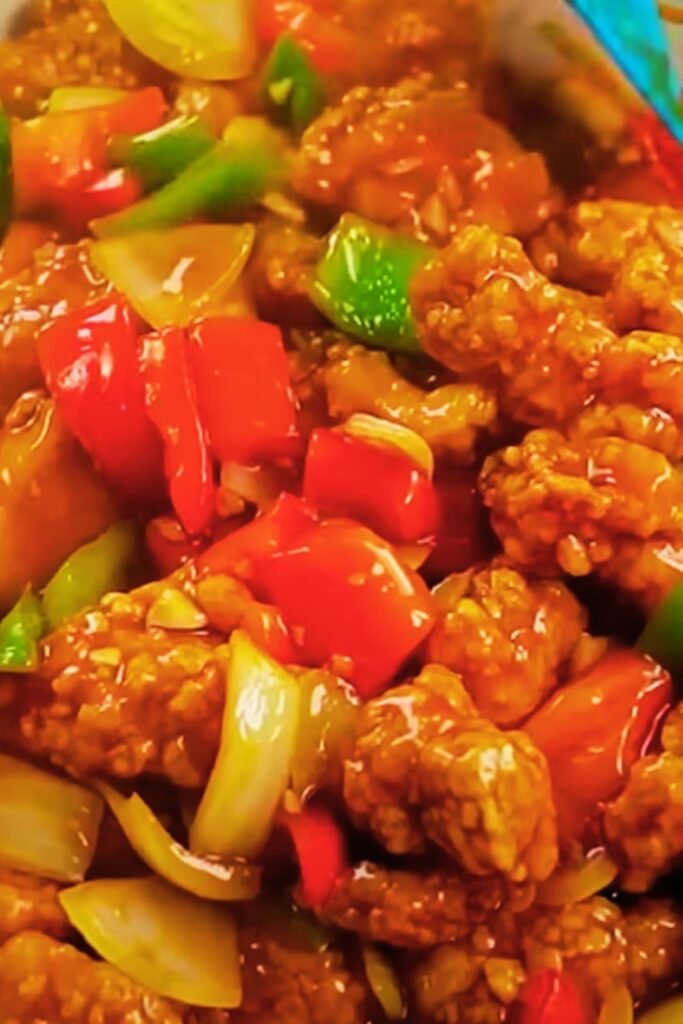
Vegetable Components
The vegetables in this stir-fry aren’t just colorful additions—they’re integral to the dish’s success. I always include:
- Bell peppers (red, yellow, green): Provide crunch and natural sweetness
- Pineapple chunks: Add tropical sweetness and acidity
- Onions: Create aromatic base and mild sharpness
- Snap peas or snow peas: Contribute fresh crispness
- Carrots: Offer natural sweetness and vibrant color
The Perfect Sauce Formula
| Ingredient | Amount | Purpose | Substitution Options |
|---|---|---|---|
| Rice vinegar | 1/4 cup | Acidity base | Apple cider vinegar |
| Brown sugar | 1/3 cup | Primary sweetness | Honey, maple syrup |
| Soy sauce | 3 tablespoons | Umami depth | Tamari, coconut aminos |
| Ketchup | 2 tablespoons | Color and tang | Tomato paste + sugar |
| Cornstarch | 1 tablespoon | Thickening agent | Arrowroot powder |
| Ginger | 1 teaspoon | Aromatic warmth | Ground ginger |
| Garlic | 2 cloves | Savory foundation | Garlic powder |

Step-by-Step Cooking Process
Preparation Phase
Before I even turn on the stove, I make sure everything is prepped and ready. Stir-frying happens quickly, and there’s no time to chop vegetables once you start cooking.
- Protein preparation: Cut chicken into uniform 1-inch pieces for even cooking
- Vegetable prep: Slice all vegetables to similar sizes for consistent texture
- Sauce mixing: Whisk all sauce ingredients until completely smooth
- Equipment setup: Have wok or large skillet, cooking utensils, and serving dishes ready
The Cooking Sequence
Heating the pan: I heat my wok over high heat until it’s smoking—this creates the perfect searing environment that gives restaurant-quality results.
Cooking the protein:
- Add oil when the pan is properly heated
- Cook chicken pieces without overcrowding (work in batches if necessary)
- Don’t move the chicken for the first 2 minutes to develop proper browning
- Total cooking time: 4-5 minutes until golden and cooked through
Adding aromatics:
- Push chicken to one side of the pan
- Add minced garlic and ginger to the empty space
- Cook for 30 seconds until fragrant
Incorporating vegetables:
- Add harder vegetables first (carrots, onions)
- Follow with medium-density vegetables (bell peppers)
- Finish with delicate vegetables (snap peas, pineapple)
Sauce integration:
- Create a well in the center of the pan
- Pour in the sauce mixture
- Allow it to bubble and thicken for 1-2 minutes
- Toss everything together until evenly coated
Advanced Techniques for Restaurant-Quality Results
Temperature Control Mastery
The difference between good and exceptional stir-fry lies in temperature management. I’ve discovered that maintaining consistent high heat while managing cooking times creates that coveted “wok hei”—the breath of the wok that gives professional stir-fries their distinctive flavor.
Texture Optimization
| Technique | Method | Result |
|---|---|---|
| Velvet the chicken | Marinate in egg white and cornstarch | Silky, tender texture |
| Blanch vegetables | Quick boil then ice bath | Vibrant color, perfect crunch |
| Double-cook method | Pre-cook protein, finish with vegetables | Even cooking throughout |
| Oil temperature test | Drop of batter sizzles immediately | Proper frying temperature |
Sauce Consistency Secrets
I’ve learned that the key to perfect sauce consistency isn’t just about thickening agents—it’s about timing and technique. The sauce should coat the ingredients without being gloppy or too thin. I achieve this by:
- Mixing cornstarch with cold liquid first to prevent lumps
- Adding sauce when the pan is at medium-high heat
- Stirring constantly for even distribution
- Cooking just until the sauce becomes glossy and coats a spoon
Nutritional Profile and Health Benefits
Comprehensive Nutritional Analysis
| Nutrient | Per Serving | Daily Value % | Health Benefit |
|---|---|---|---|
| Protein | 28g | 56% | Muscle maintenance |
| Vitamin C | 85mg | 94% | Immune support |
| Vitamin A | 2,100 IU | 42% | Eye health |
| Iron | 2.1mg | 12% | Energy production |
| Fiber | 4g | 16% | Digestive health |
| Calories | 320 | 16% | Moderate energy |
The beauty of this dish extends beyond its taste—it’s genuinely nutritious. The combination of lean protein, colorful vegetables, and minimal oil creates a balanced meal that satisfies both your palate and your nutritional needs.
Health-Conscious Modifications
Throughout my years of making this recipe, I’ve developed several variations for different dietary needs:
Lower sodium version: Replace regular soy sauce with reduced-sodium variety and increase other seasonings
Diabetic-friendly adaptation: Substitute brown sugar with stevia or monk fruit sweetener
Gluten-free option: Use tamari instead of soy sauce and ensure all other ingredients are certified gluten-free
Paleo modification: Replace soy sauce with coconut aminos and use arrowroot instead of cornstarch
Serving Suggestions and Meal Planning
Perfect Pairings
I’ve experimented with numerous side dishes over the years, and certain combinations consistently elevate the entire meal:
Grain options:
- Jasmine rice for traditional pairing
- Brown rice for added nutrition
- Cauliflower rice for low-carb option
- Quinoa for protein boost
Complementary dishes:
- Steamed dumplings as appetizers
- Hot and sour soup for contrast
- Simple cucumber salad for freshness
- Egg rolls for added indulgence
Storage and Meal Prep Strategies
| Storage Method | Duration | Quality Retention | Reheating Tips |
|---|---|---|---|
| Refrigerator | 3-4 days | Excellent | Add splash of water when reheating |
| Freezer | 2-3 months | Good | Thaw overnight before reheating |
| Portioned containers | 3-4 days | Excellent | Microwave with damp paper towel |
| Vacuum sealed | 4-5 days | Superior | Steam reheat recommended |
I often prepare double batches because this dish actually improves slightly after a day—the flavors meld beautifully overnight. For meal prep, I store the components separately and combine them when reheating to maintain optimal texture.
Troubleshooting Common Issues
Texture Problems and Solutions
Soggy vegetables: This usually happens when the pan isn’t hot enough or when vegetables are added too early. I ensure my wok is smoking hot and add vegetables in the correct sequence.
Tough chicken: Overcooking is the primary culprit. I remove chicken from heat as soon as it’s cooked through, around 165°F internal temperature.
Watery sauce: Either too much liquid was added, or the cornstarch wasn’t properly dissolved. I always mix my cornstarch with cold liquid before adding to prevent lumps.
Flavor Balance Adjustments
Sometimes the sweet-sour balance needs fine-tuning. Here’s my approach:
- Too sweet: Add more vinegar or a splash of lemon juice
- Too sour: Incorporate additional brown sugar or honey
- Lacking depth: Increase soy sauce or add a pinch of MSG
- Not enough heat: Include red pepper flakes or fresh chilies
Cultural Context and Recipe Evolution
Sweet and sour dishes have fascinating origins that span multiple cultures. While this style of cooking is most associated with Chinese cuisine, variations exist throughout Asia and beyond. I find it interesting how this basic flavor combination has been adapted to local tastes and ingredients worldwide.
My version incorporates traditional Chinese techniques with modern American preferences—slightly less oil than traditional versions, more vegetables for nutrition, and adjustable spice levels to accommodate different palates.
Advanced Variations and Creative Adaptations
Regional Interpretations
Cantonese style: Includes lychees and uses white vinegar for sharper acidity
American Chinese adaptation: Incorporates pineapple chunks and uses ketchup-based sauce
Thai-inspired version: Adds fish sauce and fresh herbs like cilantro and mint
Korean fusion: Includes kimchi and uses rice wine in the sauce
Protein Alternatives
| Protein Option | Cooking Adjustment | Flavor Profile | Cooking Time |
|---|---|---|---|
| Pork tenderloin | Slice thin, cook quickly | Rich, savory | 3-4 minutes |
| Firm tofu | Press, cube, cornstarch coat | Neutral, absorbs sauce | 4-5 minutes |
| Shrimp | Don’t overcook | Sweet, delicate | 2-3 minutes |
| Beef strips | High heat, quick sear | Rich, robust | 3-4 minutes |
Seasonal Adaptations
I love adapting this recipe based on seasonal ingredient availability. Spring brings fresh snap peas and tender carrots, summer offers peak bell peppers and fresh pineapple, fall provides crisp apples as an interesting alternative to pineapple, and winter calls for heartier vegetables like broccoli and Brussels sprouts.
Each seasonal variation brings its own character to the dish while maintaining the essential sweet and sour balance that makes this recipe so beloved.
Questions and Answers
Q: Can I make this dish ahead of time for a dinner party? A: Absolutely! I recommend preparing all components separately and doing the final stir-fry just before serving. The sauce can be made up to three days ahead, vegetables can be prepped the morning of, and chicken can be cut and marinated up to 24 hours in advance.
Q: What’s the secret to getting restaurant-style glossy sauce? A: The key is proper cornstarch technique and high heat. I always dissolve cornstarch in cold liquid first, then add it to the hot pan while stirring constantly. The sauce should bubble vigorously for about a minute to activate the thickening properties fully.
Q: How do I prevent my vegetables from becoming mushy? A: Timing and temperature are crucial. I add vegetables in order of cooking time required—hard vegetables like carrots first, then peppers, and finally delicate items like pineapple. Keep the heat high and don’t overcrowd the pan.
Q: Can I use frozen vegetables for this recipe? A: While fresh vegetables give the best texture, frozen can work in a pinch. I recommend thawing and patting them completely dry first. Add them later in the cooking process since they’ll cook faster than fresh vegetables.
Q: What’s the best way to cut chicken for even cooking? A: I cut against the grain into uniform pieces about 1-inch in size. This ensures even cooking and makes the chicken more tender. Partially freezing the chicken for 15-20 minutes makes it easier to cut cleanly.
Q: How can I make this dish spicier without overwhelming the sweet and sour balance? A: I like to add heat through fresh chilies or red pepper flakes rather than hot sauce, which can alter the flavor profile. Start with a small amount and adjust to taste. Sriracha works well if you want to use a prepared sauce.
Q: Is there a way to reduce the sodium content without sacrificing flavor? A: Definitely! Use low-sodium soy sauce, increase the garlic and ginger for flavor depth, and add a splash of citrus juice for brightness. You can also use coconut aminos as a soy sauce substitute.
Q: What type of oil works best for stir-frying? A: I prefer neutral oils with high smoke points like avocado oil or refined peanut oil. These won’t impart additional flavors and can handle the high heat necessary for proper stir-frying without burning.
Q: How do I know when the chicken is perfectly cooked? A: The chicken should reach an internal temperature of 165°F, but visually, it should be golden brown on the outside and no longer pink inside. It should feel firm but not tough when pressed with a spatula.
Q: Can I double or triple this recipe for a large group? A: Yes, but I recommend cooking in batches rather than overcrowding your pan. Overcrowding leads to steaming instead of stir-frying, which affects texture. It’s better to cook multiple smaller batches and combine them at the end.
This Sweet and Sour Chicken Stir-Fry has become more than just a recipe in my kitchen—it’s a celebration of balanced flavors, fresh ingredients, and the joy of creating something delicious from scratch. Whether you’re cooking for family dinner or entertaining friends, this dish delivers both comfort and sophistication in every colorful, flavorful bite.