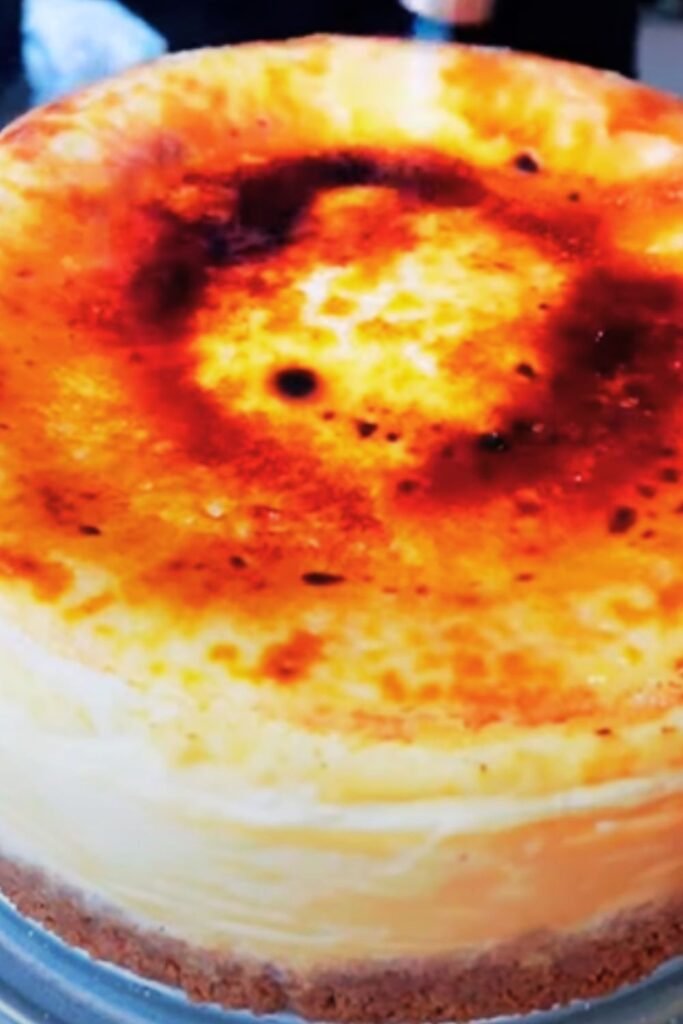
When I first encountered crème brûlée cheesecake, I knew I had discovered something extraordinary. This magnificent dessert combines the silky richness of classic cheesecake with the elegant caramelized sugar top that makes crème brûlée so irresistible. After years of perfecting this recipe, I’m excited to share every secret that will help you create this showstopper in your own kitchen.
The fusion of French sophistication and American comfort food creates a dessert that’s both familiar and exotic. My journey with this recipe began when I wanted to impress guests at a dinner party, but it has since become my signature dessert that friends and family request for every special occasion.
Understanding the Magic Behind Crème Brûlée Cheesecake
Crème Brûlée: A classic French dessert featuring rich vanilla custard topped with a layer of hardened caramelized sugar, created by torching granulated sugar until it forms a crispy, golden crust.
Cheesecake: A rich, creamy dessert typically made with cream cheese, eggs, and sugar, baked on a graham cracker crust until set but still slightly jiggly in the center.
Crème Brûlée Cheesecake: A hybrid dessert that incorporates the creamy, dense texture of cheesecake with the signature caramelized sugar topping and vanilla bean flavor profile of crème brûlée.
The genius of this combination lies in how the two desserts complement each other. The cheesecake provides a sturdy, rich base that can support the dramatic sugar crust, while the crème brûlée elements add textural contrast and sophisticated flavor notes that elevate the entire experience.
Essential Equipment and Ingredients
Before diving into the recipe, I want to ensure you have everything needed for success. This dessert requires specific tools and high-quality ingredients to achieve the perfect result.
Equipment List
| Equipment | Purpose | Alternative Options |
|---|---|---|
| 9-inch springform pan | Creates removable cheesecake base | Deep-dish pie pan (adjust baking time) |
| Kitchen torch | Caramelizes sugar topping | Broiler (watch carefully) |
| Food processor | Creates smooth crust | Rolling pin and plastic bag |
| Stand mixer | Ensures smooth filling | Hand mixer (longer mixing time) |
| Fine-mesh strainer | Removes lumps from filling | Whisk thoroughly |
| Roasting pan | Water bath for baking | Large baking dish |
| Vanilla bean scraper | Extracts vanilla seeds | Sharp knife |
Ingredient Quality Guide
| Ingredient | Quality Indicators | Storage Tips |
|---|---|---|
| Cream cheese | Room temperature, no lumps | Remove from fridge 2-3 hours before use |
| Heavy cream | 35-40% fat content | Keep refrigerated until ready to use |
| Vanilla beans | Plump, oily, fragrant | Store in airtight container |
| Eggs | Large, fresh, room temperature | Place in warm water 10 minutes before use |
| Sugar (for caramelizing) | Superfine or granulated | Store in dry, cool place |
| Graham crackers | Fresh, not stale | Keep sealed until ready to use |
The Complete Recipe: Step-by-Step Mastery
For the Crust:
- 1½ cups graham cracker crumbs
- ⅓ cup granulated sugar
- 6 tablespoons unsalted butter, melted
- Pinch of salt
For the Cheesecake Filling:
- 32 oz cream cheese, room temperature
- 1 cup granulated sugar
- 4 large eggs, room temperature
- 1 cup heavy cream
- 2 vanilla beans, split and scraped
- 1 tablespoon vanilla extract
- 2 tablespoons all-purpose flour
- ¼ teaspoon salt
For the Crème Brûlée Topping:
- ½ cup granulated sugar (preferably superfine)
- Additional vanilla bean seeds (optional)
Detailed Preparation Process
Phase 1: Creating the Perfect Crust
I always start with the crust because it needs time to set properly. In my food processor, I pulse the graham crackers until they form fine, even crumbs. The key is achieving consistency – no large pieces that might create weak spots in your crust.
Mix the crumbs with sugar and salt, then drizzle in the melted butter gradually while pulsing. The mixture should hold together when pressed but not be overly wet. I press this firmly into the bottom of my springform pan, using the bottom of a measuring cup to ensure even distribution.
Preheat your oven to 350°F and bake the crust for 10 minutes until it’s just set and lightly golden. This pre-baking step prevents a soggy bottom and creates a stable foundation for your cheesecake.
Phase 2: Mastering the Cheesecake Filling
The filling is where patience becomes crucial. I begin by beating the cream cheese until it’s completely smooth and fluffy – this takes longer than you might expect, about 4-5 minutes with a stand mixer. Any lumps at this stage will remain in your finished cheesecake.
Gradually add the sugar, beating until fully incorporated. The mixture should be pale and light. Add eggs one at a time, beating just until combined after each addition. Overmixing after adding eggs can incorporate too much air, leading to cracks during baking.
In a separate bowl, I whisk together the heavy cream, vanilla bean seeds, vanilla extract, flour, and salt. The flour helps stabilize the custard and prevents curdling. Slowly pour this mixture into the cream cheese base, mixing on low speed until just combined.
Phase 3: The Water Bath Technique
The water bath (bain-marie) is essential for even, gentle cooking. I wrap the outside of my springform pan with two layers of heavy-duty aluminum foil to prevent water from seeping in. Place the pan in a large roasting pan and pour hot water until it reaches halfway up the sides of the springform pan.
This technique ensures the cheesecake cooks evenly without the edges setting too quickly, which can cause cracks. Bake at 325°F for 55-65 minutes, until the center is almost set but still slightly jiggly.
Phase 4: The Cooling Process
Proper cooling is crucial for texture and preventing cracks. I turn off the oven and crack the door open, allowing the cheesecake to cool gradually for one hour. This prevents thermal shock that can cause the surface to crack.
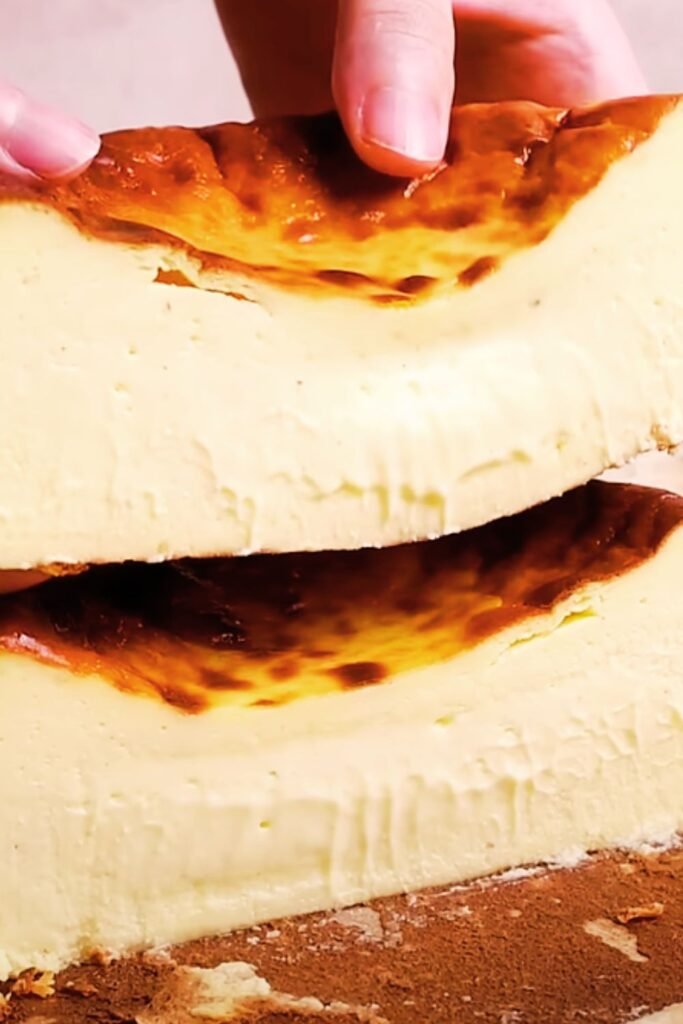
Remove from the water bath and cool completely at room temperature before refrigerating for at least 4 hours, though overnight is ideal. The cheesecake needs this time to fully set and develop its characteristic dense, creamy texture.
Mastering the Crème Brûlée Topping
This is where the magic happens – transforming your beautiful cheesecake into a crème brûlée masterpiece. Remove the cheesecake from the refrigerator about 30 minutes before serving to take the chill off the surface.
Evenly sprinkle the superfine sugar over the entire surface of the cheesecake. I use about 2 tablespoons per 6-inch section, ensuring complete coverage without creating thick spots that won’t caramelize properly.
Using a kitchen torch, work in small circular motions, keeping the flame moving constantly. You’ll see the sugar begin to melt and bubble, then turn golden brown. The goal is a deep amber color that will harden into a crispy shell as it cools.
Allow the caramelized sugar to cool for 2-3 minutes before serving. The contrast between the warm, crispy top and the cool, creamy cheesecake beneath creates an incredible sensory experience.
Troubleshooting Common Issues
Cracked Cheesecake Surface
Causes: Overmixing, temperature fluctuations, or insufficient water bath Solutions: Mix ingredients just until combined, maintain steady oven temperature, ensure adequate water in bath
Soggy Crust
Causes: Insufficient pre-baking, too much butter, or water leakage Solutions: Pre-bake crust until set, measure butter accurately, seal springform pan properly
Uneven Caramelization
Causes: Uneven sugar distribution, torch distance, or surface moisture Solutions: Distribute sugar evenly, maintain consistent torch distance, ensure dry surface
Grainy Texture
Causes: Cold ingredients, insufficient mixing, or temperature shock Solutions: Bring ingredients to room temperature, mix thoroughly, cool gradually
Flavor Variations and Creative Twists
Chocolate Crème Brûlée Cheesecake
Replace ¼ cup of flour with cocoa powder and add 4 oz melted dark chocolate to the filling. The result is a rich, decadent variation that chocolate lovers will adore.
Lemon Crème Brûlée Cheesecake
Add zest of 2 lemons and 2 tablespoons fresh lemon juice to the filling. The citrus brightness cuts through the richness beautifully.
Espresso Crème Brûlée Cheesecake
Incorporate 2 tablespoons instant espresso powder dissolved in 1 tablespoon hot water. This creates a sophisticated coffee flavor that pairs wonderfully with the caramelized sugar.
Storage and Serving Guidelines
Storage Information
| Storage Method | Duration | Quality Notes |
|---|---|---|
| Refrigerator (covered) | 5-7 days | Best texture first 3 days |
| Freezer (wrapped) | 2-3 months | Thaw in refrigerator 24 hours |
| Room temperature | 2 hours maximum | Food safety concern beyond this |
Serving Recommendations
I recommend serving slices on chilled plates to maintain the temperature contrast. Cut with a sharp knife dipped in warm water and wiped clean between cuts for the cleanest presentation.
Portion Sizes: This rich dessert serves 12-16 people generously, or 8-10 people who really love their dessert.
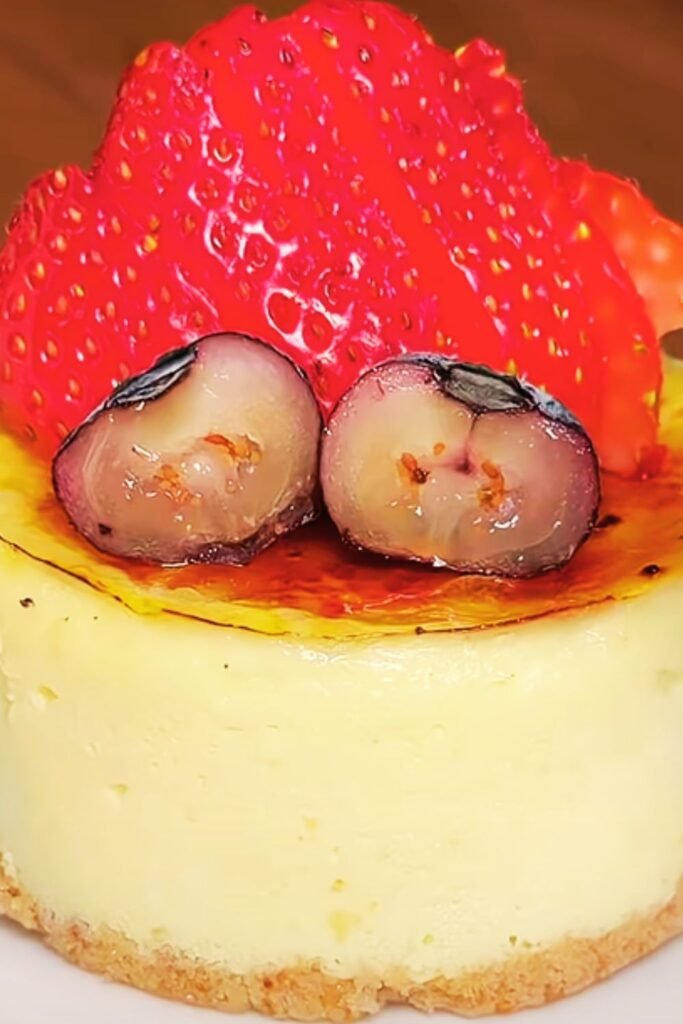
Accompaniments: Fresh berries, a dollop of whipped cream, or a drizzle of berry coulis complement the richness beautifully.
Nutritional Information and Dietary Considerations
Nutritional Breakdown (per serving, based on 12 servings)
| Nutrient | Amount | Daily Value % |
|---|---|---|
| Calories | 485 | 24% |
| Total Fat | 32g | 49% |
| Saturated Fat | 20g | 100% |
| Cholesterol | 165mg | 55% |
| Sodium | 285mg | 12% |
| Total Carbs | 43g | 16% |
| Protein | 8g | 16% |
Dietary Modifications
Gluten-Free: Replace graham crackers with gluten-free cookies or almond flour crust Reduced Sugar: Use sugar substitutes in filling, but maintain regular sugar for caramelization Lighter Version: Substitute part of the cream cheese with Greek yogurt (texture will be different)
Professional Tips for Perfect Results
After making this dessert countless times, I’ve learned several tricks that make the difference between good and exceptional:
Temperature Control: Use an oven thermometer to ensure accurate temperature. Even small variations can affect the final texture.
Timing: Don’t rush the process. Each step needs adequate time for the best results.
Quality Ingredients: This dessert showcases each ingredient, so use the best you can afford.
Practice: The torching technique improves with practice. Start with less expensive desserts to perfect your technique.
Advanced Techniques for Experienced Bakers
Creating Sugar Art
Once you’ve mastered basic caramelization, try creating decorative patterns with the torch. You can create spiral designs, crosshatch patterns, or even write initials in the caramelized sugar.
Flavor Infusions
Experiment with infusing the cream with different flavors before adding to the filling. Steep tea, herbs, or spices in warm cream, then strain before using.
Presentation Enhancements
Consider individual servings in ramekins for an elegant presentation. Adjust baking time to 25-30 minutes for smaller portions.
Frequently Asked Questions
Q: Can I make this dessert without a kitchen torch? A: Yes, you can use your oven’s broiler, but watch very carefully as it can go from perfect to burned in seconds. Place the cheesecake on the highest rack and broil for 1-2 minutes until the sugar caramelizes.
Q: How far in advance can I make this cheesecake? A: The cheesecake base can be made up to 2 days ahead, but add the caramelized sugar topping just before serving for the best texture contrast.
Q: Why did my cheesecake crack even though I used a water bath? A: Cracks usually result from temperature shock or overmixing. Ensure your oven temperature is accurate, avoid opening the oven door during baking, and mix ingredients just until combined.
Q: Can I freeze individual slices? A: Yes, wrap individual slices tightly in plastic wrap and freeze for up to 2 months. Thaw in the refrigerator and add fresh caramelized sugar before serving.
Q: What’s the best way to clean my springform pan after baking? A: Soak in warm, soapy water immediately after use. For stubborn residue, make a paste with baking soda and water, let sit for 15 minutes, then scrub gently.
Q: How do I know when the cheesecake is done baking? A: The center should be almost set but still slightly jiggly when you gently shake the pan. It will continue to set as it cools. An instant-read thermometer should read 150°F in the center.
Q: Can I make this recipe in a regular cake pan instead of a springform pan? A: While possible, I strongly recommend using a springform pan for easy removal. If you must use a regular pan, line it with parchment paper with overhang to lift out the cheesecake.
Q: What should I do if my caramelized sugar gets too dark? A: Unfortunately, burned sugar tastes bitter and cannot be fixed. Scrape off the burned sugar and start over with a fresh layer. Keep the torch moving and work more quickly next time.
This crème brûlée cheesecake represents the perfect marriage of two beloved desserts. With patience, quality ingredients, and attention to detail, you’ll create a dessert that’s both impressive and delicious. The combination of creamy cheesecake and crispy caramelized sugar creates a textural symphony that never fails to delight.
Remember, baking is both an art and a science. While following the recipe precisely is important, don’t be afraid to make it your own once you’ve mastered the basics. Each time you make this dessert, you’ll learn something new and improve your technique.
The joy of sharing this dessert with others makes every step of the process worthwhile. Whether you’re celebrating a special occasion or simply indulging in a weekend baking project, this crème brûlée cheesecake will become a treasured addition to your dessert repertoire.