“As an Amazon Associate, I earn from qualifying purchases.”
When I first discovered bazlama during my travels through Turkey, I was amazed by how something so simple could taste so extraordinary. This traditional Turkish flatbread requires no oven, no yeast, and incredibly just three basic ingredients that you likely already have in your kitchen. After countless attempts to recreate that authentic taste at home, I’ve perfected this recipe that brings the warm, comforting flavors of Turkish countryside right to your stovetop.
Bazlama represents the essence of rustic Turkish cooking – simple ingredients transformed into something magical through technique and tradition. Unlike many bread recipes that intimidate home cooks with lengthy ingredient lists and complex processes, bazlama embraces minimalism while delivering maximum flavor and satisfaction.
What Makes Bazlama Special
Definition Lists:
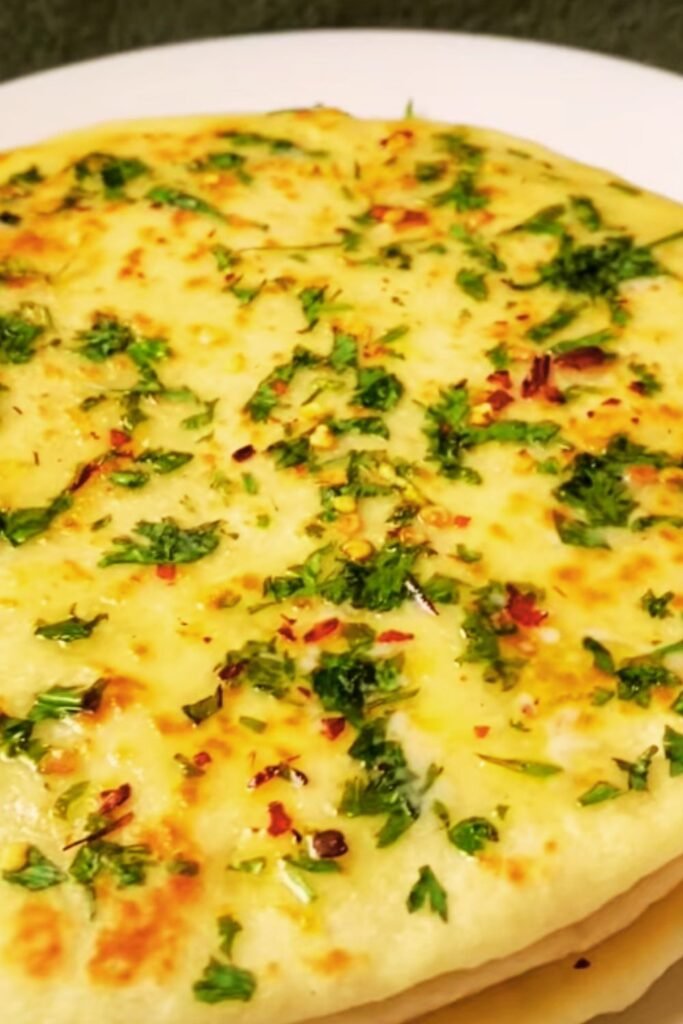
Bazlama : A traditional Turkish flatbread cooked on a griddle or pan, characterized by its soft texture and slightly charred spots
No-knead technique : A method that relies on mixing and resting rather than extensive kneading to develop gluten structure
Stovetop cooking : The traditional method using a saj (metal griddle) or heavy-bottomed pan to achieve authentic results
Yogurt activation : The process where yogurt’s acidity reacts with flour proteins to create tender, flavorful bread
The beauty of bazlama lies in its accessibility. While other bread recipes demand precise temperatures, timing, and equipment, this Turkish treasure adapts to your kitchen conditions. I’ve made bazlama on camping trips, in tiny apartment kitchens, and even during power outages – it’s incredibly forgiving and consistently delicious.
What sets bazlama apart from other flatbreads is its unique texture. The yogurt creates a tender crumb while the stovetop cooking method produces those characteristic dark spots that add a subtle smoky flavor. Each bite offers a perfect balance of chewiness and softness that makes it ideal for both standalone eating and as a vehicle for other foods.
The Magic of Three Ingredients
The simplicity of bazlama’s ingredient list might seem too good to be true, but each component plays a crucial role in creating the final product. I’ve experimented with various ratios and substitutions over the years, and I can confidently say that these three ingredients work in perfect harmony.
Essential Ingredients Breakdown:
| Ingredient | Amount | Purpose | Quality Impact |
|---|---|---|---|
| All-purpose flour | 2 cups (240g) | Structure and body | Higher protein content creates better texture |
| Plain yogurt | 3/4 cup (180ml) | Tenderness and tang | Full-fat yogurt produces richer flavor |
| Salt | 1 teaspoon (5g) | Flavor enhancement | Sea salt provides more complex taste |
The flour provides the foundation, creating the gluten network that gives bazlama its characteristic chewiness. I prefer using all-purpose flour because it strikes the perfect balance between protein content and tenderness. Bread flour can make the result too chewy, while cake flour lacks the structure needed for proper texture.
Yogurt serves as both the liquid component and the secret ingredient that makes bazlama special. The natural acidity in yogurt tenderizes the gluten, preventing the bread from becoming tough. Additionally, the beneficial bacteria in yogurt contribute to the complex flavor profile that makes bazlama so addictive. I always use full-fat yogurt because the additional richness translates directly to better taste and texture.
Salt might seem like a minor player, but it’s absolutely essential. Beyond flavoring, salt regulates gluten development and helps create the proper dough consistency. I use fine sea salt, but table salt works perfectly well too.
Missing a few things? You can grab them on Amazon here.
Step-by-Step Preparation Method
Creating perfect bazlama requires attention to technique rather than complicated procedures. Through years of practice, I’ve refined this method to ensure consistent results every time.
Mixing the Dough:
• Combine flour and salt in a large mixing bowl, whisking thoroughly to distribute evenly • Create a well in the center of the flour mixture • Add yogurt to the well and begin mixing with a wooden spoon or your hands • Continue mixing until a shaggy dough forms – it should look rough and slightly sticky • Don’t worry if the dough appears messy at this stage; that’s perfectly normal
The initial mixing stage is crucial for bazlama success. I prefer using my hands because I can feel the dough’s texture developing. The goal isn’t to create a smooth, uniform dough like you might with other bread recipes. Instead, you want a cohesive mass that holds together while maintaining some roughness.
Resting and Development:
After mixing, cover the dough with a damp kitchen towel and let it rest for 30 minutes. This resting period allows the flour to fully hydrate and the gluten to relax naturally. I’ve found that bazlama benefits from this passive development rather than aggressive kneading.
During the resting period, the yogurt’s acidity continues working on the flour proteins, creating that tender texture bazlama is famous for. I sometimes extend this resting period up to an hour if I’m busy with other preparations – the bread only gets better with time.
Shaping and Cooking:
| Step | Time | Temperature | Visual Cue |
|---|---|---|---|
| Divide dough | 2 minutes | Room temp | 6-8 equal portions |
| Roll portions | 3-4 minutes each | Room temp | 6-inch circles, 1/4 inch thick |
| Heat pan | 2-3 minutes | Medium-high | Water droplets dance and evaporate |
| First side cooking | 2-3 minutes | Medium-high | Golden spots and slight puffing |
| Flip and finish | 1-2 minutes | Medium-high | Matching golden spots |
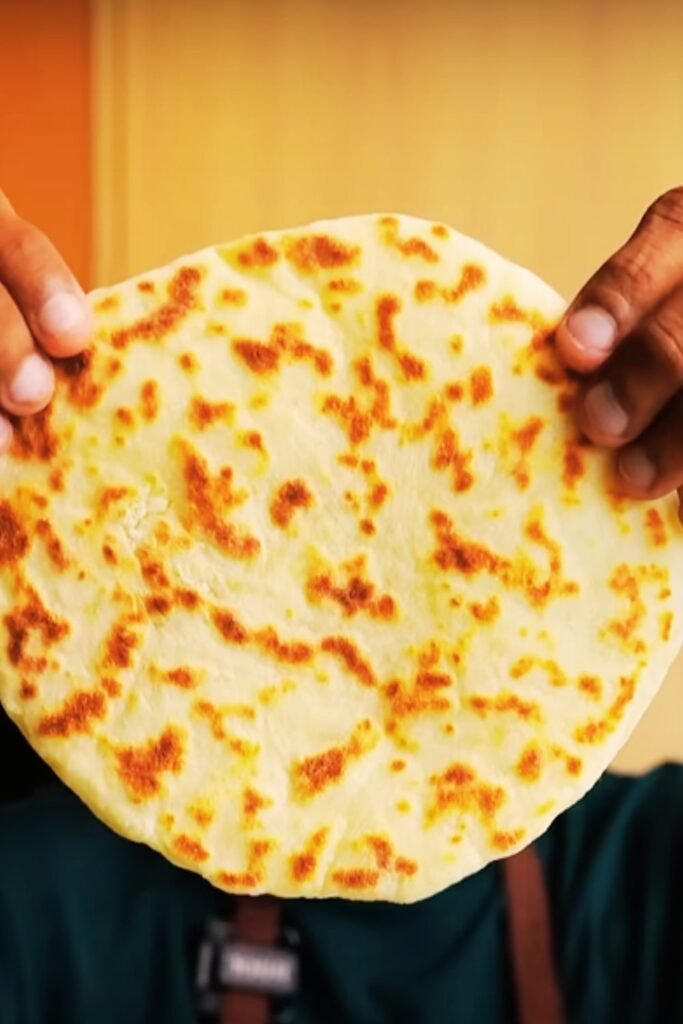
The shaping process requires a gentle touch. I lightly flour my work surface and rolling pin, then roll each portion into a circle roughly six inches in diameter. Don’t aim for perfect circles – the rustic, handmade appearance is part of bazlama’s charm.
When cooking, I use a cast-iron skillet or heavy-bottomed pan. The key is maintaining consistent medium-high heat that’s hot enough to create those characteristic dark spots without burning the bread. I know the pan is ready when a drop of water sizzles and evaporates within seconds.
Missing any kitchen essentials? You can grab them on Amazon here.
Mastering the Cooking Technique
The stovetop cooking method distinguishes bazlama from oven-baked breads and requires specific techniques to achieve authentic results. After countless batches, I’ve identified the critical factors that determine success or failure.
Temperature Control:
Maintaining proper heat is absolutely crucial. Too hot, and the outside burns before the inside cooks through. Too cool, and you’ll end up with tough, chewy bread without those distinctive charred spots. I start with medium-high heat and adjust based on how the first piece cooks.
The ideal cooking temperature creates gentle sizzling when the dough hits the pan. You should hear a soft hissing sound – not aggressive spattering or complete silence. If the pan is smoking, it’s too hot. If there’s no sound when you add the dough, increase the heat.
Timing and Visual Cues:
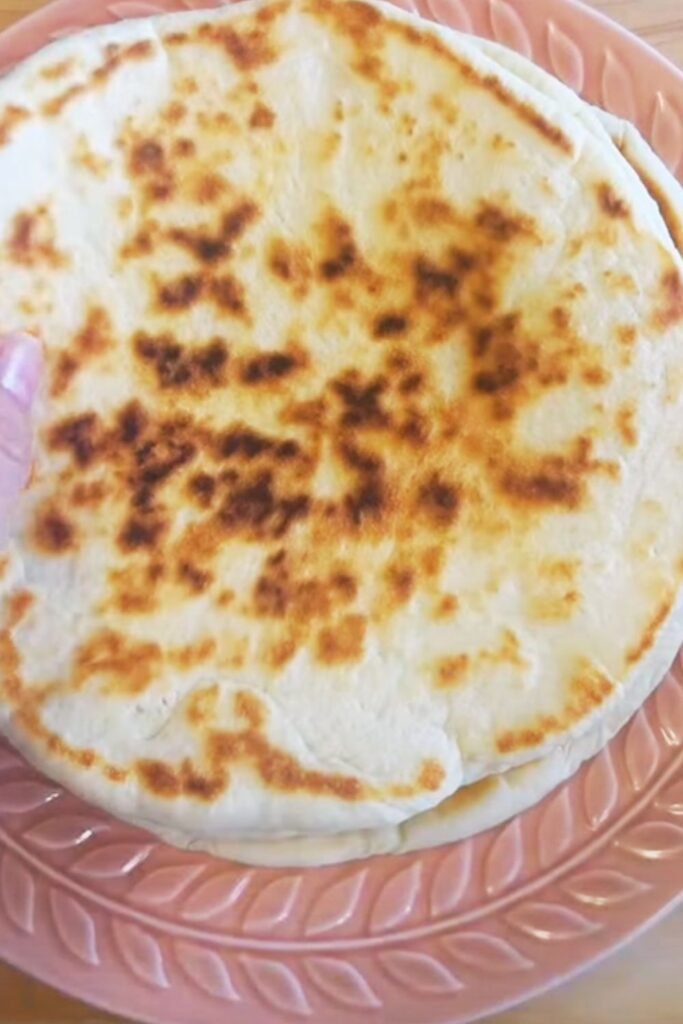
Each side of bazlama needs 2-3 minutes of cooking time, but I rely more on visual cues than strict timing. The bottom is ready to flip when golden-brown spots appear and the edges begin to look set. The bread might puff slightly, which is a wonderful sign that steam is creating the desired texture.
For the second side, I cook for slightly less time since the bread is already partially cooked. The goal is matching golden spots on both sides while ensuring the center is fully cooked. I sometimes press gently with a spatula to check for doneness – properly cooked bazlama springs back when pressed.
Common Mistakes to Avoid:
• Rolling the dough too thin, which results in crispy rather than soft bread • Using insufficient heat, leading to tough, chewy texture • Flipping too frequently, preventing proper browning • Overcrowding the pan, which creates uneven cooking • Skipping the resting period, resulting in dense bread
Nutritional Profile and Health Benefits
Understanding bazlama’s nutritional content helps appreciate why this traditional bread has sustained communities for generations. The simple ingredient list creates a surprisingly nutritious and satisfying food.
Nutritional Breakdown per Serving (1 piece):
| Nutrient | Amount | % Daily Value | Health Impact |
|---|---|---|---|
| Calories | 185 | 9% | Moderate energy density |
| Carbohydrates | 32g | 11% | Primary energy source |
| Protein | 7g | 14% | Complete protein from flour and yogurt |
| Fat | 3g | 5% | Heart-healthy from yogurt |
| Fiber | 2g | 8% | Digestive health support |
| Calcium | 85mg | 8% | Bone health from yogurt |
| Sodium | 390mg | 17% | Electrolyte balance |
The combination of flour and yogurt creates a complete protein profile, making bazlama more nutritionally dense than many commercial breads. The yogurt contributes beneficial probiotics that support digestive health, while the simple preparation method preserves these beneficial bacteria better than heavily processed alternatives.
Health Advantages:
The fermentation aspect of yogurt provides several health benefits beyond basic nutrition. The probiotics support gut health, which increasingly research links to overall wellness including immune function and mental health. Additionally, the calcium content from yogurt supports bone health, particularly important for growing children and older adults.
Bazlama’s low fat content makes it suitable for various dietary approaches, while the moderate protein content helps with satiety. The simple ingredient list means fewer additives and preservatives compared to store-bought breads, making it an excellent choice for those seeking cleaner eating options.
Serving Suggestions and Pairings
Bazlama’s versatility makes it suitable for countless serving applications, from simple snacks to elaborate meals. Throughout my culinary adventures, I’ve discovered numerous ways to enjoy this wonderful bread that highlight its adaptability.
Traditional Turkish Pairings:
• Cheese and herbs: Crumble fresh white cheese (beyaz peynir) with chopped parsley, dill, and tomatoes • Honey and butter: Warm bazlama spread with butter and drizzled with wildflower honey • Menemen: Turkish scrambled eggs with tomatoes and peppers served alongside warm bread • Sucuklu yumurta: Spicy Turkish sausage with eggs, perfect for breakfast • Fresh vegetables: Sliced cucumbers, tomatoes, and onions with a sprinkle of salt
International Adaptations:
The neutral flavor profile of bazlama makes it excellent for fusion applications. I’ve successfully used it as a base for Mediterranean-style toppings, Mexican-inspired combinations, and even Asian-fusion creations.
Breakfast Applications:
| Topping Combination | Flavor Profile | Preparation Time |
|---|---|---|
| Avocado and tomato | Fresh and light | 5 minutes |
| Scrambled eggs and herbs | Protein-rich comfort | 10 minutes |
| Hummus and vegetables | Mediterranean healthy | 3 minutes |
| Cream cheese and cucumber | Cool and refreshing | 4 minutes |
| Nut butter and banana | Sweet and energizing | 2 minutes |
Missing any kitchen essentials? You can grab them on Amazon here.
Lunch and Dinner Ideas:
Bazlama works wonderfully as a wrap for various fillings. I often use it to enclose grilled vegetables, roasted meats, or bean-based salads. The bread’s flexibility allows it to hold substantial fillings without breaking, while its mild flavor complements rather than competes with other ingredients.
For dinner applications, I sometimes use bazlama as a pizza base, though I recommend par-cooking it first to prevent sogginess. The bread also makes an excellent side for soups and stews, perfect for soaking up flavorful broths.
Storage and Reheating Methods
Proper storage ensures your bazlama maintains its wonderful texture and flavor for several days. Through trial and error, I’ve developed reliable methods for keeping this bread at its best.
Short-term Storage (1-3 days):
Wrap cooled bazlama individually in clean kitchen towels, then place in a sealed container or plastic bag. The towel prevents condensation while maintaining moisture levels. Store at room temperature away from direct sunlight or heat sources.
I’ve found that bazlama actually improves slightly after a few hours of storage, as the flavors meld and the texture becomes more uniform. However, avoid storing in the refrigerator, which can make the bread tough and dry.
Long-term Storage (up to 3 months):
For longer storage, wrap individual breads in plastic wrap, then place in freezer bags with the air pressed out. Label with the date and freeze immediately after cooling completely. Properly frozen bazlama maintains excellent quality for up to three months.
Reheating Techniques:
| Method | Time | Result | Best For |
|---|---|---|---|
| Stovetop pan | 30 seconds per side | Crispy exterior, soft interior | Individual servings |
| Microwave | 15-20 seconds | Soft throughout | Quick warming |
| Oven wrap | 5-7 minutes at 350°F | Even heating | Multiple pieces |
| Direct flame | 10-15 seconds per side | Slight char, authentic taste | Gas stove users |
The stovetop reheating method most closely replicates the original cooking process and produces the best results. I heat a dry pan over medium heat, then warm each side for about 30 seconds until heated through and slightly crispy.
Missing a few things? You can grab them on Amazon here.
Troubleshooting Common Issues
Even with a simple recipe like bazlama, several common problems can occur. Having made hundreds of batches, I’ve encountered and solved most issues that home cooks face.
Dough Too Sticky:
This usually indicates too much yogurt or insufficient flour absorption. Add flour gradually, one tablespoon at a time, until the dough becomes manageable. Remember that bazlama dough should be slightly sticky – completely dry dough produces tough bread.
Dough Too Dry:
If your dough cracks when rolling or feels tough, add yogurt gradually, one tablespoon at a time. Different flour types absorb moisture differently, so adjustments are sometimes necessary. The humidity in your kitchen also affects dough consistency.
Bread Turns Out Tough:
Several factors contribute to tough bazlama: overworking the dough, insufficient resting time, or cooking at too low temperature. Ensure you’re mixing just until combined, allowing proper resting, and maintaining adequate heat during cooking.
Uneven Cooking:
Hot spots in your pan create uneven browning. If this occurs regularly, invest in a heavy-bottomed pan or cast-iron skillet for more even heat distribution. Also, ensure your rolled dough maintains consistent thickness throughout.
Lack of Characteristic Dark Spots:
These spots develop from proper heat levels and natural browning reactions. If your bazlama lacks them, increase your cooking temperature slightly and ensure the pan is properly preheated before adding dough.
Missing a few things? You can grab them on Amazon here.
Variations and Flavor Enhancements
While traditional bazlama uses only three ingredients, several variations can add interest without compromising the bread’s essential character. I’ve experimented with numerous additions over the years, finding some that enhance while others detract from the original’s perfection.
Herb-Infused Bazlama:
Adding dried herbs directly to the flour creates aromatic bread perfect for Mediterranean applications. I particularly enjoy oregano, thyme, or za’atar mixed into the dry ingredients. Use approximately one tablespoon of dried herbs per batch.
Whole Grain Variations:
Substituting up to half the all-purpose flour with whole wheat flour creates a nuttier, more complex flavor while adding nutritional benefits. The texture becomes slightly denser, but the trade-off in flavor and nutrition makes it worthwhile for health-conscious cooks.
Garlic and Onion Powder:
A teaspoon each of garlic and onion powder mixed with the flour creates savory bazlama perfect for accompanying hearty soups and stews. This variation works particularly well for dinner applications.
Sweet Versions:
Adding a tablespoon of honey to the yogurt before mixing creates slightly sweet bazlama perfect for breakfast applications. This version pairs beautifully with fresh fruit, nut butters, or simply enjoyed with butter.
Missing any kitchen essentials? You can grab them on Amazon here.
Cultural Context and Historical Background
Understanding bazlama’s cultural significance enriches the cooking experience and connects us to centuries of Turkish culinary tradition. This humble bread represents the ingenuity of nomadic peoples who created satisfying, nutritious food using minimal ingredients and equipment.
Historical Origins:
Bazlama originated among nomadic Turkish tribes who needed portable, long-lasting bread that could be made without permanent ovens. The name derives from the Turkish verb “bazlamak,” meaning to press or flatten, referring to the cooking method on metal plates over open fires.
Regional Variations:
Different regions of Turkey have developed their own bazlama traditions. In Central Anatolia, cooks often make larger versions using traditional saj griddles. Eastern regions sometimes incorporate local herbs, while coastal areas might use slightly different yogurt types that reflect local dairy traditions.
Modern Significance:
Today, bazlama represents comfort food for many Turkish families, often prepared for special occasions or when missing home-style cooking. The bread’s simplicity makes it accessible to modern cooks while maintaining its authentic character and connection to Turkish heritage.
Questions and Answers
Q: Can I use Greek yogurt instead of regular yogurt for this recipe?
Yes, Greek yogurt works well, but you might need to add a tablespoon or two of water since it’s thicker than regular yogurt. The extra protein in Greek yogurt can actually create a slightly more tender result, though the flavor will be a bit more tangy.
Q: What’s the best way to tell when bazlama is properly cooked?
Look for golden-brown spots on the bottom surface and slightly set edges. The bread might puff slightly during cooking, which indicates proper steam development. When you flip it, you should see those characteristic dark spots that give bazlama its authentic appearance and flavor.
Q: How long should I let the dough rest, and is this step really necessary?
The minimum resting time is 30 minutes, but I often let it rest for up to an hour when I have time. This step is crucial because it allows the flour to fully hydrate and the gluten to relax naturally, resulting in more tender bread. Skipping this step produces noticeably tougher bazlama.
Q: Can I make the dough ahead of time and cook it later?
Absolutely! The dough actually improves with longer resting periods. You can make it up to 24 hours ahead and store it covered in the refrigerator. Just bring it back to room temperature for about 30 minutes before rolling and cooking.
Q: Why does my bazlama sometimes turn out too thick and doughy in the center?
This usually happens when the dough is rolled too thick or the cooking temperature is too high, causing the outside to cook before the center. Roll the dough to about 1/4 inch thickness and maintain medium-high heat for even cooking throughout.
Q: Can I freeze the uncooked dough portions?
Yes, you can freeze rolled dough portions between sheets of parchment paper for up to three months. Thaw them in the refrigerator overnight, then bring to room temperature before cooking. The texture remains excellent after freezing.
Q: What type of pan works best for cooking bazlama?
A cast-iron skillet or heavy-bottomed pan provides the best heat distribution and retention. Non-stick pans work too, but they don’t create the same browning reactions that give bazlama its characteristic flavor. Avoid thin pans that create hot spots.
Q: Is it normal for the dough to look shaggy and rough after mixing?
Yes, this is completely normal and actually desirable! Unlike other bread doughs that require smooth, uniform texture, bazlama dough should look somewhat rough and rustic. Over-mixing leads to tough bread, so embrace the shaggy appearance.
Q: Can I make smaller or larger portions than the recipe suggests?
Certainly! The recipe easily scales up or down. For smaller households, halve all ingredients. For larger batches, double or triple as needed. Just maintain the same ratios and cooking techniques regardless of batch size.
Q: How do I know if my yogurt is suitable for this recipe?
Any plain, unsweetened yogurt works well. Avoid yogurt with added thickeners like gellan gum or pectin, as these can affect texture. Full-fat yogurt produces the richest results, but low-fat versions work adequately too. The yogurt should be smooth and creamy, not separated or watery.
Q: What should I do if my rolled dough keeps shrinking back?
This indicates the gluten is too tight, usually from insufficient resting time or overworking the dough. Let the dough rest for an additional 15-20 minutes, then try rolling again. If it continues shrinking, cover and rest for up to an hour.
Q: Can I add other ingredients like seeds or spices to the dough?
While traditional bazlama uses only three ingredients, small additions work well. Try sesame seeds, nigella seeds, or dried herbs mixed into the flour. Keep additions to no more than 2-3 tablespoons total to maintain the bread’s characteristic texture and cooking properties.
Missing a few things? You can grab them on Amazon here.
Missing any kitchen essentials? You can grab them on Amazon here.