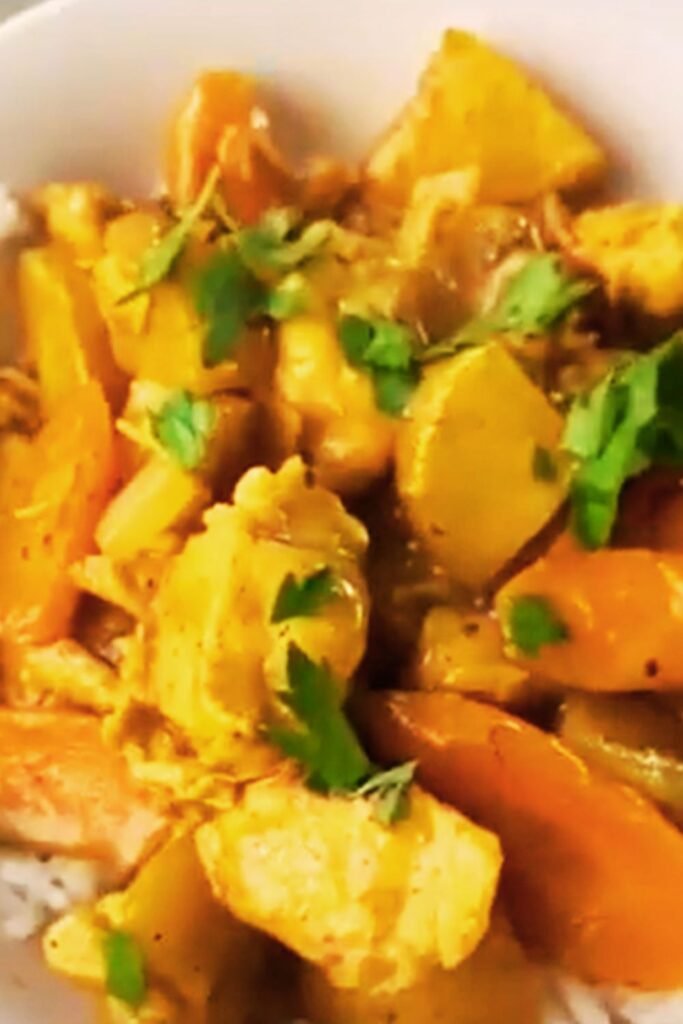
There’s something truly magical about the moment aromatic spices hit hot oil, releasing their fragrance throughout your kitchen. That’s exactly what happens when I make my favorite Thai Yellow Curry with chicken, potatoes, and carrots. This rich, warming dish has become my go-to comfort food, transporting me to the bustling streets of Bangkok with every bite.
After spending three months traveling through Thailand and learning from local cooks, I’ve perfected this recipe to capture the authentic flavors while making it accessible for home cooks. Today, I’m sharing my most treasured version—a curry that balances sweet, savory, and spicy notes in perfect harmony.
The Heart of Thai Yellow Curry
Thai Yellow Curry (Kaeng Kari) stands distinct from its red and green cousins thanks to its milder heat profile and rich aromatic blend. The signature golden color comes from turmeric, while ingredients like lemongrass, galangal, and coriander create its complex flavor foundation.
What makes yellow curry special is its accessibility—it’s often the gateway curry for those new to Thai cuisine. Less fiery than red or green varieties, it focuses instead on a perfect balance of warm spices with subtle heat. The addition of coconut milk creates a luxuriously creamy sauce that’s perfect for coating tender chicken, potatoes, and sweet carrots.
Ingredients You’ll Need
For the Curry Paste (or use 4-5 tablespoons store-bought yellow curry paste):
- 5 dried red chilies, deseeded and soaked
- 1 tablespoon coriander seeds
- 2 teaspoons cumin seeds
- 1 teaspoon white peppercorns
- 3 tablespoons chopped lemongrass (about 2 stalks, tough outer layers removed)
- 1 tablespoon galangal, chopped (or ginger if unavailable)
- 1 tablespoon fresh turmeric, chopped (or 2 teaspoons ground turmeric)
- 6 cloves garlic, peeled
- 2 shallots, roughly chopped
- 1 teaspoon shrimp paste (optional, omit for vegetarian version)
- 1 teaspoon salt
- 1 tablespoon vegetable oil for blending
For the Curry:
- 2 tablespoons vegetable oil
- 1 cinnamon stick
- 3 cardamom pods, slightly crushed
- 1 bay leaf
- 2 pounds (900g) boneless chicken thighs, cut into 1½-inch pieces
- 2 cans (13.5 oz each) coconut milk (one for cooking, one for adding later)
- 1 large potato (about 12 oz/350g), peeled and cut into 1-inch chunks
- 2 medium carrots, peeled and cut diagonally into ½-inch slices
- 1 medium onion, cut into wedges
- 2 tablespoons palm sugar or brown sugar
- 3 tablespoons fish sauce (adjust to taste)
- 2 tablespoons tamarind paste or lime juice
- 2-3 kaffir lime leaves (optional)
- ½ cup fresh cilantro leaves, for garnish
- Thai basil leaves, for garnish
For Serving:
- Jasmine rice, freshly cooked
- Lime wedges
- Sliced red chilies
- Crispy fried shallots
- Fresh cucumber slices
Traditional vs. Modern Methods
Before diving into the cooking process, let’s compare traditional and modern approaches to making Thai yellow curry:
| Aspect | Traditional Method | Modern Adaptation |
|---|---|---|
| Curry Paste | Made by hand using mortar and pestle | Food processor or blender acceptable |
| Coconut Milk | Fresh coconut milk, first and second pressing | Canned coconut milk, separating cream from liquid |
| Cooking Vessel | Clay pot over charcoal | Heavy-bottomed pot or Dutch oven |
| Spices | Whole spices toasted and ground fresh | Pre-ground spices acceptable |
| Protein | Often uses bone-in chicken pieces | Boneless chicken for convenience |
| Cooking Time | Long simmering (1-2 hours) | 45-60 minutes total |
| Seasoning | Fish sauce, palm sugar, no measurements | Balanced measurements for consistency |
I’m sharing a recipe that honors traditional techniques while making practical adaptations for the modern kitchen.
Step-by-Step Instructions
Making the Curry Paste (if making from scratch)
- In a dry skillet over medium heat, toast the coriander seeds, cumin seeds, and white peppercorns until fragrant, about 2-3 minutes. Don’t burn them!
- Transfer to a spice grinder or mortar and grind to a fine powder.
- If using a food processor or blender, combine the ground spices with all remaining paste ingredients and blend until smooth. Add a splash of water if needed to help it blend.
- If using a mortar and pestle (traditional method), start by pounding the dried chilies, then gradually add harder ingredients like lemongrass, galangal, and turmeric. Add softer ingredients like garlic and shallots last. Pound until you achieve a fine paste.
Cooking the Curry
- Heat the vegetable oil in a large pot or Dutch oven over medium heat. Add the cinnamon stick, cardamom pods, and bay leaf, frying for 30 seconds until fragrant.
- Add your curry paste (homemade or store-bought) and stir continuously for 2-3 minutes until aromatic and slightly darkened. This is crucial for developing flavor depth.
- Open one can of coconut milk without shaking it. Scoop out the thick cream that has risen to the top and add it to the pot with the curry paste. Stir and simmer until the oil separates from the cream (about 3-5 minutes). This technique, called “cracking” the coconut cream, is essential for authentic flavor.
- Add the chicken pieces and stir to coat with the curry mixture. Cook for 5 minutes, stirring occasionally.
- Pour in the remaining coconut cream and the second can of coconut milk. Add the potato chunks and bring to a gentle simmer.
- Cook for 15 minutes, then add the carrot pieces and onion wedges. If using kaffir lime leaves, tear them slightly to release flavor and add them now.
- Simmer for another 15-20 minutes, or until the vegetables are tender and the chicken is fully cooked.
- Season with palm sugar, fish sauce, and tamarind paste or lime juice. Start with smaller amounts and adjust to taste—the perfect balance should be slightly sweet, salty, and tangy.
- Turn off the heat and let the curry rest for 5-10 minutes before serving. This allows the flavors to meld together.
Serving Your Yellow Curry
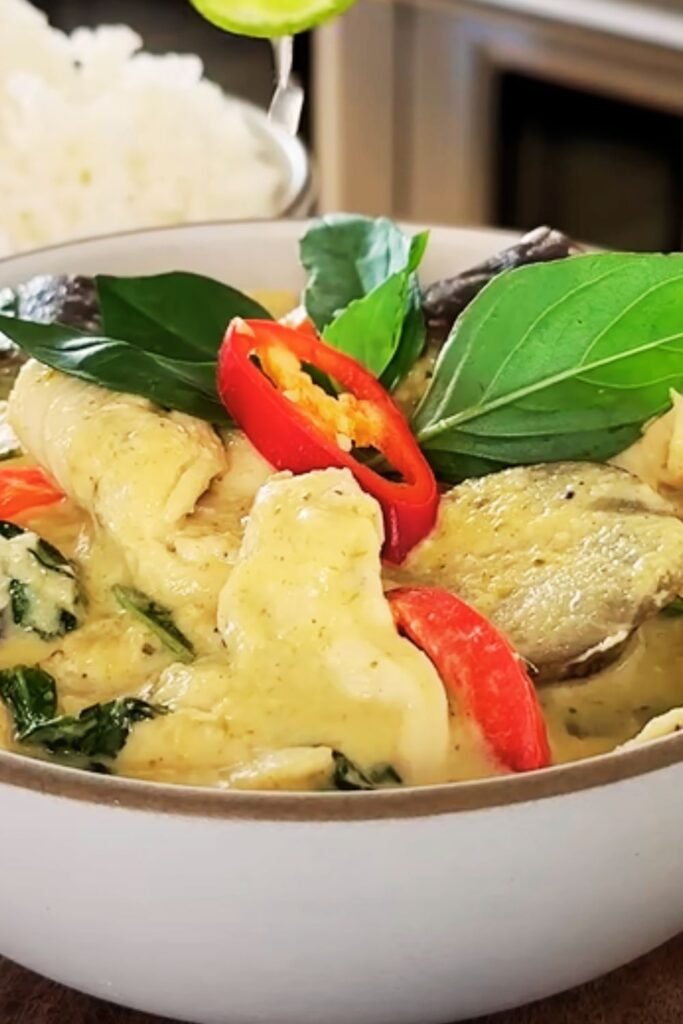
Ladle the curry into bowls over freshly steamed jasmine rice. Garnish with fresh cilantro and Thai basil leaves. Place lime wedges, sliced chilies, crispy fried shallots, and cucumber slices on the side for each person to customize their experience.
Tips for Perfect Yellow Curry Every Time
- Don’t rush the paste-frying step. This is where much of the flavor develops.
- Use chicken thighs rather than breast for more flavor and tenderness.
- Potatoes matter: Choose waxy varieties like Yukon Gold or red potatoes that hold their shape.
- Control the heat level by adjusting the number of chilies in your paste.
- Let the curry rest before serving to allow flavors to harmonize.
- Taste and adjust the seasoning balance of sweet (palm sugar), salty (fish sauce), and sour (tamarind or lime) before serving.
Regional Variations and Adaptations
Thai Yellow Curry shows fascinating regional differences throughout Thailand:
Northern Thailand
In the mountainous north, yellow curry often includes local herbs like makhwaen (a Szechuan pepper relative) and incorporates more root vegetables suitable to cooler climates.
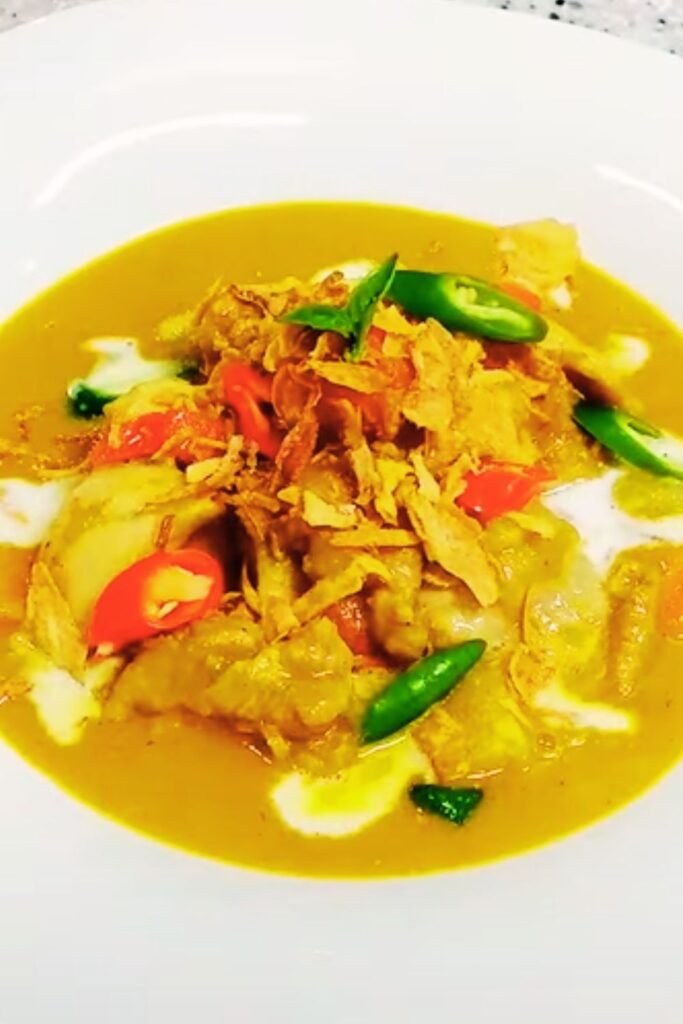
Southern Thailand
Southern variations tend to be spicier and may include local ingredients like pineapple or seafood instead of chicken. The Muslim influence in this region means yellow curry is especially popular.
Central Thailand
The version I’m sharing is closest to central Thai style, which balances flavors evenly and is considered the “standard” yellow curry throughout Thailand and internationally.
Storage and Reheating
This curry actually tastes even better the next day! Store leftovers in an airtight container in the refrigerator for up to 3 days. When reheating, do so gently over medium-low heat, adding a splash of coconut milk or water if the sauce has thickened too much.
You can also freeze portions for up to 3 months. Thaw overnight in the refrigerator before reheating.
Nutritional Information
Here’s an approximate nutritional breakdown per serving (about 1.5 cups of curry with 1 cup of jasmine rice):
| Nutrient | Amount | % Daily Value* |
|---|---|---|
| Calories | 650 | – |
| Total Fat | 38g | 49% |
| Saturated Fat | 24g | 120% |
| Cholesterol | 85mg | 28% |
| Sodium | 820mg | 36% |
| Total Carbohydrates | 54g | 20% |
| Dietary Fiber | 5g | 18% |
| Sugars | 8g | – |
| Protein | 28g | 56% |
| Vitamin A | – | 210% |
| Vitamin C | – | 45% |
| Calcium | – | 8% |
| Iron | – | 20% |
*Based on a 2,000 calorie diet
Common Substitutions and Dietary Adaptations
Making dietary adaptations or working around missing ingredients? Here are some tested substitutions:
Vegetarian/Vegan Version
- Replace chicken with firm tofu (pressed and cubed) or a mix of vegetables like cauliflower, bell peppers, and green beans
- Substitute fish sauce with soy sauce or salt
- Omit shrimp paste or substitute with miso paste
Gluten-Free
The recipe is naturally gluten-free, but always check store-bought curry paste labels for hidden gluten ingredients.
Ingredient Substitutions
- No lemongrass? Use 1 tablespoon lemon zest plus 1 teaspoon ginger
- No galangal? Substitute with ginger
- No fresh turmeric? Use ground turmeric (1 teaspoon fresh = ¼ teaspoon dried)
- No tamarind paste? Use lime juice
- No kaffir lime leaves? Add an extra splash of lime juice
Frequently Asked Questions
Q: Can I make yellow curry paste in advance?
A: Absolutely! Homemade curry paste can be stored in an airtight container in the refrigerator for up to 2 weeks, or frozen in ice cube trays for up to 3 months. Having pre-made paste on hand makes weeknight curry a breeze.
Q: Why is my curry watery instead of creamy?
A: The key to a creamy curry is properly “cracking” the coconut cream at the beginning. Make sure to use full-fat coconut milk, separate the cream, and cook it with the curry paste until the oil separates. Also, avoid stirring too much once the vegetables are added.
Q: Is yellow curry always mild?
A: While generally milder than red or green curries, the heat level is completely adjustable based on the number of chilies you include in your paste. Traditional Thai yellow curry has a gentle warmth rather than burning heat.
Q: Can I use a slow cooker or pressure cooker?
A: Yes! For slow cooker: still fry the paste and crack the coconut cream on the stovetop first, then transfer everything to a slow cooker and cook on low for 6-8 hours. For pressure cooker or Instant Pot: use the sauté function for the initial steps, then pressure cook for 6 minutes with natural release.
Q: What if my curry tastes too bland?
A: Thai food is all about balance. If your curry lacks flavor, try adding more fish sauce (for saltiness), palm sugar (for sweetness), or lime/tamarind (for sourness). Also ensure you’ve cooked the paste properly at the beginning to develop its full flavor potential.
Q: Can I add other vegetables to my yellow curry?
A: Definitely! Bell peppers, bamboo shoots, green beans, eggplant, and pumpkin all work wonderfully in yellow curry. Just adjust cooking times based on each vegetable’s requirements.
My Personal Connection to This Recipe
The first time I tasted authentic Thai yellow curry was at a small family restaurant in Chiang Mai. I watched in fascination as the grandmother deftly pounded ingredients in a large mortar, her arms moving with decades of practiced rhythm. When she noticed my interest, she invited me into the kitchen through gestures and smiles (despite our language barrier).
Over the next few hours, she showed me the careful toasting of spices, the patient grinding of ingredients, and most importantly, how to taste and adjust balance throughout the cooking process. “Mai pet, mai wan, mai prio, mai kem,” she repeated—not too spicy, not too sweet, not too sour, not too salty. Finding perfect balance was everything.
When I returned home, I spent months trying to recreate that transcendent curry, experimenting with proportions and techniques until I achieved something that transported me back to that small Chiang Mai kitchen. This recipe is the result of that journey—authentic in spirit, adaptable for home kitchens, and deeply satisfying to both make and eat.
I hope this recipe brings as much joy to your kitchen as it has to mine. There’s something profoundly connecting about preparing dishes that span continents and generations, linking us to traditions and tastes that have brought comfort to countless people before us.
Happy cooking!