Have you ever had one of those moments when you just can’t decide between two delicious desserts? That was exactly my dilemma last weekend when I couldn’t choose between making classic cinnamon rolls or indulging in some Oreos. Then it hit me – why not combine them? And that’s how these irresistible Oreo-stuffed cinnamon rolls were born.
I’ve been baking for over a decade now, and I can honestly say this mashup creation ranks among my top five favorite sweet treats. The soft, pillowy cinnamon roll dough wrapped around crushed Oreo cookies creates a flavor combination that’s simply divine. The contrasting textures of fluffy dough and crunchy cookie bits, all tied together with cream cheese frosting, make for a truly unforgettable breakfast treat or dessert.
In this article, I’ll walk you through the entire process of creating these heavenly rolls. Don’t worry if you’re new to making cinnamon rolls from scratch – I’ve broken down each step to make it as approachable as possible. So tie on your apron, preheat that oven, and let’s create some magic!
Ingredients You’ll Need
For the Dough:
- 4 cups all-purpose flour (plus extra for dusting)
- 1/3 cup granulated sugar
- 1 teaspoon salt
- 2 1/4 teaspoons (1 packet) active dry yeast
- 1 cup warm milk (about 110°F)
- 1/3 cup unsalted butter, melted
- 2 large eggs, room temperature
- 1 teaspoon vanilla extract
For the Filling:
- 1/3 cup unsalted butter, softened
- 1/2 cup brown sugar, packed
- 2 tablespoons ground cinnamon
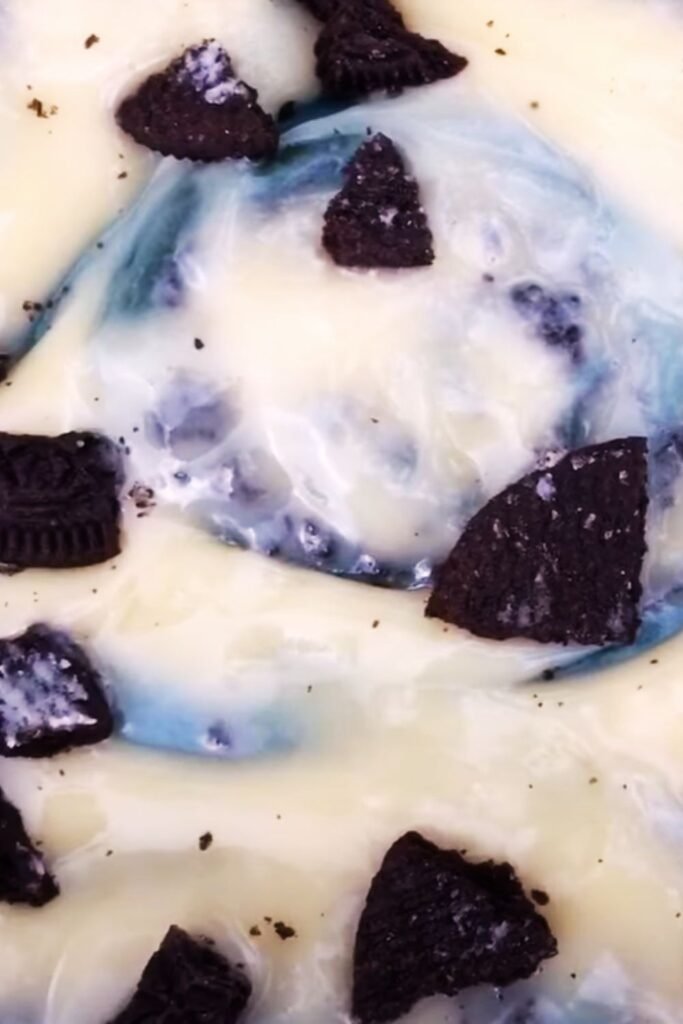
- 24 Oreo cookies, crushed (about 2 1/2 cups crushed)
- 2 tablespoons heavy cream (to brush on dough)
For the Cream Cheese Frosting:
- 8 oz cream cheese, softened
- 1/4 cup unsalted butter, softened
- 2 cups powdered sugar
- 1 teaspoon vanilla extract
- 1-2 tablespoons milk (to adjust consistency)
- 4 Oreo cookies, finely crushed for garnish (optional)
Essential Equipment
Before we dive into the baking process, make sure you have these tools ready:
- Large mixing bowl
- Stand mixer with dough hook (optional but helpful)
- Rolling pin
- 9×13 inch baking pan
- Measuring cups and spoons
- Pastry brush
- Parchment paper
- Kitchen thermometer (for checking milk temperature)
- Plastic wrap or clean kitchen towel
- Wire cooling rack
- Offset spatula for spreading frosting
Detailed Instructions
Step 1: Prepare the Dough
- In a small bowl, combine the warm milk (110°F – not hotter or it will kill the yeast) with the yeast and 1 tablespoon of the sugar. Let it sit for about 5-10 minutes until foamy and activated.
- In the bowl of a stand mixer fitted with the dough hook (or a large bowl if mixing by hand), combine the flour, remaining sugar, and salt.
- Add the melted butter, eggs, vanilla extract, and the activated yeast mixture to the dry ingredients.
- Mix on low speed until the dough comes together, then increase to medium speed and knead for 5-7 minutes until the dough is smooth and elastic. If kneading by hand, turn the dough onto a floured surface and knead for about 10 minutes.
- The dough should be slightly tacky but not sticky. If it’s too sticky, add a tablespoon of flour at a time until you reach the right consistency.
- Place the dough in a lightly oiled bowl, cover with plastic wrap or a clean kitchen towel, and let it rise in a warm area for about 1-1.5 hours, or until doubled in size.

Step 2: Prepare the Filling
While the dough is rising, let’s prepare our decadent Oreo filling:
- In a medium bowl, mix together the brown sugar and cinnamon until well combined.
- Place the Oreo cookies in a zip-top bag and crush them using a rolling pin. You want a mixture of fine crumbs and small chunks for texture variety. Alternatively, you can pulse them in a food processor, but be careful not to turn them into dust.
- Set aside both the cinnamon-sugar mixture and the crushed Oreos.
Step 3: Roll and Fill the Dough
- Once the dough has doubled in size, punch it down to release the air bubbles.
- Turn the dough out onto a lightly floured surface and roll it into a rectangle approximately 18×12 inches. Use a ruler for accuracy if you have one handy.
- Spread the softened butter evenly across the surface of the dough, leaving about a 1/2-inch border along the edges.
- Sprinkle the cinnamon-sugar mixture evenly over the butter, gently pressing it into the butter with your hands.
- Distribute the crushed Oreos evenly over the cinnamon-sugar layer. The cookies might seem like a lot, but trust me, they’ll create pockets of delicious chocolatey goodness in your rolls.
- Brush the far edge of the dough with a little water to help seal the roll.
- Starting from the long edge closest to you, tightly roll the dough into a log, pinching the seam to seal it when you reach the end.
Step 4: Slice and Second Rise
- Using a sharp knife or unflavored dental floss (my preferred method for clean cuts), slice the log into 12 equal rolls, each about 1.5 inches thick.
- Arrange the rolls in a greased 9×13 inch baking pan, leaving some space between each roll for expansion.
- Cover the pan with plastic wrap or a kitchen towel and let the rolls rise again for about 30-45 minutes, or until puffy and nearly doubled in size.
- During this second rise, preheat your oven to 350°F (175°C).
- Just before baking, gently brush the tops of the rolls with heavy cream. This creates a beautiful golden color and keeps the tops soft during baking.
Step 5: Bake to Golden Perfection
- Bake the rolls in the preheated oven for 22-25 minutes, or until the tops are golden brown and the centers are fully cooked. If you notice the tops browning too quickly, loosely cover the pan with aluminum foil.
- To test for doneness, insert a thermometer into the center of a roll – it should read about 190°F (88°C).
- Remove from the oven and allow the rolls to cool in the pan for about 10 minutes while you prepare the frosting.
Step 6: Make the Cream Cheese Frosting
- In a medium bowl, beat the softened cream cheese and butter until smooth and creamy.
- Gradually add the powdered sugar, mixing on low speed until incorporated.
- Add the vanilla extract and 1 tablespoon of milk, then beat on medium speed until light and fluffy. Add more milk if needed to achieve your desired consistency.
- For an extra Oreo touch, fold in 2 tablespoons of finely crushed Oreo cookies into the frosting, reserving the rest for garnish.
Step 7: Frost and Serve
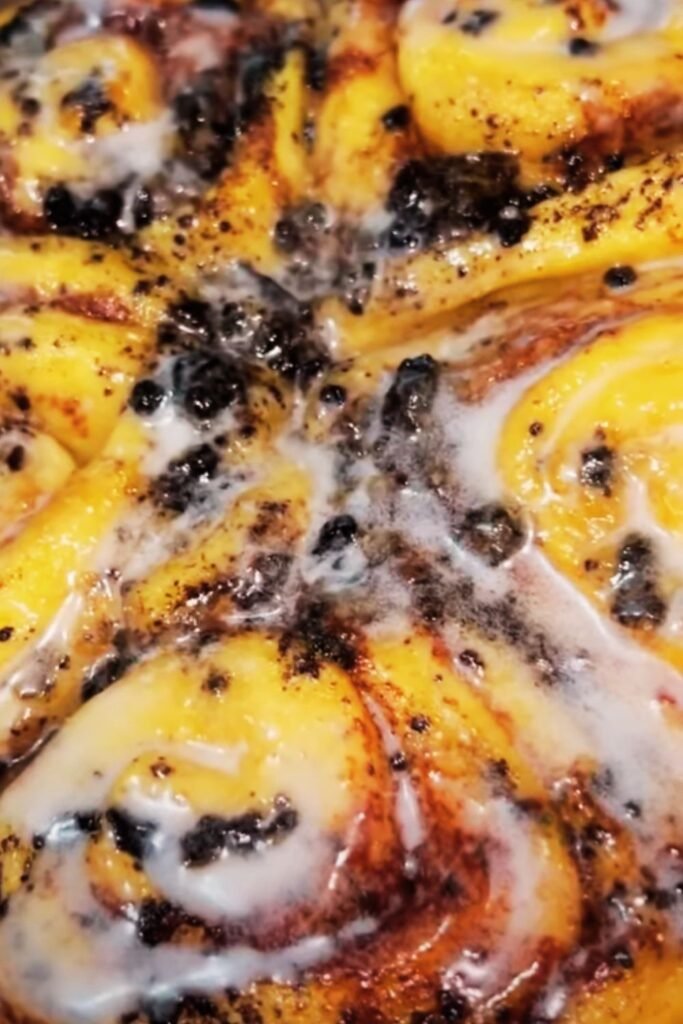
- While the rolls are still warm (but not hot), spread the cream cheese frosting generously over the top. The warmth will help the frosting melt slightly into the crevices.
- Sprinkle the remaining crushed Oreos on top for decoration and added texture.
- Serve warm for the ultimate indulgent experience!
Storage and Make-Ahead Options
These Oreo-stuffed cinnamon rolls are best enjoyed fresh from the oven, but here are some tips if you want to prepare them in advance:
Overnight Option:
- Prepare the rolls through Step 4, but instead of letting them rise a second time, cover the pan tightly with plastic wrap and refrigerate overnight (up to 12 hours).
- In the morning, remove the rolls from the refrigerator and let them come to room temperature and complete their second rise (about 1 hour) before baking as directed.
Storage:
- Store leftover rolls in an airtight container at room temperature for up to 2 days.
- For longer storage, refrigerate for up to 5 days.
- Reheat individual rolls in the microwave for 15-20 seconds to restore their soft texture.
Freezing:
- Fully baked and frosted rolls can be frozen for up to 2 months.
- Wrap individual rolls tightly in plastic wrap, then place in a freezer bag.
- Thaw overnight in the refrigerator and reheat in the microwave or oven until warm.
Nutritional Information
Here’s the approximate nutritional breakdown for one Oreo-stuffed cinnamon roll with frosting:
| Nutrient | Amount per Roll |
|---|---|
| Calories | 485 |
| Total Fat | 23g |
| Saturated Fat | 13g |
| Cholesterol | 75mg |
| Sodium | 320mg |
| Total Carbohydrates | 65g |
| Dietary Fiber | 1.5g |
| Sugars | 38g |
| Protein | 6g |
*Note: Nutritional values are estimates and may vary based on specific ingredients and portion sizes.
Variations to Try
The beauty of this recipe is its versatility. Here are some exciting variations to experiment with:
Different Oreo Flavors:
- Use mint Oreos for a refreshing twist
- Try peanut butter Oreos for a nutty dimension
- Golden Oreos create a vanilla-on-vanilla experience
- Seasonal Oreo flavors can make this recipe perfect for holidays
Add-ins and Toppings:
- Fold 1/2 cup chocolate chips into the filling
- Drizzle with caramel sauce before serving
- Add chopped nuts for extra crunch
- Sprinkle with flaky sea salt to balance the sweetness
Dietary Modifications:
- Use plant-based butter and milk alternatives for a dairy-free option
- Substitute gluten-free flour blend for traditional flour (note: texture may vary)
- Reduce sugar in the dough by 25% for a less sweet version
Serving Suggestions
These indulgent rolls make a statement on their own, but here are some ideas to turn them into a complete treat experience:
- Serve warm with a scoop of vanilla ice cream for dessert
- Pair with fresh berries to cut through the richness
- Accompany with a cold glass of milk for dunking
- Create a brunch spread with fresh fruit, yogurt, and these rolls as the centerpiece
- Offer small pieces as part of a dessert buffet or sweet table
Troubleshooting Tips
Even experienced bakers encounter issues sometimes. Here are solutions to common cinnamon roll problems:
Dough Isn’t Rising:
- Check that your yeast hasn’t expired
- Ensure your milk is warm (110°F), not hot
- Place dough in a warm, draft-free environment
Filling Leaks Out:
- Make sure butter is softened but not melted when spreading
- Roll the dough tightly and seal the edges well
- Don’t overfill with Oreo pieces
Rolls Are Doughy in Center:
- Test for doneness with a thermometer (190°F)
- Allow proper spacing between rolls for even baking
- Check that your oven temperature is accurate with an oven thermometer
Frosting Is Too Runny:
- Make sure cream cheese and butter are not too warm
- Add powdered sugar gradually until desired consistency is reached
- Chill frosting briefly if needed before spreading
Expert Tips for Perfect Oreo-Stuffed Cinnamon Rolls
After making these rolls countless times, I’ve discovered some pro tips that make a significant difference:
- Room temperature ingredients matter: Eggs and milk at room temperature create a more evenly mixed dough that rises better.
- Don’t rush the rising process: Proper fermentation develops flavor and texture. Be patient!
- Use dental floss for cutting: This prevents squishing the rolls and maintains their round shape.
- Invest in an oven thermometer: Many ovens run hot or cold, which can dramatically affect baking results.
- The “warm place” hack: Create the perfect rising environment by preheating your oven for just 1 minute, then turning it off and placing your covered dough inside.
- Texture contrast is key: Leave some Oreo pieces slightly larger for pockets of crunch among the soft dough.
- Frost while warm, not hot: Waiting about 10 minutes after baking allows the rolls to set slightly while still being warm enough to melt the frosting just a bit.
Questions & Answers
Can I make these without a stand mixer? Yes, absolutely! While a stand mixer makes the process easier, you can mix the dough by hand with a wooden spoon until combined, then knead on a floured surface for about 10 minutes until smooth and elastic. It’s a bit more work but produces equally delicious results.
How do I know when the dough has risen enough? The dough should approximately double in size, and when you gently press a finger into it, the indentation should remain rather than spring back immediately. This usually takes 1-1.5 hours in a warm environment.
Can I use quick rise (instant) yeast instead of active dry yeast? Yes! If using instant yeast, you can skip the activation step with warm milk and simply mix it directly with the dry ingredients. You may also notice a slightly faster rising time.
What’s the best way to crush the Oreos? For optimal texture variation, I recommend placing the cookies in a zip-top bag and crushing them with a rolling pin rather than using a food processor. This way, you’ll get a nice mix of fine crumbs and small chunks, which creates interesting texture in every bite.
Can I prepare these the night before? Definitely! Follow the recipe through arranging the sliced rolls in the baking pan, then cover tightly with plastic wrap and refrigerate overnight. In the morning, let them come to room temperature and complete their second rise (about 1 hour) before baking as directed.
Why did my rolls come out dry? This typically happens from using too much flour or overbaking. Make sure to measure your flour correctly (spoon and level rather than scooping) and check the rolls a few minutes before the suggested baking time, as ovens can vary in temperature.
How can I make these less sweet? You can reduce the sugar in the dough by up to 25% without affecting the texture. For the frosting, start with half the powdered sugar and adjust to taste. Using regular Oreos rather than Double Stuf will also slightly reduce the sweetness.
What’s the secret to getting the frosting just right? Make sure your cream cheese and butter are softened but not melting. Beat them together first until completely smooth before adding other ingredients. Add powdered sugar gradually, and adjust the consistency with small amounts of milk until it’s spreadable but not runny.
Conclusion
These Oreo-stuffed cinnamon rolls represent everything I love about baking – creativity, indulgence, and bringing joy through food. The combination of soft, fragrant cinnamon dough with the chocolate cookie crunch creates a taste experience that’s truly special. Whether you’re serving these for a holiday breakfast, weekend brunch, or as a decadent dessert, they’re sure to become a requested favorite.
Don’t be intimidated by the multiple steps – the process is actually quite therapeutic, and the reward is absolutely worth it. Plus, the heavenly aroma that will fill your kitchen while these bake is almost as delightful as the taste itself.
I hope you enjoy making and sharing these rolls as much as I do. Remember, baking is both a science and an art – follow the instructions carefully, but also feel free to add your own creative touches. Happy baking!