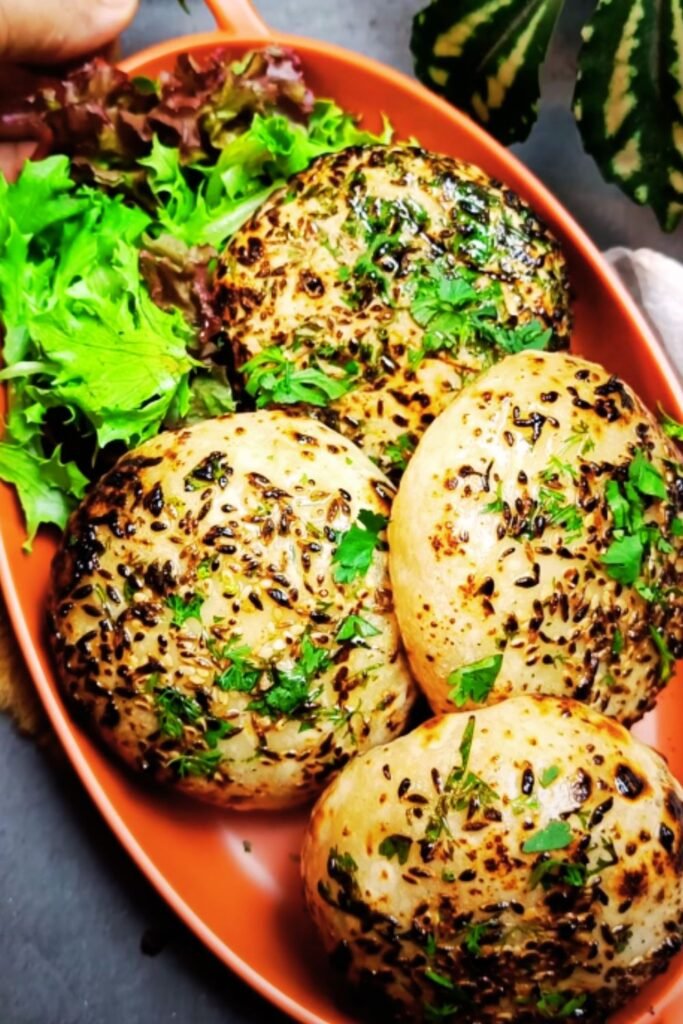
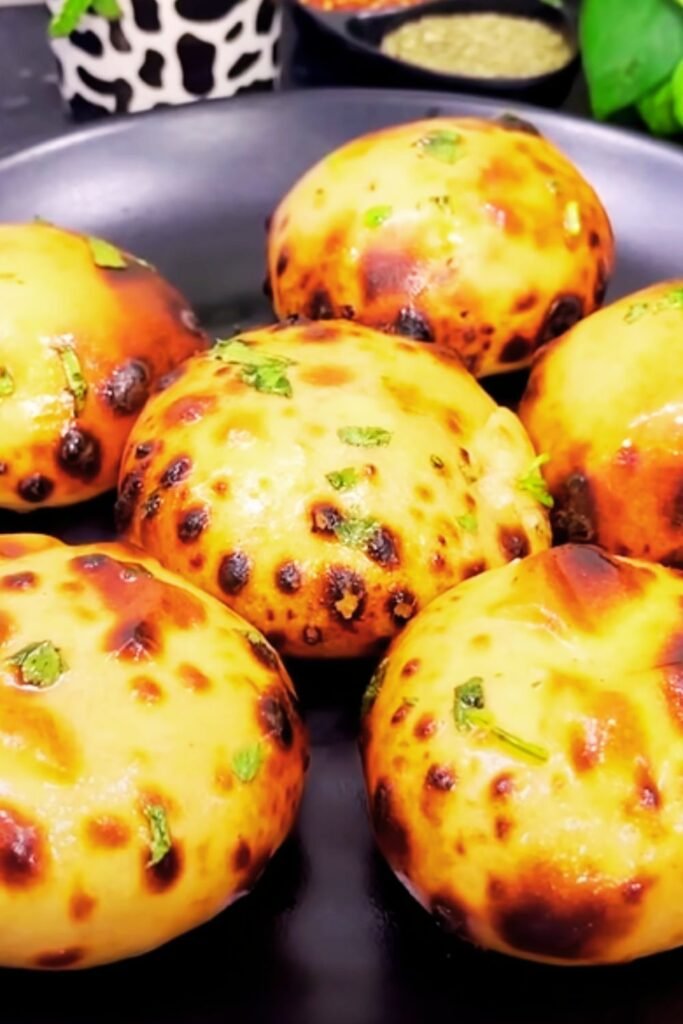
When I first discovered the magical world of stuffed cookies, my baking journey took an exciting turn. Among all the variations I’ve experimented with, Big Blue Monster Stuffed Cookies hold a special place in my heart – and my cookie jar. These aren’t just ordinary cookies; they’re a delightful fusion of chewy cookie dough wrapped around a surprise filling that creates an explosion of flavors with every bite.
The concept of stuffed cookies has revolutionized home baking, transforming simple cookie recipes into extraordinary treats that surprise and delight. My Big Blue Monster cookies combine the nostalgic appeal of cookie monster’s favorite treat with modern baking techniques that ensure perfect results every time.
Understanding the Big Blue Monster Cookie Concept
Cookie Stuffing Technique : The method of encasing various fillings within cookie dough before baking, creating a hidden center that reveals itself upon the first bite.
Monster Cookie Base : A robust cookie dough typically featuring oats, chocolate chips, and sometimes peanut butter, known for its chewy texture and ability to hold substantial fillings.
Blue Coloring Elements : Food-safe colorings and ingredients that give these cookies their distinctive monster-inspired blue hue while maintaining optimal flavor profiles.
The beauty of these cookies lies in their versatility. I’ve discovered that the “monster” aspect doesn’t just refer to their size – though they are generously proportioned – but also to their ability to accommodate various fillings and flavor combinations. The blue coloring adds a playful element that makes these cookies perfect for themed parties, children’s events, or anyone who wants to add whimsy to their baking repertoire.
Essential Ingredients and Their Roles
Creating perfect Big Blue Monster Stuffed Cookies requires understanding how each ingredient contributes to the final product. I’ve spent countless hours perfecting this recipe, and I can tell you that ingredient quality makes a significant difference.
| Ingredient Category | Primary Ingredients | Function | Quality Tips |
|---|---|---|---|
| Base Flour | All-purpose flour, Oat flour | Structure and texture | Use fresh flour, sift for best results |
| Sweeteners | Brown sugar, Granulated sugar | Moisture, flavor, texture | Light brown sugar preferred for chewiness |
| Fats | Butter, Coconut oil | Richness, texture, flavor | Room temperature butter works best |
| Binding Agents | Eggs, Vanilla extract | Structure, flavor enhancement | Large eggs at room temperature |
| Leavening | Baking soda, Baking powder | Rise and texture | Check expiration dates regularly |
| Colorants | Blue food coloring, Natural alternatives | Visual appeal | Gel colorings provide better results |
| Mix-ins | Chocolate chips, Oats, Sprinkles | Texture, flavor, authenticity | Mini chips distribute more evenly |
The secret to my recipe’s success lies in the balance between these ingredients. I use a combination of brown and white sugars to achieve the perfect chewy-crispy texture balance. The brown sugar contributes moisture and a subtle molasses flavor, while the white sugar helps with structure and crispness around the edges.
Filling Options and Combinations
One of the most exciting aspects of making stuffed cookies is choosing the perfect filling. Through my experimentation, I’ve discovered several winning combinations that complement the monster cookie base beautifully.
Classic Chocolate Fillings
- Nutella or chocolate hazelnut spread
- Melted chocolate ganache (cooled to workable consistency)
- Chocolate chip cookie dough (yes, cookie dough in cookie dough!)
- Brownie batter (partially baked)
Fruity Monster Variations
- Blueberry jam (natural blue color enhancement)
- Mixed berry compote
- Lemon curd with blue food coloring
- Raspberry preserve with blue swirls
Nutty and Creamy Options
- Peanut butter (classic monster cookie pairing)
- Almond butter with mini chocolate chips
- Cream cheese frosting (blue-tinted)
- Marshmallow fluff with food coloring
Creative Contemporary Fillings
- Cookie butter spreads
- Salted caramel sauce
- Dulce de leche
- Flavored buttercreams
The key to successful stuffing lies in consistency. I always ensure my fillings are thick enough to hold their shape but not so thick that they tear the cookie dough during assembly. For liquid fillings like jams or caramel, I often mix them with powdered sugar to achieve the right consistency.
Step-by-Step Baking Process
Creating these impressive cookies requires attention to detail and proper technique. I’ve refined this process through numerous baking sessions, and I’m excited to share my proven method with you.
Preparation Phase
I always begin by organizing my workspace and preparing all ingredients. This mise en place approach ensures smooth execution and prevents any overlooked steps.
Equipment Setup
- Large mixing bowls (at least two)
- Electric mixer (stand mixer preferred)
- Cookie scoops (multiple sizes)
- Parchment-lined baking sheets
- Wire cooling racks
- Small bowls for fillings
Ingredient Preparation
- Bring butter and eggs to room temperature (about 1 hour)
- Measure all dry ingredients into separate bowls
- Prepare chosen fillings and portion into workable amounts
- Preheat oven to 350°F (175°C)
Dough Creation Process
The foundation of exceptional stuffed cookies begins with perfectly mixed dough. I’ve learned that overmixing leads to tough cookies, while undermixing results in uneven texture.
Wet Ingredient Combination
- Cream butter with both sugars until light and fluffy (3-4 minutes)
- Add eggs one at a time, mixing well after each addition
- Incorporate vanilla extract and blue food coloring gradually
- Mix until color is evenly distributed throughout
Dry Ingredient Integration
- Combine flour, baking soda, baking powder, and salt in separate bowl
- Add dry ingredients to wet mixture in three additions
- Mix on low speed until just combined
- Fold in oats and chocolate chips by hand
The dough should be slightly sticky but manageable. If it’s too wet, I add flour one tablespoon at a time. If too dry, a teaspoon of milk helps achieve the right consistency.
Assembly Technique
This step requires patience and practice, but the results are worth the effort. I’ve developed a technique that ensures even filling distribution and proper sealing.
Portion and Shape
- Divide dough into equal portions (about 2 tablespoons each)
- Flatten each portion in your palm to create a disc
- Place 1 teaspoon of filling in the center
- Carefully wrap dough around filling, sealing edges completely
- Roll gently between palms to create uniform shape
Quality Control Checks
- Ensure no filling is visible from outside
- Check that seams are properly sealed
- Verify consistent sizing across all cookies
- Look for any air pockets that might cause cracking
Baking Optimization
Proper baking technique transforms good cookies into exceptional ones. I’ve fine-tuned these parameters through extensive testing.
| Baking Parameter | Recommended Setting | Adjustment Notes |
|---|---|---|
| Oven Temperature | 350°F (175°C) | Reduce by 25°F for convection ovens |
| Baking Time | 12-15 minutes | Edges should be set, centers slightly soft |
| Pan Spacing | 2 inches apart | Prevents spreading and merging |
| Rack Position | Center rack | Ensures even heat distribution |
| Cooling Time | 5 minutes on pan | Allows structure to set before moving |
I always bake one test cookie first to verify timing and temperature accuracy. Ovens can vary significantly, and this small step prevents disappointment with entire batches.
Troubleshooting Common Issues
Through my baking journey, I’ve encountered and solved numerous challenges. Here are the most common issues and my proven solutions.
Filling Leakage Problems
- Cause: Insufficient sealing or overfilling
- Solution: Use less filling and ensure complete edge sealing
- Prevention: Practice proper wrapping technique with scrap dough
Uneven Blue Coloring
- Cause: Inadequate mixing or low-quality coloring
- Solution: Use gel food coloring and mix thoroughly
- Prevention: Add coloring gradually while mixing
Texture Issues
- Cause: Overmixing, incorrect measurements, or temperature problems
- Solution: Follow mixing instructions precisely and verify ingredient temperatures
- Prevention: Use kitchen scale for accurate measurements
Spreading Problems
- Cause: Warm dough or insufficient flour
- Solution: Chill dough 30 minutes before baking
- Prevention: Maintain proper ingredient ratios and dough consistency

Storage and Serving Recommendations
Proper storage maintains the cookies’ quality and extends their enjoyment period. I’ve tested various storage methods to determine the most effective approaches.
Short-term Storage (1-3 days)
- Store in airtight containers at room temperature
- Layer between parchment paper to prevent sticking
- Keep different flavored fillings separated
- Maintain consistent temperature environment
Medium-term Storage (1 week)
- Refrigerate in sealed containers
- Allow to come to room temperature before serving
- Wrap individually for grab-and-go convenience
- Consider vacuum sealing for optimal freshness
Long-term Storage (1-3 months)
- Freeze in freezer-safe containers
- Flash freeze individually before bulk storage
- Label with dates and filling types
- Thaw at room temperature for best texture
Serving Suggestions
These versatile cookies pair wonderfully with various beverages and accompaniments:
- Hot Beverages: Coffee, hot chocolate, chai tea, herbal teas
- Cold Beverages: Cold milk, iced coffee, fruit smoothies, lemonade
- Complementary Treats: Fresh berries, whipped cream, vanilla ice cream
- Special Occasions: Birthday parties, school events, bake sales, holiday gatherings
Advanced Variations and Customizations
Once you’ve mastered the basic recipe, numerous creative possibilities await exploration. I’ve developed several variations that showcase the recipe’s adaptability.
Seasonal Adaptations
- Summer: Lemon-blueberry filling with blue frosting swirls
- Fall: Pumpkin spice dough with cinnamon cream filling
- Winter: Peppermint bark filling with crushed candy canes
- Spring: Strawberry jam with blue-tinted white chocolate chips
Dietary Modifications
- Gluten-Free: Substitute with certified gluten-free flour blend
- Vegan: Use plant-based butter and egg replacers
- Reduced Sugar: Replace portion of sugar with stevia or monk fruit
- Nut-Free: Ensure all ingredients are processed in nut-free facilities
Professional Presentation Techniques
- Drizzling: Melted white chocolate with blue food coloring
- Dusting: Powdered sugar for elegant finish
- Decorating: Royal icing designs and edible glitter
- Packaging: Custom boxes for gift-giving occasions
Nutritional Considerations and Portion Control
Understanding the nutritional profile helps make informed decisions about consumption and portion sizes. I’ve calculated these values based on my standard recipe.
| Nutritional Component | Per Cookie (Approx.) | Daily Value % | Notes |
|---|---|---|---|
| Calories | 280-320 | 14-16% | Varies by filling choice |
| Total Fat | 12-16g | 18-25% | Primarily from butter and nuts |
| Saturated Fat | 6-8g | 30-40% | Monitor intake accordingly |
| Carbohydrates | 38-42g | 13-14% | Complex carbs from oats |
| Sugars | 22-28g | – | Natural and added sugars |
| Protein | 4-6g | 8-12% | From eggs, flour, and oats |
| Fiber | 2-3g | 8-12% | Primarily from oats |
These cookies are treats meant for occasional enjoyment rather than daily consumption. I typically recommend limiting portions to one cookie per serving, especially given their generous size and rich fillings.
Questions and Answers
Q. Can I make the cookie dough ahead of time and stuff them later? Absolutely! I often prepare the dough up to 3 days in advance and store it covered in the refrigerator. Just let it come to room temperature for about 30 minutes before stuffing and baking. This actually improves the flavors as they have time to meld together.
Q. What’s the best way to achieve an even blue color throughout the cookies? I’ve found that gel food coloring works much better than liquid versions. Start with a small amount and gradually add more while mixing. The key is to cream the butter and sugar first, then add the coloring during the wet ingredient phase for even distribution.
Q. How do I prevent the filling from leaking out during baking? The secret lies in proper sealing technique. Make sure your dough disc is large enough to completely encase the filling, and pinch the edges firmly together. I also recommend chilling the assembled cookies for 15-20 minutes before baking to help them hold their shape.
Q. Can I use natural blue coloring instead of artificial food coloring? Yes! Butterfly pea flower powder creates a beautiful natural blue color, though it’s more subtle than artificial coloring. You can also use blue spirulina powder, but use it sparingly as it has a strong flavor. Fresh blueberry juice works too, but you’ll need to adjust the liquid content in the recipe.
Q. What’s the ideal texture for cookie fillings? I aim for fillings that are thick enough to hold their shape but spreadable. Think peanut butter consistency – not as thick as modeling clay, but not as thin as syrup. If your filling is too thin, add powdered sugar. If too thick, add a tiny amount of milk or melted butter.
Q. How can I tell when the cookies are perfectly baked? Look for edges that are set and lightly golden, while the centers still appear slightly soft. They’ll continue cooking on the hot pan after removal from the oven. Overbaked stuffed cookies become hard and lose their chewy texture, which is part of their appeal.
Q. Can I freeze the unbaked stuffed cookies? This is one of my favorite time-saving tricks! Assemble the cookies completely, place them on a parchment-lined baking sheet, and freeze until solid. Then transfer to freezer bags for up to 3 months. Bake directly from frozen, adding 2-3 minutes to the baking time.
Q. What are some creative filling combinations you recommend? I love experimenting with unique combinations! Some of my favorites include: salted caramel with mini pretzels, cream cheese with blueberry jam, cookie butter with chocolate chips, and peanut butter with marshmallow fluff. The key is balancing flavors and textures.
Q. How do I prevent my cookies from spreading too much during baking? Chilling is crucial! If your dough is too warm, the cookies will spread excessively. I chill assembled cookies for at least 15 minutes before baking. Also, make sure your baking sheets aren’t too warm when you place the cookies on them.
Q. Can I make mini versions of these cookies? Definitely! Use about 1 tablespoon of dough and 1/2 teaspoon of filling for mini versions. Reduce the baking time to 8-10 minutes. These are perfect for parties or when you want portion control. Kids especially love the bite-sized versions.
Creating Big Blue Monster Stuffed Cookies has become one of my most rewarding baking adventures. The combination of technique, creativity, and delicious results makes these cookies a standout treat that never fails to impress. Whether you’re baking for a special occasion or simply want to add some whimsy to your kitchen repertoire, these cookies deliver both visual appeal and exceptional taste. Remember that practice makes perfect, so don’t be discouraged if your first batch isn’t exactly as you envisioned. Each baking session teaches valuable lessons that improve your technique and confidence. Happy baking!