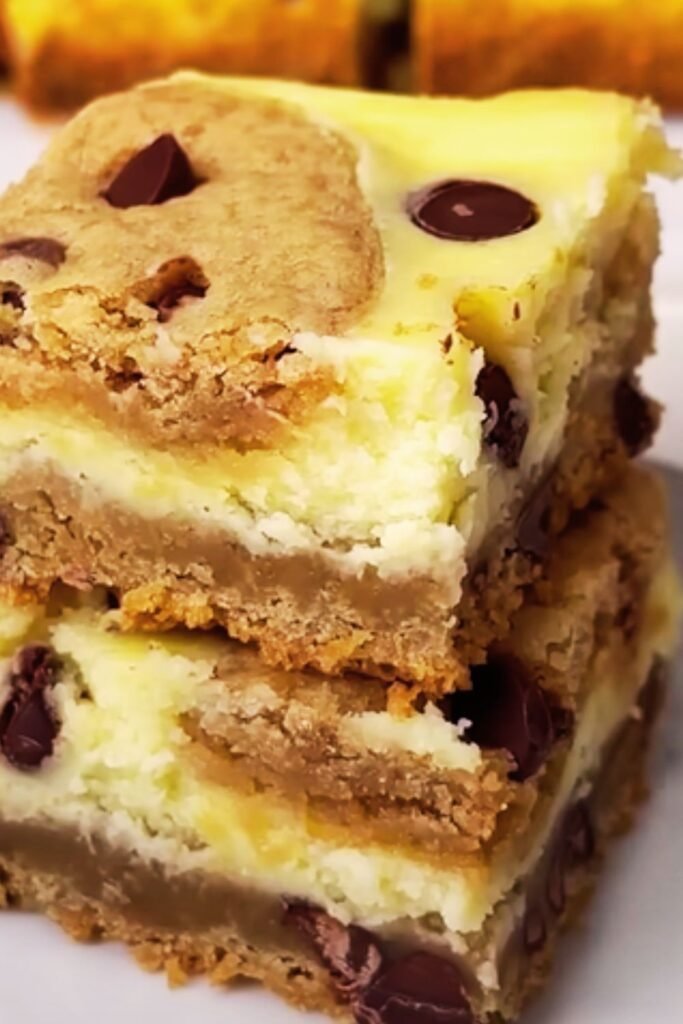
I’ve been obsessed with Biscoff cookie butter ever since I discovered it nestled between the peanut butter and Nutella at my local grocery store. That first spoonful transported me straight to cookie heaven with its warm, caramelized sweetness and distinctive cinnamon-spiced flavor. After countless experiments in my kitchen, I’ve finally perfected what I consider the ultimate dessert mashup: Biscoff Cookie Butter Swirled Cheesecake Bars.
These bars represent everything I love about dessert – the creamy richness of New York-style cheesecake, the nostalgic comfort of Biscoff cookies, and that irresistible swirl of cookie butter that creates the most beautiful marbled pattern. I’ve served these at dinner parties, family gatherings, and even packed them for office potlucks, and they never fail to disappear within minutes.
Understanding the Magic Behind Biscoff Cookie Butter
Before diving into the recipe, let me share why Biscoff cookie butter makes such an exceptional addition to cheesecake. Unlike traditional nut butters, Biscoff cookie butter brings a complex flavor profile that combines:
Caramelized Sugar Notes: The signature taste comes from the caramelization process during cookie production, creating deep, rich flavors that complement the tanginess of cream cheese perfectly.
Cinnamon and Spice Complexity: Subtle warming spices add depth without overwhelming the delicate cheesecake base.
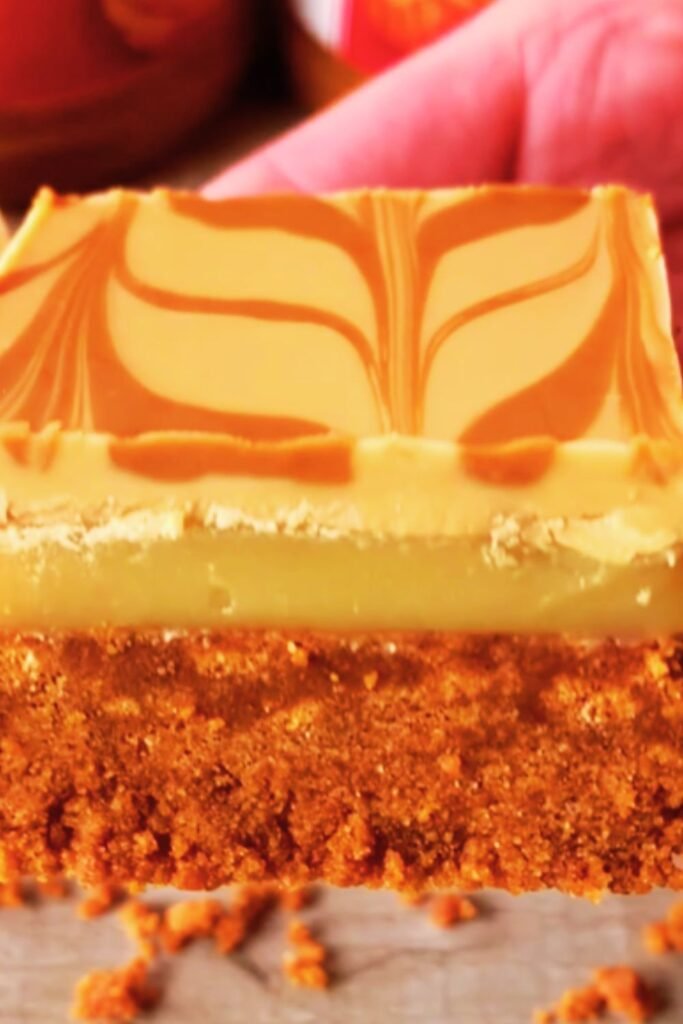
Smooth, Creamy Texture: The butter’s consistency allows for easy swirling and creates those gorgeous marbled patterns that make these bars as beautiful as they are delicious.
Natural Sweetness Balance: The cookie butter’s sweetness perfectly balances the slight tartness of the cheesecake, eliminating the need for excessive added sugar.
Essential Ingredients Breakdown
Creating the perfect Biscoff cheesecake bars requires attention to ingredient quality and proportions. Here’s what you’ll need and why each component matters:
For the Biscoff Cookie Crust:
- 2 cups Biscoff cookies, finely crushed: I prefer using original Biscoff cookies rather than the chocolate variety for this recipe. The original cookies provide the authentic spiced flavor that pairs beautifully with the cheesecake.
- 4 tablespoons unsalted butter, melted: Use real butter, not margarine. The butter helps bind the cookie crumbs and creates that perfect crispy-yet-tender crust texture.
- 2 tablespoons granulated sugar: This enhances the cookies’ natural sweetness and helps the crust hold together.
- 1/4 teaspoon sea salt: A pinch of salt amplifies all the flavors and prevents the crust from tasting flat.
For the Cheesecake Filling:
- 24 oz cream cheese, room temperature: This is crucial – cold cream cheese will create lumps no matter how long you beat it. I always take my cream cheese out at least 2 hours before baking.
- 3/4 cup granulated sugar: I’ve tested various amounts, and this provides the perfect sweetness level without competing with the cookie butter.
- 3 large eggs, room temperature: Room temperature eggs incorporate more easily and create a smoother texture.
- 1/2 cup sour cream: This adds tanginess and helps create that classic New York cheesecake texture.
- 1 teaspoon vanilla extract: Use pure vanilla extract, not imitation, for the best flavor.
- 1/4 teaspoon sea salt: Essential for balancing the sweetness and enhancing overall flavor.
For the Cookie Butter Swirl:
- 1/2 cup Biscoff cookie butter: I use the smooth variety, though crunchy works too if you prefer texture.
- 2 tablespoons heavy cream: This thins the cookie butter slightly, making it easier to swirl.
- 1 tablespoon powdered sugar: Helps create a smoother consistency for swirling.
Nutritional Information and Dietary Considerations
| Nutrient | Per Bar (1/16 of recipe) | % Daily Value |
|---|---|---|
| Calories | 385 | 19% |
| Total Fat | 24g | 31% |
| Saturated Fat | 14g | 70% |
| Cholesterol | 95mg | 32% |
| Sodium | 285mg | 12% |
| Total Carbohydrates | 38g | 14% |
| Dietary Fiber | 1g | 4% |
| Sugars | 32g | – |
| Protein | 7g | 14% |
| Calcium | 120mg | 12% |
| Iron | 1.2mg | 7% |
Dietary Modifications:
- Gluten-Free Option: Substitute regular Biscoff cookies with gluten-free gingersnaps or graham crackers
- Reduced Sugar: Replace 1/4 cup sugar with sugar substitute designed for baking
- Dairy-Free: Use vegan cream cheese and coconut cream, though texture will differ slightly
Step-by-Step Preparation Method
Preparing Your Kitchen and Equipment
I always start by organizing my workspace and preheating my oven to 325°F (163°C). Line a 9×13-inch baking pan with parchment paper, leaving overhang for easy removal. I’ve learned that proper preparation makes the entire process smoother and more enjoyable.
Creating the Perfect Biscoff Crust
The crust forms the foundation of these bars, so getting it right is essential. I place the Biscoff cookies in a food processor and pulse until they form fine, even crumbs. You want consistency similar to coarse sand – not powder, but no large chunks either.
In a medium bowl, I combine the cookie crumbs with melted butter, sugar, and salt. The mixture should hold together when pressed but not be overly wet. Press this mixture firmly into the prepared pan, ensuring even coverage and paying special attention to the corners.
I bake the crust for 10 minutes, then remove it and let it cool while preparing the filling. This pre-baking step prevents a soggy bottom and ensures the crust maintains its structure.
Mastering the Cheesecake Filling
Room temperature ingredients are absolutely crucial for smooth cheesecake. I beat the cream cheese with an electric mixer on medium speed for 3-4 minutes until completely smooth and fluffy. Scraping down the bowl sides frequently prevents lumps.
Gradually add the sugar, beating until fully incorporated. Add eggs one at a time, beating just until combined after each addition. Overmixing at this stage can incorporate too much air, leading to cracks during baking.
Finally, I fold in the sour cream, vanilla, and salt until just combined. The filling should be smooth, creamy, and pourable.
Creating the Cookie Butter Swirl
In a small bowl, I whisk together the cookie butter, heavy cream, and powdered sugar until smooth. The consistency should be similar to thick caramel sauce – fluid enough to swirl but thick enough to create distinct patterns.
Pour the cheesecake filling over the prepared crust, spreading it evenly. Drop spoonfuls of the cookie butter mixture over the surface, then use a knife to create swirl patterns. I like to drag the knife in figure-eight motions for the most attractive marbled effect.
Baking and Cooling Techniques
The Perfect Baking Environment
I bake these bars in a 325°F oven for 45-50 minutes, until the center is almost set but still slightly jiggly. The edges should look firm and slightly golden. Overbaking results in a dense, dry texture, while underbaking leaves you with a runny center.
Cooling Strategy for Best Results
Proper cooling is crucial for achieving the perfect texture. I turn off the oven and crack the door open, letting the bars cool gradually for 1 hour. This prevents sudden temperature changes that cause cracking.
After the initial cooling period, I remove the pan and let it cool completely at room temperature for another 2 hours before refrigerating. The bars need at least 4 hours of chilling time, though overnight is ideal.
Flavor Variations and Creative Twists
Seasonal Adaptations
Holiday Spice Version: Add 1/2 teaspoon ground cinnamon and 1/4 teaspoon nutmeg to the cheesecake filling for extra warmth.
Chocolate Lover’s Twist: Substitute half the Biscoff cookies with chocolate wafers and add 2 tablespoons cocoa powder to the filling.
Citrus Bright: Add 2 tablespoons fresh lemon juice and 1 tablespoon lemon zest to the filling for a bright contrast to the rich cookie butter.
Topping Variations
| Topping Style | Ingredients | Application Method |
|---|---|---|
| Whipped Cream | Heavy cream, powdered sugar, vanilla | Pipe after chilling completely |
| Caramel Drizzle | Store-bought or homemade caramel | Drizzle in patterns before serving |
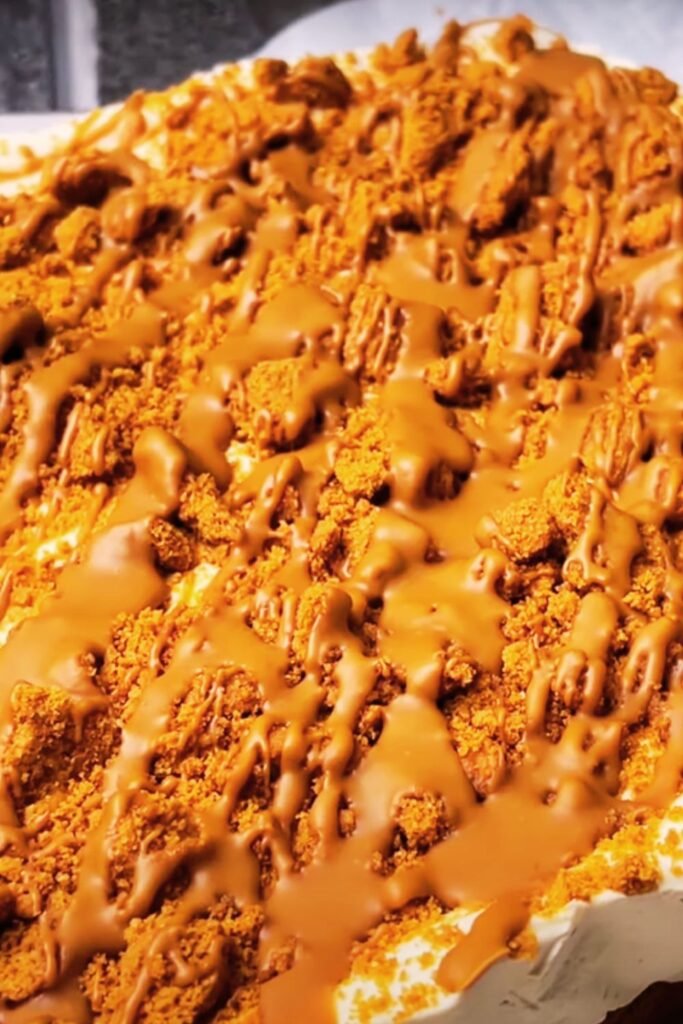
| Crushed Cookies | Additional Biscoff cookies | Sprinkle on top during final 10 minutes of baking |
| Fresh Berries | Strawberries, raspberries, blueberries | Arrange on top just before serving |
Storage and Serving Guidelines
Proper Storage Methods
These bars store beautifully, making them perfect for meal prep or entertaining. I wrap the cooled bars tightly in plastic wrap and refrigerate for up to 5 days. For longer storage, they freeze exceptionally well for up to 3 months.
When freezing, I cut the bars first, then wrap individual pieces in plastic wrap and store in a freezer-safe container. This allows me to thaw only what I need.
Serving Suggestions
I serve these bars chilled, cut into neat squares using a sharp knife wiped clean between cuts. They’re rich enough that smaller portions are satisfying – I typically cut a 9×13 pan into 16 bars.
Perfect Pairings:
- Fresh brewed coffee or espresso
- Warm chai tea or spiced tea blends
- Cold milk or cream
- Fresh fruit like strawberries or pears
- Vanilla ice cream for an extra indulgent treat
Troubleshooting Common Issues
Preventing Cracks
Cracks in cheesecake are usually caused by overbaking or rapid temperature changes. I always use the “jiggle test” – the center should move slightly when gently shaken. The gradual cooling method I described above also helps prevent cracking.
Achieving Clean Cuts
For professional-looking bars, I use a large, sharp knife and wipe it clean with a damp towel between each cut. Dental floss also works wonderfully for clean cuts without dragging the topping.
Fixing Lumpy Filling
If your filling has lumps despite room temperature ingredients, strain it through a fine-mesh sieve before pouring it over the crust. This extra step ensures silky smoothness.
The Science Behind Perfect Cheesecake Bars
Understanding the science helps me consistently create perfect results. The proteins in cream cheese and eggs coagulate during baking, creating structure. The gradual temperature increase and cooling prevent the proteins from contracting too quickly, which causes cracks.
The cookie butter swirl doesn’t just add flavor – its fat content helps create a more tender texture throughout the bars. The sugars in both the cookie butter and cheesecake base create moisture retention, keeping the bars creamy even after several days.
Making It Your Own
I encourage you to experiment with this base recipe. The beauty of these bars lies in their adaptability. Try different cookie bases like graham crackers or gingersnaps. Experiment with other nut and seed butters, though you may need to adjust the consistency with cream.
Consider seasonal additions like pumpkin spice in fall or fresh berry swirls in summer. The technique remains the same, but the flavors can reflect your preferences and the season.
Final Thoughts and Personal Tips
After making these bars countless times, I’ve learned that patience is key. Don’t rush the cooling process, and don’t skip the chilling time. The flavors develop and improve overnight, making day-two bars even better than day-one.
I always make these when I’m expecting company because they’re impressive enough for special occasions but approachable enough for casual gatherings. The combination of familiar flavors in an elevated presentation never fails to impress.
The recipe scales beautifully if you need to feed a crowd – just use a larger pan and adjust the baking time accordingly. I’ve successfully made these in half-sheet pans for large gatherings.
Questions and Answers
Q: Can I use homemade cookie butter instead of store-bought Biscoff? A: Absolutely! Homemade cookie butter works beautifully in this recipe. Just ensure it has a similar consistency to store-bought versions. If it’s too thick, thin it with a little cream or melted butter.
Q: Why do my cheesecake bars crack every time I make them? A: Cracking usually results from overbaking or rapid temperature changes. Use the gentle jiggle test to check doneness, and always cool gradually. Also, ensure your oven temperature is accurate with an oven thermometer.
Q: Can I make these bars ahead of time for a party? A: Yes! These bars actually improve with time. I often make them 2-3 days ahead. They store perfectly in the refrigerator and the flavors have time to meld together beautifully.
Q: What’s the best way to get clean, professional-looking cuts? A: Use a large, sharp knife and wipe it clean with a damp towel between each cut. Alternatively, unflavored dental floss works wonderfully for clean cuts without dragging the topping.
Q: Can I freeze these bars? A: Absolutely! They freeze beautifully for up to 3 months. I recommend cutting them first, then wrapping individual pieces in plastic wrap before storing in a freezer-safe container.
Q: My cookie butter swirl sank to the bottom. What went wrong? A: This usually happens when the cookie butter mixture is too thin or the cheesecake filling is too loose. Make sure your cookie butter mixture has the consistency of thick caramel, and don’t overmix the cheesecake filling.
Q: Can I use low-fat cream cheese to make this recipe healthier? A: I don’t recommend it. Low-fat cream cheese contains more water and less fat, which affects both texture and flavor. The bars won’t set properly and will lack the rich, creamy texture that makes them special.
Q: How do I know when the bars are perfectly done? A: The edges should be set and slightly golden, while the center should still jiggle slightly when gently shaken. The surface should look almost set but not completely firm. They’ll continue cooking from residual heat during the cooling process.
Q: Can I add other mix-ins to the cheesecake filling? A: Yes, but be mindful of moisture content. Chocolate chips, chopped nuts, or small pieces of cookies work well. Avoid fresh fruit, as it releases moisture during baking and can affect the texture.
Q: What’s the secret to getting the perfect swirl pattern? A: The key is having the right consistency for your cookie butter mixture and not overdoing the swirling. Drop spoonfuls evenly across the surface, then use a knife to create gentle figure-eight patterns. Too much swirling will muddy the pattern.
These Biscoff Cookie Butter Swirled Cheesecake Bars have become my signature dessert, and I’m confident they’ll become a favorite in your kitchen too. The combination of textures, the beautiful presentation, and the irresistible flavor make them perfect for any occasion. Take your time with each step, and don’t be afraid to make the recipe your own with creative variations.