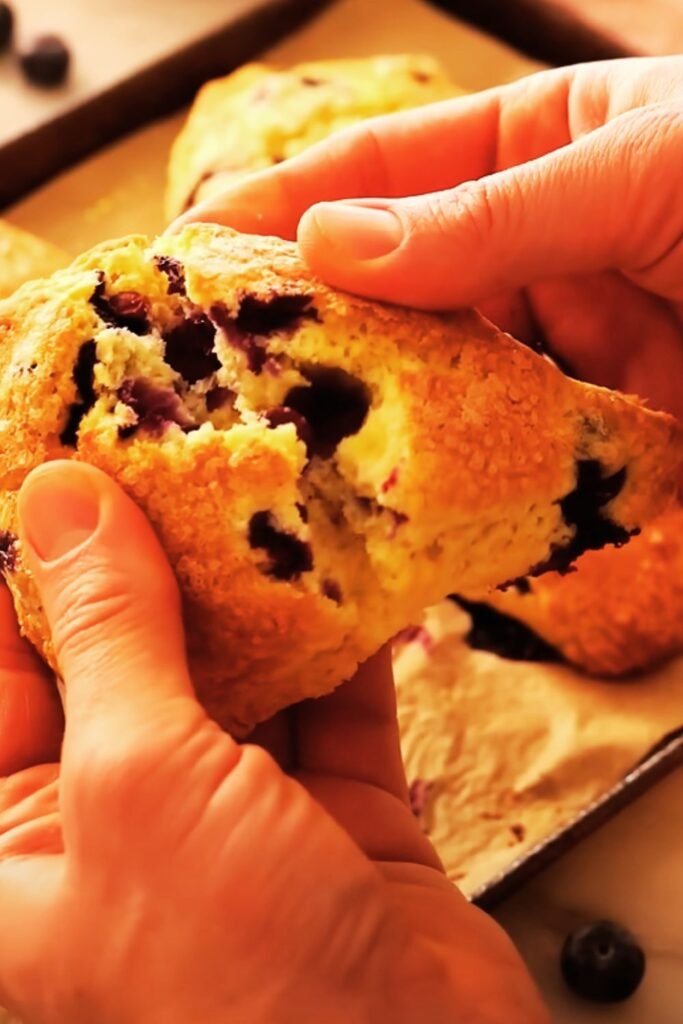
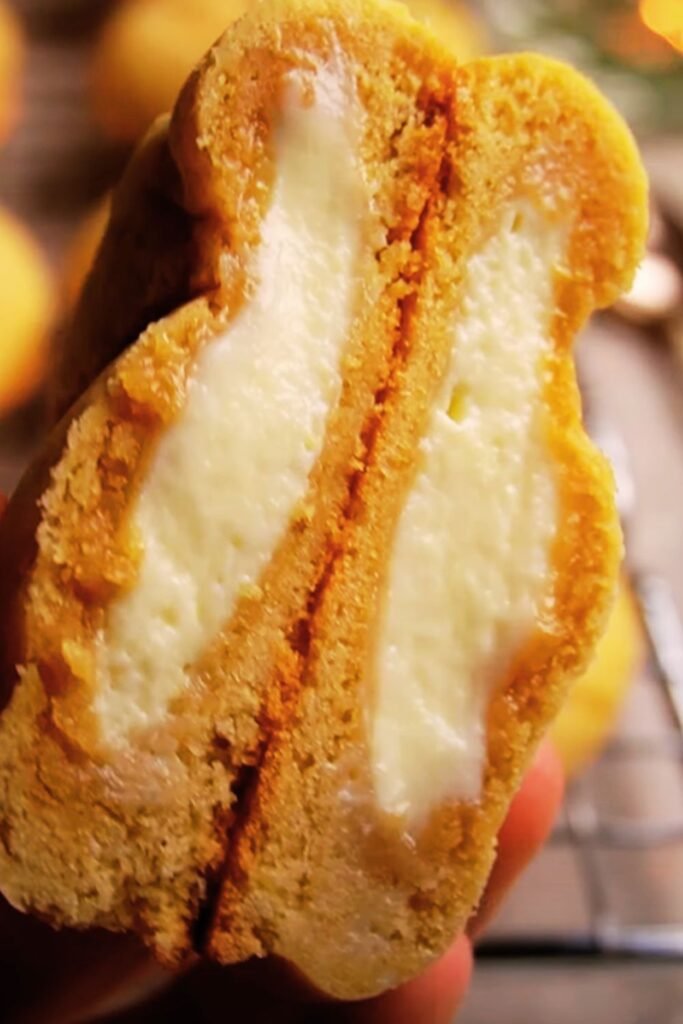
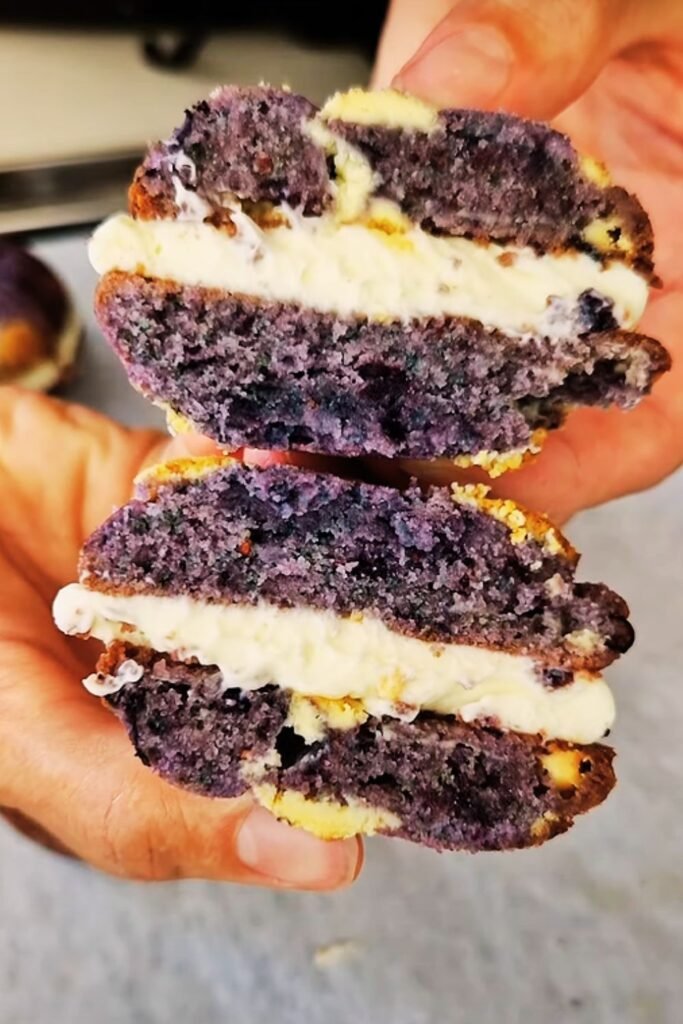
When I first discovered the magic of combining two beloved desserts – cheesecake and cookies – into one irresistible treat, my baking world completely transformed. These blueberry cheesecake cookies have become my go-to recipe for impressing guests, satisfying sweet cravings, and bringing smiles to faces around my kitchen table. The creamy richness of cheesecake perfectly complements the tender, buttery cookie base, while fresh blueberries add bursts of tartness that balance the sweetness beautifully.
I’ve spent countless hours perfecting this recipe, testing different ratios of cream cheese to butter, experimenting with various flour types, and discovering the secret to achieving that perfect chewy-yet-tender texture that makes these cookies absolutely addictive. What started as a simple desire to recreate my favorite cheesecake flavors in cookie form has evolved into a foolproof recipe that consistently delivers bakery-quality results from my home kitchen.
Understanding the Magic Behind Blueberry Cheesecake Cookies
Before diving into the recipe, I want to share what makes these cookies so special. The foundation lies in understanding how traditional cheesecake components translate into cookie form. The cream cheese provides richness and tang, similar to how it functions in cheesecake filling, while the cookie dough base replaces the traditional graham cracker crust. The blueberries serve as nature’s perfect flavor enhancer, providing acidity that cuts through the richness and adds beautiful color contrast.
Key Components Defined
Cream Cheese Base: The heart of these cookies, providing the signature tangy flavor and contributing to the soft, tender texture that distinguishes them from regular sugar cookies.
Cookie Dough Foundation: A carefully balanced mixture of butter, sugars, and flour that creates structure while maintaining the soft, chewy consistency we desire.
Fresh Blueberries: These little flavor bombs provide natural sweetness, tartness, and moisture that keeps the cookies from becoming too dense or heavy.
Vanilla Extract: Enhances the overall flavor profile and bridges the gap between the tangy cream cheese and sweet cookie base.
Lemon Zest: My secret ingredient that brightens the entire flavor profile and complements both the blueberries and cream cheese beautifully.
Essential Ingredients and Their Roles
The success of these blueberry cheesecake cookies depends heavily on using quality ingredients and understanding how each component contributes to the final result. I’ve learned through trial and error that substitutions can dramatically affect the outcome, so I always recommend sticking closely to the specified ingredients for best results.
Primary Ingredients Breakdown
| Ingredient | Amount | Purpose | Substitution Notes |
|---|---|---|---|
| Cream Cheese | 8 oz (room temperature) | Provides tangy flavor and tender texture | Must be full-fat; low-fat versions affect texture |
| Unsalted Butter | 1/2 cup (softened) | Creates richness and helps bind ingredients | Salted butter can be used but reduce added salt |
| Granulated Sugar | 3/4 cup | Sweetens and helps create tender texture | Can substitute up to 1/4 cup with brown sugar |
| Brown Sugar | 1/4 cup | Adds moisture and subtle molasses flavor | Light or dark brown sugar both work well |
| Large Egg | 1 whole | Binds ingredients and adds structure | Room temperature egg mixes more easily |
| Vanilla Extract | 2 teaspoons | Enhances overall flavor profile | Pure vanilla extract preferred over imitation |
| All-Purpose Flour | 2 1/4 cups | Provides structure and texture | Measure by weight (281g) for best results |
| Baking Powder | 1 teaspoon | Creates slight lift and tender crumb | Fresh baking powder ensures proper rising |
| Salt | 1/2 teaspoon | Enhances flavors and balances sweetness | Fine sea salt or table salt both work |
| Fresh Blueberries | 1 1/2 cups | Adds flavor, color, and moisture | Frozen can be used but don’t thaw first |
| Lemon Zest | 1 tablespoon | Brightens flavors and complements berries | Fresh lemon zest only; bottled lacks potency |
Ingredient Quality Matters
I cannot stress enough how much ingredient quality affects the final product. The cream cheese should be full-fat and at room temperature – this ensures smooth mixing and proper texture development. Cold cream cheese creates lumps that are nearly impossible to eliminate, while low-fat versions lack the richness and can make cookies tough.
Fresh blueberries work best, but I’ve successfully used frozen ones during off-season baking. The key with frozen berries is using them straight from the freezer without thawing, which prevents excessive bleeding of color and moisture into the dough.
Step-by-Step Preparation Method
Creating perfect blueberry cheesecake cookies requires attention to detail and proper technique. I’ve refined this method through countless batches, and following these steps precisely will give you consistent, professional-quality results every time.
Preparation Phase
Step 1: Room Temperature Ingredients I always start by ensuring my cream cheese, butter, and egg are at room temperature. This typically takes 1-2 hours if you remember to take them out ahead of time. For quicker results, I cut the cream cheese into smaller cubes and the butter into pieces, which reduces the time to about 30 minutes.
Step 2: Oven and Pan Preparation Preheat your oven to 350°F (175°C). Line baking sheets with parchment paper or silicone baking mats. I prefer parchment paper because it prevents sticking and makes cleanup effortless.
Mixing Process
Step 3: Cream the Base In a large mixing bowl, combine the softened cream cheese and butter. Using an electric mixer on medium speed, cream them together for 2-3 minutes until the mixture is light, fluffy, and completely smooth. This step is crucial – proper creaming incorporates air and creates the foundation for tender cookies.
Step 4: Add Sugars Add both granulated and brown sugars to the cream cheese mixture. Beat on medium speed for another 2 minutes until well combined and slightly increased in volume. The mixture should be noticeably lighter in color.
Step 5: Incorporate Wet Ingredients Beat in the egg and vanilla extract until fully incorporated. Add the lemon zest and mix briefly. The mixture might look slightly curdled at this point, which is normal.
Step 6: Dry Ingredient Integration In a separate bowl, whisk together flour, baking powder, and salt. With the mixer on low speed, gradually add the dry ingredients to the wet mixture. Mix just until the flour is incorporated – overmixing develops gluten and creates tough cookies.
Step 7: Fold in Blueberries Using a wooden spoon or rubber spatula, gently fold the blueberries into the dough. Be gentle to avoid crushing the berries and turning the entire dough purple.
Baking Techniques for Perfect Results
The baking process is where many home bakers encounter challenges. Through my experience, I’ve discovered several key techniques that ensure consistent, professional results every time.
Shaping and Spacing
I use a cookie scoop or spoons to portion the dough into roughly 2-tablespoon portions. The cookies should be spaced about 2 inches apart on the baking sheet, as they spread moderately during baking. I’ve found that slightly flattening each portion with my fingers creates more even baking.
Baking Time and Temperature
| Oven Type | Temperature | Baking Time | Visual Cues |
|---|---|---|---|
| Conventional | 350°F (175°C) | 12-14 minutes | Edges set, centers slightly soft |
| Convection | 325°F (165°C) | 10-12 minutes | Light golden edges, no browning |
| Gas Oven | 350°F (175°C) | 11-13 minutes | Watch carefully for hot spots |
| Electric | 350°F (175°C) | 12-15 minutes | Even browning, set edges |
The cookies are done when the edges are set and the centers still appear slightly underbaked. They’ll continue cooking on the hot pan after removal from the oven. I always err on the side of underbaking rather than overbaking, as these cookies are meant to be soft and chewy.
Troubleshooting Common Issues
Throughout my cookie-baking journey, I’ve encountered and solved numerous issues that can arise with this recipe. Here are the most common problems and my proven solutions:
Texture Problems and Solutions
| Issue | Likely Cause | My Solution |
|---|---|---|
| Cookies too soft/spreading | Butter too warm, insufficient flour | Chill dough 30 minutes before baking |
| Cookies too dense/heavy | Overmixing, old baking powder | Mix minimally, check baking powder freshness |
| Blueberries sinking | Berries too wet, dough too soft | Toss berries in flour before folding in |
| Cookies too sweet | Ingredient ratios off | Increase lemon zest, add pinch of salt |
| Uneven baking | Hot spots, incorrect rack position | Rotate pans halfway through baking |
| Cookies too pale | Oven temperature low, underbaking | Check oven thermometer, increase time slightly |
Preventing Blueberry Bleeding
One challenge I frequently address is preventing blueberries from bleeding their color throughout the dough. My solution involves tossing the blueberries in a tablespoon of flour before folding them into the dough. This coating helps contain the juices and prevents excessive color bleeding while maintaining the berries’ structural integrity during baking.
Variations and Flavor Adaptations
The beauty of this base recipe lies in its adaptability. I’ve created numerous variations over the years, each bringing unique flavors while maintaining the signature cheesecake cookie texture.
Seasonal Variations
Summer Berry Medley: Replace blueberries with a mixture of raspberries, blackberries, and chopped strawberries. The combination creates a more complex berry flavor profile.
Fall Spice Version: Add 1/2 teaspoon cinnamon and 1/4 teaspoon nutmeg to the dry ingredients, and substitute dried cranberries for blueberries.
Winter Citrus: Use orange zest instead of lemon, and fold in dried cranberries and chopped white chocolate chips.
Spring Fresh: Incorporate fresh strawberry pieces and add a tablespoon of fresh mint, finely chopped.
Dietary Modifications
I’ve successfully adapted this recipe for various dietary needs:
Gluten-Free Version: Substitute the all-purpose flour with a 1:1 gluten-free flour blend. The texture remains remarkably similar to the original.
Reduced Sugar: Cut the granulated sugar to 1/2 cup and increase the vanilla extract to 1 tablespoon to enhance sweetness perception.
Dairy-Free Adaptation: Use vegan cream cheese and plant-based butter substitutes. The texture differs slightly but remains delicious.
Storage and Serving Recommendations
Proper storage ensures these cookies maintain their optimal texture and flavor for maximum enjoyment. I’ve tested various storage methods to determine the best approaches for different timeframes.
Short-Term Storage (1-3 Days)
Store cooled cookies in an airtight container at room temperature. Place parchment paper between layers to prevent sticking. They’ll maintain their soft, chewy texture perfectly.
Medium-Term Storage (1 Week)
For longer storage, I refrigerate the cookies in airtight containers. Before serving, I let them come to room temperature for about 15 minutes, which restores their optimal texture.
Long-Term Storage (Up to 3 Months)
These cookies freeze beautifully. I wrap them individually in plastic wrap, then place them in freezer-safe containers. They thaw quickly at room temperature and taste freshly baked.
Serving Suggestions
| Occasion | Serving Style | Accompaniments |
|---|---|---|
| Casual Snacking | Room temperature | Cold glass of milk |
| Afternoon Tea | Slightly warmed | Hot tea or coffee |
| Dessert Course | Room temperature | Fresh berry compote |
| Party Platters | Arrange on tiered stands | Variety of other cookies |
| Gift Giving | In decorative tins | Include recipe card |
Nutritional Considerations
Understanding the nutritional profile helps make informed decisions about portion sizes and frequency of enjoyment. I’ve calculated these values based on the standard recipe yielding 24 cookies.
Nutritional Information Per Cookie
| Nutrient | Amount | % Daily Value |
|---|---|---|
| Calories | 185 | 9% |
| Total Fat | 8g | 12% |
| Saturated Fat | 5g | 25% |
| Cholesterol | 35mg | 12% |
| Sodium | 125mg | 5% |
| Total Carbohydrates | 26g | 9% |
| Dietary Fiber | 1g | 4% |
| Sugars | 18g | – |
| Protein | 3g | 6% |
| Vitamin C | 4mg | 4% |
Healthier Modifications
While these cookies are an indulgent treat, I’ve developed modifications that reduce certain nutritional concerns without significantly impacting taste:
Reduced Fat Version: Substitute half the butter with unsweetened applesauce. This reduces calories and fat while maintaining moisture.
Added Fiber: Replace 1/4 cup all-purpose flour with whole wheat pastry flour for increased fiber content.
Antioxidant Boost: The blueberries already provide excellent antioxidants, but adding a tablespoon of ground flaxseed increases omega-3 fatty acids.
Professional Tips from My Kitchen
After years of perfecting this recipe, I’ve accumulated professional-level tips that elevate these cookies from good to extraordinary:
Temperature Control
Ingredient Temperature: I cannot overemphasize the importance of proper ingredient temperatures. Room temperature ingredients combine more easily, creating smoother batters and more consistent textures.
Oven Hot Spots: Every oven has hot spots. I rotate my baking sheets halfway through baking time to ensure even browning and prevent some cookies from overbaking while others remain underdone.
Quality Control Measures
Consistent Sizing: Using a cookie scoop ensures uniform size, which means even baking. I prefer a #40 scoop (about 1.5 tablespoons) for optimal size.
Parchment Paper Quality: Not all parchment papers are created equal. I invest in high-quality, heavy-duty parchment that won’t curl or brown at baking temperatures.
Flour Measurement: I always measure flour by weight when possible (281g for 2 1/4 cups). Volume measurements can vary significantly depending on how flour is scooped and packed.
Timing Strategies
Batch Preparation: I prepare multiple batches of dough when making these cookies for events. The dough can be portioned, frozen on baking sheets, then transferred to freezer bags for baking later.
Fresh Berry Timing: If using fresh blueberries, I add them at the very end of mixing to prevent over-handling and color bleeding.
Questions and Answers
Q: Can I make the cookie dough ahead of time? Absolutely! I frequently make the dough up to 2 days ahead and store it covered in the refrigerator. Let it come to room temperature for about 15 minutes before scooping and baking. You can also freeze portioned dough balls for up to 3 months.
Q: Why do my cookies spread too much during baking? Excessive spreading usually indicates that your butter was too warm when mixing, or your dough needs chilling. I recommend chilling the dough for 30 minutes if it seems too soft, and always ensure ingredients are at proper room temperature, not warm.
Q: Can I use frozen blueberries instead of fresh? Yes, frozen blueberries work well in this recipe. The key is using them straight from the freezer without thawing. Thawed berries release too much moisture and can make the cookies soggy. I also toss frozen berries in a light coating of flour before folding them into the dough.
Q: How do I prevent the blueberries from sinking to the bottom? Tossing the blueberries in a tablespoon of flour before folding them into the dough helps suspend them throughout the cookie. Also, avoid overmixing once the berries are added, as this can break them down and cause sinking.
Q: Can I double this recipe successfully? I’ve doubled this recipe many times with excellent results. Just ensure you have a large enough mixing bowl and that you don’t overmix when combining the larger quantity of ingredients. You might need to mix in batches if your mixer struggles with the larger volume.
Q: What’s the best way to store leftover cookies? For optimal freshness, I store these cookies in an airtight container at room temperature for up to 3 days. For longer storage, refrigerate them for up to a week or freeze individually wrapped cookies for up to 3 months. They taste best at room temperature.
Q: Can I make these cookies without cream cheese? The cream cheese is essential for the characteristic tangy flavor and tender texture that defines these cookies. However, you could substitute with an equal amount of mascarpone cheese for a milder flavor, though the texture will be slightly different.
Q: Why are my cookies too dense? Dense cookies typically result from overmixing the dough after adding flour, using too much flour, or expired baking powder. Mix just until the flour is incorporated, measure flour accurately, and ensure your baking powder is fresh (replace every 12-18 months).
Q: Can I add other mix-ins besides blueberries? Definitely! I’ve successfully used chocolate chips, chopped white chocolate, dried cranberries, chopped pecans, or mini marshmallows. Keep the total add-in amount to about 1 1/2 cups for best results.
Q: How do I know when the cookies are perfectly baked? The cookies are done when the edges are set and lightly golden, but the centers still appear slightly soft and underbaked. They’ll continue cooking on the hot pan after removal from the oven. This typically takes 12-14 minutes in most ovens.
These blueberry cheesecake cookies represent the perfect marriage of two beloved desserts, creating something entirely new and irresistible. The combination of tangy cream cheese, sweet cookie base, and bursts of fresh blueberry flavor creates a treat that satisfies multiple cravings simultaneously. Through careful attention to ingredient quality, proper technique, and understanding the science behind the baking process, you can consistently create bakery-quality cookies in your own kitchen.
I hope this comprehensive guide provides you with all the knowledge and confidence needed to master these delightful cookies. Remember that baking is both an art and a science – while following the recipe precisely is important, don’t be afraid to make small adjustments based on your preferences and kitchen conditions. Each batch you make will teach you something new about the process, and soon you’ll be creating these cookies with the same confidence and success that I’ve developed over years of practice.
The joy of sharing these cookies with family and friends, seeing their faces light up with that first bite, makes every moment spent perfecting this recipe worthwhile. Happy baking!