There’s something truly magical about the combination of chocolate and cheesecake. When these two delightful treats come together in perfect harmony, the result is nothing short of extraordinary. Today, I’m excited to share my recipe for a Layered Chocolate Cheesecake that has consistently wowed family gatherings and dinner parties alike. This showstopper dessert features three distinct chocolate layers—a chocolate cookie crust, a creamy chocolate cheesecake filling, and a glossy chocolate ganache topping. It’s the ultimate indulgence for chocolate lovers and cheesecake enthusiasts.
Why This Recipe Works
I’ve spent years perfecting this cheesecake recipe, experimenting with different chocolate varieties, ratios, and techniques. What makes this particular version special is the careful balance of textures and flavors. The crunchy chocolate cookie base provides the perfect foundation for the silky-smooth cheesecake layer, while the rich ganache topping adds that final luxurious touch.
Unlike many cheesecake recipes that can end up dense or crack during baking, I’ll share my foolproof techniques to ensure your cheesecake turns out perfectly creamy with a beautiful smooth top every time. The secret lies in temperature control, proper mixing methods, and the gentle steam bath during baking.
Ingredients
For the Chocolate Cookie Crust:
- 2 cups chocolate cookie crumbs (about 24 chocolate sandwich cookies with filling removed)
- 6 tablespoons unsalted butter, melted
- 3 tablespoons granulated sugar
- ¼ teaspoon salt
For the Chocolate Cheesecake Filling:
- 24 ounces (3 blocks) cream cheese, softened to room temperature
- 1 cup granulated sugar
- ¼ cup unsweetened cocoa powder, sifted
- 8 ounces semi-sweet chocolate, melted and slightly cooled
- 1 tablespoon vanilla extract
- ¼ teaspoon salt
- 4 large eggs, room temperature
- ⅔ cup sour cream, room temperature
- ⅓ cup heavy cream, room temperature
For the Chocolate Ganache Topping:
- 8 ounces bittersweet chocolate (60-70% cocoa), finely chopped
- 1 cup heavy cream
- 2 tablespoons unsalted butter, room temperature
- 1 teaspoon vanilla extract
Special Equipment
- 9-inch springform pan
- Large roasting pan (for water bath)
- Heavy-duty aluminum foil
- Electric mixer (stand or handheld)
- Food processor (optional, for making cookie crumbs)
- Instant-read thermometer (optional)
Step-by-Step Instructions
Preparing the Chocolate Crust
- Preheat your oven to 350°F (175°C).
- Wrap the outside of a 9-inch springform pan with a double layer of heavy-duty aluminum foil, ensuring it comes at least 2 inches up the sides. This prevents water from seeping in during the water bath baking.
- In a medium bowl, combine the chocolate cookie crumbs, melted butter, sugar, and salt until the mixture resembles wet sand.
- Press the mixture firmly and evenly into the bottom and about 1 inch up the sides of the prepared springform pan. I like to use the bottom of a measuring cup to help compact the crust evenly.
- Bake the crust for 10 minutes, then remove from the oven and allow to cool completely while preparing the filling.
- Reduce the oven temperature to 325°F (165°C).
Making the Chocolate Cheesecake Filling
- In a microwave-safe bowl, melt the semi-sweet chocolate in 30-second intervals, stirring between each interval until smooth and completely melted. Set aside to cool slightly.
- In the bowl of a stand mixer fitted with the paddle attachment (or using a hand mixer), beat the softened cream cheese on medium-low speed until completely smooth and lump-free, about 2 minutes.
- Add the sugar and beat until incorporated, about 1 minute.
- Add the sifted cocoa powder and salt, mixing until well combined.
- With the mixer running on low speed, slowly pour in the melted chocolate and vanilla extract, mixing until incorporated.
- Add the eggs one at a time, beating just until each is incorporated before adding the next. Be careful not to overmix once the eggs are added, as this can incorporate too much air and cause the cheesecake to crack.
- Add the sour cream and heavy cream, mixing on low speed just until combined.
- Use a rubber spatula to scrape down the sides and bottom of the bowl, ensuring the mixture is homogeneous with no streaks.
Baking the Cheesecake
- Pour the filling into the cooled crust, smoothing the top with a spatula.
- Place the foil-wrapped springform pan in a larger roasting pan.
- Place the roasting pan in the oven and carefully pour hot water into the roasting pan until it reaches about halfway up the sides of the springform pan.
- Bake at 325°F for 60-70 minutes, or until the edges are set but the center still has a slight jiggle (it will firm up as it cools). The internal temperature should reach about 150°F (65°C) if using a thermometer.
- Turn off the oven, crack the door open slightly, and let the cheesecake cool in the oven for 1 hour. This gradual cooling helps prevent cracking.
- After an hour, remove the cheesecake from the water bath and place it on a cooling rack to cool completely, about 2 hours.
- Once completely cooled, cover with plastic wrap and refrigerate for at least 6 hours, preferably overnight.
Preparing the Chocolate Ganache Topping
- Place the finely chopped bittersweet chocolate in a heat-proof bowl.
- In a small saucepan, heat the heavy cream over medium heat until it just begins to simmer (small bubbles form around the edges).
- Pour the hot cream over the chocolate and let sit for 2-3 minutes without stirring.
- After a few minutes, gently whisk until the chocolate is completely melted and the mixture is smooth.
- Add the room temperature butter and vanilla extract, whisking until fully incorporated and glossy.
- Allow the ganache to cool for about 5-10 minutes until it reaches a pourable but slightly thickened consistency.
Assembling the Layered Chocolate Cheesecake
- Remove the chilled cheesecake from the refrigerator and carefully run a thin knife around the edges of the pan before removing the springform ring.
- Transfer the cheesecake to a serving plate or cake stand.
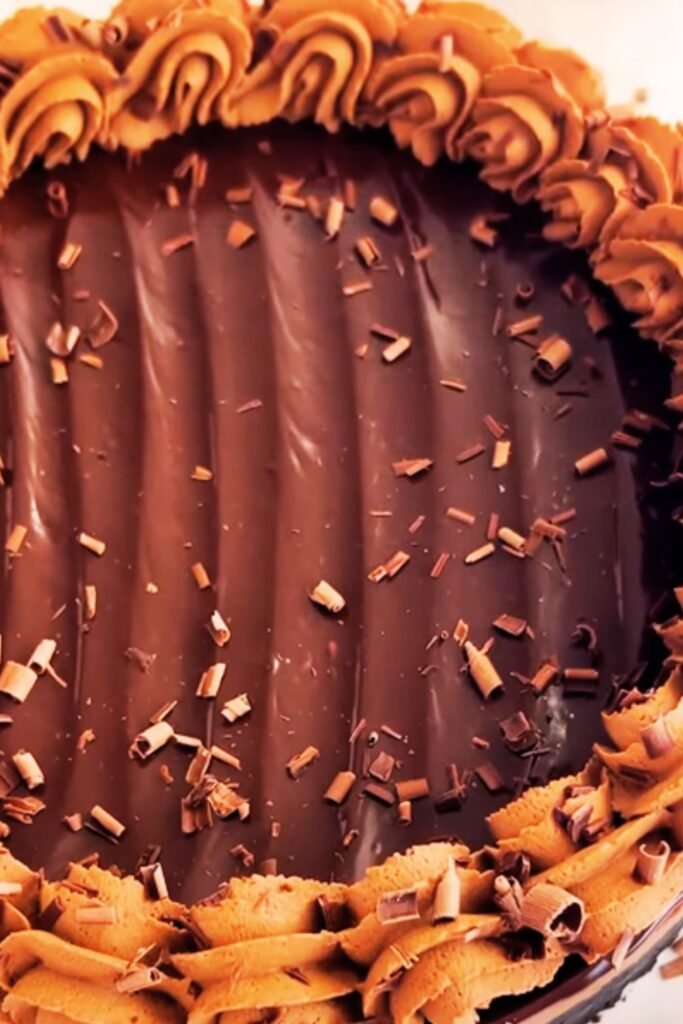
- Pour the slightly cooled ganache over the top of the cheesecake, starting from the center and working outward. Use an offset spatula to guide the ganache to the edges, allowing some to drip down the sides for a dramatic effect.
- Return the cheesecake to the refrigerator for at least 30 minutes to set the ganache.
- For an extra touch, you can garnish with chocolate curls, shavings, or fresh berries just before serving.
Expert Tips for Perfect Results
I’ve made this cheesecake countless times, and these tips have helped me achieve consistently excellent results:
Temperature Matters
- All refrigerated ingredients (cream cheese, eggs, sour cream, heavy cream) should be at room temperature before mixing. This ensures a smooth batter without lumps.
- Cold ingredients don’t blend evenly and can lead to overbeating, which introduces too much air into the batter.
- I like to set my ingredients out at least 2 hours before starting to ensure they’re properly tempered.
Mixing Technique
- Use medium-low speed when beating the cream cheese and sugar to avoid incorporating too much air.
- Once you add the eggs, mix only until just combined. Overbeating at this stage is the number one cause of cracked cheesecakes.
- Always scrape down the sides and bottom of the bowl between additions to ensure everything is evenly incorporated.
Water Bath Benefits
- Don’t skip the water bath! It provides a humid environment and ensures even, gentle heating.
- Make sure your foil wrap is secure and comes up high enough on the sides of the pan. I sometimes use two layers of heavy-duty foil for extra protection.
- The water should be hot but not boiling when added to the roasting pan.
Cooling Process
- The gradual cooling in the turned-off oven is crucial for preventing cracks.
- Never place a hot cheesecake directly in the refrigerator—the sudden temperature change can cause cracking and condensation on the surface.
Perfect Ganache
- For the smoothest ganache, make sure your chocolate is very finely chopped to ensure even melting.
- The cream should be hot but not boiling when poured over the chocolate.
- Let the chocolate and cream sit untouched for a few minutes before stirring—this allows the chocolate to melt evenly without seizing.
Nutritional Information
Here’s a breakdown of the approximate nutritional content per slice (assuming 12 slices per cheesecake):
| Nutrient | Amount per Serving |
|---|---|
| Calories | 650 |
| Total Fat | 48g |
| Saturated Fat | 28g |
| Cholesterol | 175mg |
| Sodium | 320mg |
| Total Carbohydrates | 45g |
| Dietary Fiber | 3g |
| Sugars | 35g |
| Protein | 9g |
Note: These values are approximations and may vary based on specific brands of ingredients used.
Storage and Make-Ahead Instructions
This cheesecake actually improves with time as the flavors meld, making it an excellent make-ahead dessert.
Refrigerator Storage
- Store the cheesecake in an airtight container in the refrigerator for up to 5 days.
- For best results, wait to add the ganache until 1-2 days before serving.
Freezer Storage
- This cheesecake freezes beautifully! You can freeze it with or without the ganache topping.
- To freeze, place the completely cooled cheesecake (without ganache) on a cardboard round and wrap tightly in plastic wrap, then in aluminum foil.
- Freeze for up to 2 months.
- To thaw, transfer to the refrigerator 24 hours before serving, then add the fresh ganache topping if desired.
Variations and Substitutions
I love experimenting with this base recipe to create different flavor profiles. Here are some of my favorite variations:
White Chocolate Version
- Replace the semi-sweet chocolate in the filling with white chocolate and omit the cocoa powder.
- For the ganache, use white chocolate and add a teaspoon of vanilla bean paste for beautiful flecks.
Mocha Twist
- Add 2 tablespoons of espresso powder to the filling for a coffee-chocolate combination.
- For an extra kick, add 1 tablespoon of coffee liqueur to the ganache.
Triple Chocolate Layer
- Add a layer of chocolate mousse between the cheesecake and ganache layers.
- Combine 1 cup of heavy cream (whipped to stiff peaks) with 4 ounces of melted chocolate and spread over the chilled cheesecake before adding the ganache.
Gluten-Free Option
- Use gluten-free chocolate cookies for the crust.
- Ensure all other ingredients are certified gluten-free (particularly the vanilla extract and cocoa powder).
Reduced Sugar Alternative
- Reduce the sugar in the filling to ¾ cup.
- Use bittersweet chocolate (70-85% cocoa) in the filling instead of semi-sweet.
- For the crust, use reduced-sugar cookies or nut flour with cocoa powder.
Perfect Pairings
A dessert this rich deserves thoughtful accompaniments. Here are my favorite serving suggestions:
Beverages
- Fresh-brewed coffee, especially a medium roast that won’t overpower the chocolate
- Hot chocolate with a cinnamon stick
- Milk (regular or plant-based)
- Hot tea, particularly chai or Earl Grey
Accompaniments
- Fresh raspberries or strawberries to cut through the richness
- A small dollop of lightly sweetened whipped cream
- A sprinkle of flaky sea salt to enhance the chocolate flavor
- A light dusting of cocoa powder for visual appeal
Troubleshooting Common Issues
Even experienced bakers occasionally run into problems. Here’s how to handle some common cheesecake challenges:
Cracked Top
- If your cheesecake cracks despite following all precautions, don’t worry! The ganache topping will cover any imperfections.
- For future cheesecakes, ensure you’re not overbeating the batter after adding eggs and that your oven temperature isn’t too high.
Soggy Crust
- If water leaks into your crust, improve your wrapping technique next time with multiple layers of heavy-duty foil.
- You can also place the springform pan in a slightly larger cake pan before placing in the water bath for extra protection.
Grainy Texture
- This usually indicates that the cream cheese wasn’t softened enough or wasn’t beaten until completely smooth before adding other ingredients.
- Room temperature ingredients are crucial for a silky-smooth filling.
Ganache Too Thick or Thin
- If your ganache is too thick to pour, warm it slightly by placing the bowl over a pot of warm water and stirring.
- If it’s too thin, refrigerate for 5-10 minutes, stirring occasionally until it reaches the desired consistency.
Q&A Section
How can I tell when my cheesecake is done baking? The cheesecake is done when the edges are set but the center still has a slight wobble (about 2-3 inches in diameter). If you have an instant-read thermometer, the internal temperature should reach about 150°F (65°C). Remember that the cheesecake will continue to set as it cools.
Can I make this recipe without a springform pan? While a springform pan is ideal for easy removal, you can use a deep 9-inch cake pan lined with parchment paper. After chilling, carefully warm the sides of the pan with a hot towel to help release the cheesecake, then invert onto a plate and flip back onto your serving dish.
Why did my ganache seize or become grainy? Ganache typically seizes when liquid is introduced to already cooled chocolate or when it’s overheated. Make sure your chocolate is finely chopped and that you allow it to sit with the hot cream for a few minutes before stirring. Also, ensure no water droplets get into the mixture.
How far in advance can I make this cheesecake? The cheesecake (without ganache) can be made up to 3 days in advance and stored in the refrigerator. I recommend adding the ganache no more than 24 hours before serving for the best shine and texture.
What’s the best way to slice this cheesecake neatly? For perfectly clean slices, dip a sharp knife in hot water, wipe it dry, then make your cut. Clean and reheat the knife between each slice. This prevents the filling and ganache from sticking to the knife.
Can I use Dutch-processed cocoa powder instead of natural? Yes! Dutch-processed cocoa will give your cheesecake a darker color and slightly milder flavor. Either type works well in this recipe.
My cheesecake cracked even with the water bath. What went wrong? Cracking can occur from overbeating (especially after adding eggs), baking at too high a temperature, or cooling too quickly. Next time, beat minimally after adding eggs, check your oven temperature with an oven thermometer, and allow for the full slow cooling process.
Is there a non-dairy version of this recipe? Yes, you can substitute dairy-free cream cheese, coconut cream instead of sour cream, and plant-based butter. For the ganache, use coconut cream and dairy-free chocolate. The texture will be slightly different but still delicious.
Final Thoughts
Creating this Layered Chocolate Cheesecake is truly a labor of love, but the results are absolutely worth the effort. There’s something deeply satisfying about seeing the expressions of pure delight when people take their first bite of this decadent dessert. The combination of the crisp chocolate crust, velvety chocolate cheesecake, and glossy ganache creates a symphony of textures and rich chocolate flavor that’s simply irresistible.
Don’t be intimidated by the multiple steps or techniques involved. Take your time, follow the instructions carefully, and remember that even if it doesn’t look perfect, it will taste amazing. The beauty of this dessert is in its depth of flavor and the care taken in its preparation.
Whether you’re making this for a special celebration or simply treating yourself and loved ones to something extraordinary, this Layered Chocolate Cheesecake is guaranteed to impress. So gather your ingredients, preheat your oven, and prepare to create a chocolate masterpiece that will have everyone asking for seconds—and your recipe!