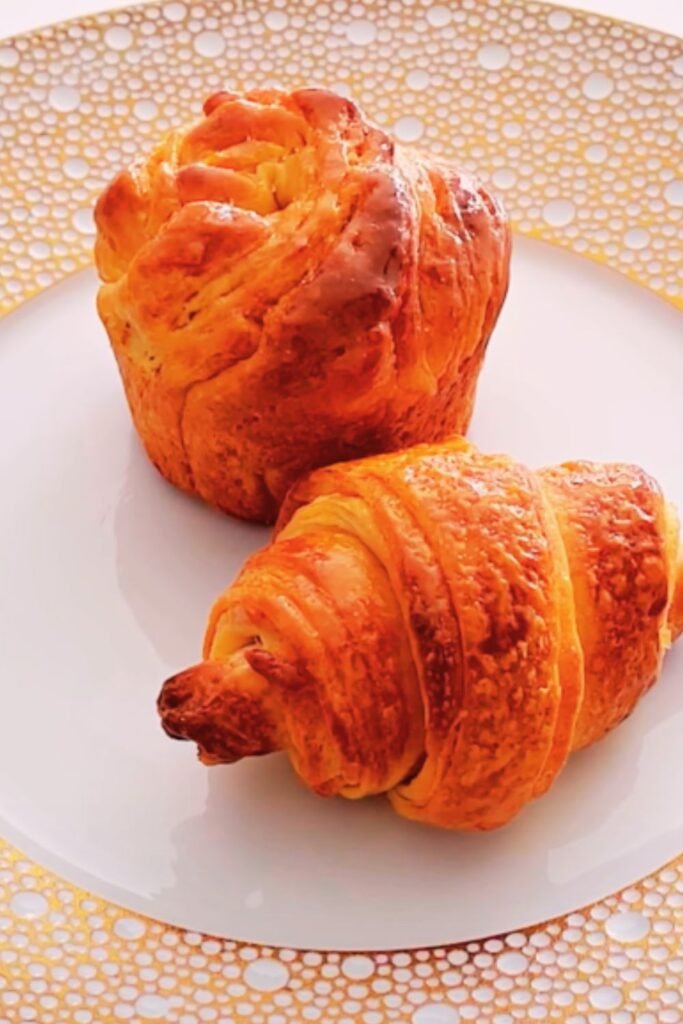
Have you ever found yourself torn between ordering a croissant or a muffin at your local bakery? Well, I’m thrilled to tell you that you no longer need to choose! The magnificent cruffin—a delightful hybrid of a croissant and a muffin—has been winning hearts in bakeries worldwide, and I’m absolutely obsessed with them.
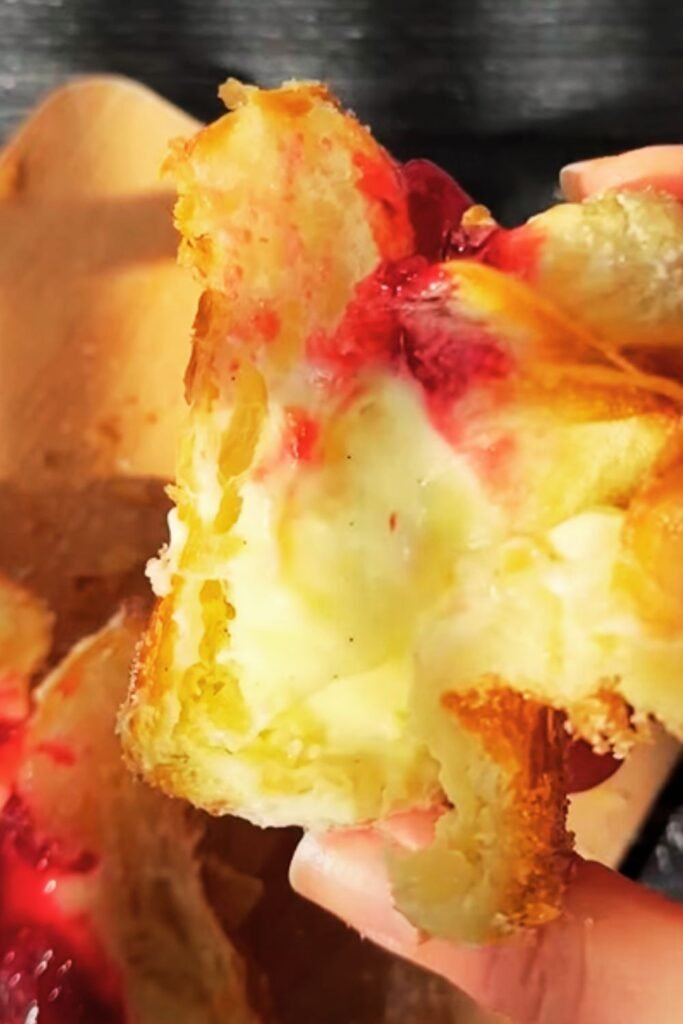
When I first discovered cruffins, I couldn’t believe I’d been missing out on these flaky, buttery delights for so long. The first bite into a cruffin’s crisp exterior giving way to those tender, airy layers inside is nothing short of magical. Today, I’m going to share everything I know about these incredible pastries, from their fascinating origin story to the step-by-step process of creating them in your own kitchen.
What Exactly Is a Cruffin?
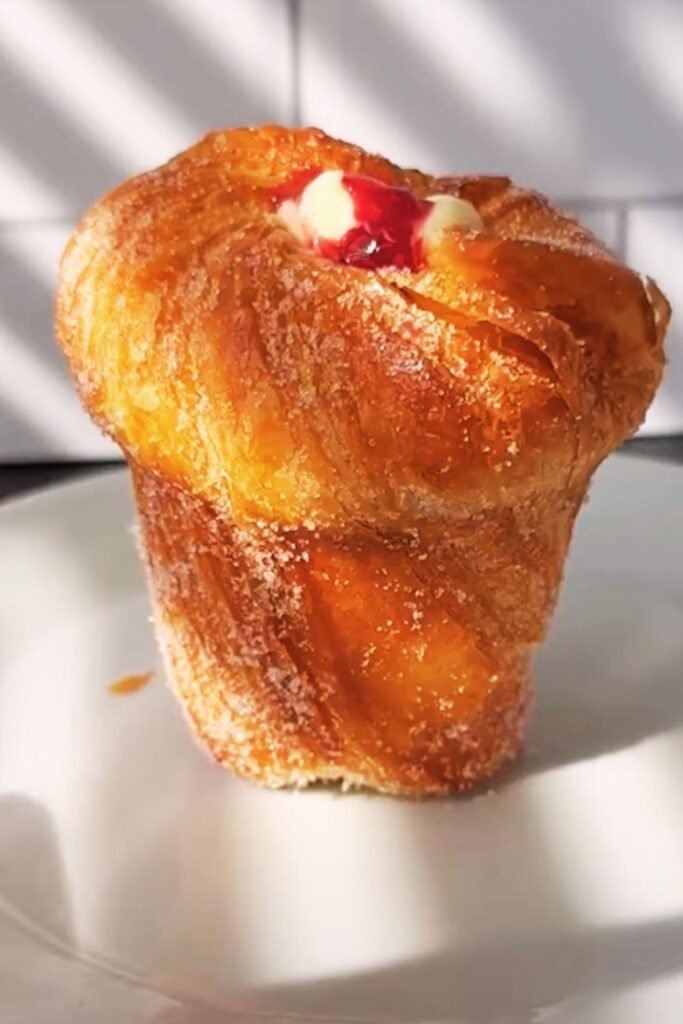
A cruffin is the beautiful marriage of two beloved pastries: the French croissant and the American muffin. It combines the flaky, buttery layers of a croissant with the shape and portability of a muffin. These pastries are typically baked in muffin tins, which gives them their distinctive shape, but the dough is prepared using the lamination technique used for croissants.
The result? A crispy exterior with a spiral of buttery layers inside that can be filled with anything from chocolate ganache to lemon curd or pastry cream. The top is often dusted with sugar, giving it that irresistible bakery-style finish.
The Origin Story of the Cruffin
The cruffin’s history isn’t as long as many other pastries, but it’s certainly an interesting one. While it’s difficult to pinpoint exactly who created the very first cruffin, many credit Mr. Holmes Bakehouse in San Francisco for popularizing this hybrid treat around 2014. Their signature cruffins would sell out within minutes of opening each day, with lines forming around the block.
I remember the first time I heard about people waiting in line for hours just to taste these mysterious pastries. At the time, I thought it was just another food fad that would quickly fade. How wrong I was! Years later, cruffins have cemented their place in the pastry world, with bakeries across the globe offering their own unique versions.
The popularity of the cruffin also coincided with the rise of social media, particularly Instagram. The photogenic nature of these spiral-shaped treats—often oozing with colorful fillings—made them perfect for sharing online, further fueling their rise to fame.
Why Cruffins Have Captured Hearts (and Taste Buds)
What makes the cruffin so special? I believe it’s a combination of factors:
- Texture Contrast: The exterior has a satisfying crunch while the interior remains soft and tender.
- Versatility: They can be filled with virtually anything, from sweet to savory options.
- Visual Appeal: The spiral design and various fillings make them incredibly photogenic.
- Novelty Factor: They offer something different from traditional pastries.
- Best of Both Worlds: They combine the buttery richness of croissants with the convenient shape of muffins.
Essential Ingredients for Perfect Cruffins
Before diving into the baking process, let’s talk about the ingredients that make cruffins so delectable. Quality matters tremendously when working with such a butter-forward pastry!
| Ingredient | Quantity | Notes |
|---|---|---|
| All-purpose flour | 500g | High protein content (11-13%) works best |
| Active dry yeast | 7g (1 packet) | Can substitute with instant yeast (5g) |
| Granulated sugar | 50g | Adds flavor and feeds the yeast |
| Salt | 10g | Enhances flavor and controls yeast activity |
| Cold water | 270ml | Temperature between 4-10°C (39-50°F) is ideal |
| Unsalted butter (for dough) | 40g | Room temperature for easier incorporation |
| European-style butter (for lamination) | 250g | High fat content (82%+) for better layers |
| Egg | 1 large | For egg wash before baking |
| Sugar (for coating) | As needed | For dusting finished cruffins |
A Note on Butter
The single most important ingredient in your cruffins is butter—specifically, the butter used for lamination. I strongly recommend using a European-style butter with at least 82% fat content. American butter typically contains around 80% fat and has a higher water content, which can create steam during baking and disrupt your delicate layers.
I once tried making cruffins with regular supermarket butter and while they were still tasty, they didn’t have the same defined layers or rich flavor as when I used high-quality European butter. Trust me, the extra few dollars for good butter make all the difference!
Equipment You’ll Need
Making cruffins at home requires some specific equipment. Here’s what you’ll need:
- Stand Mixer with Dough Hook: While you can knead by hand, a stand mixer makes the process much easier.
- Rolling Pin: Preferably a heavy, straight rolling pin for even pressure.
- Ruler: For measuring your dough as you roll and fold.
- Pastry Brush: For applying egg wash.
- Muffin Tin: Standard 12-cup muffin tin.
- Sharp Knife or Pastry Wheel: For cutting dough cleanly.
- Pastry Bag with Piping Tips: For filling your cruffins after baking.
- Refrigerator Space: You’ll need room to chill your dough between folds.
Step-by-Step Cruffin Making Process
Day 1: Prepare the Dough
- Make the Détrempe (Dough Base):
- In the bowl of your stand mixer, combine flour, sugar, salt, and yeast.
- Add cold water and the 40g of room temperature butter.
- Mix on low speed until incorporated, then increase to medium speed.
- Knead for about 5-7 minutes until the dough is smooth and elastic.
- Shape into a rectangle, wrap in plastic, and refrigerate for at least 2 hours.
- Prepare the Butter Block:
- Place the 250g of cold butter between two sheets of parchment paper.
- Pound with a rolling pin to soften slightly, then roll into an 8×8 inch (20×20 cm) square.
- Refrigerate until ready to use.
- First Lamination:
- Roll the chilled dough into a square about 12×12 inches (30×30 cm).
- Place the butter block in the center at a 45-degree angle (like a diamond).
- Fold the corners of the dough over the butter, ensuring they overlap.
- Seal the edges well by pinching them together.
- First Fold:
- Roll the dough into a rectangle approximately 10×20 inches (25×50 cm).
- Fold in thirds like a letter (this is called a “letter fold” or “business letter fold”).
- Wrap and refrigerate for at least 1 hour.
- Second and Third Folds:
- Remove from refrigerator and place on a lightly floured surface.
- Roll into a rectangle again and perform another letter fold.
- Refrigerate for 1 hour.
- Repeat this process one more time for a total of 3 letter folds.
- After the final fold, wrap the dough well and refrigerate overnight.
Day 2: Shape and Bake
- Roll and Cut:
- Roll the chilled dough into a rectangle about 12×20 inches (30×50 cm) and about 1/8 inch thick.
- Trim the edges to create straight sides.
- Brush the surface lightly with water.
- Sprinkle with cinnamon sugar if desired (optional but delicious).
- Shape the Cruffins:
- Starting from the long edge, roll the dough tightly into a log.
- Cut the log into 12 equal pieces.
- Place each piece, cut side up, in a greased muffin tin.
- Final Proof:
- Cover the muffin tin loosely with plastic wrap.
- Let rise at room temperature for about 1-2 hours, until noticeably puffy.
- Bake:
- Preheat your oven to 375°F (190°C).
- Brush the tops with egg wash.
- Bake for 20-25 minutes until deeply golden brown.
- Remove from the oven and let cool in the tin for 5 minutes.
- While still warm, roll in granulated sugar or dust with powdered sugar.
Common Cruffin Fillings
Once your cruffins have cooled slightly, you can fill them with various delicious fillings. Using a small knife, create a hole in the center of each cruffin, then use a pastry bag fitted with a long tip to pipe in your filling.
Here are some of my favorite fillings:
| Filling Type | Base Ingredients | Flavor Variations | Difficulty Level |
|---|---|---|---|
| Pastry Cream | Milk, eggs, sugar, cornstarch | Vanilla, chocolate, coffee, pistachio | Medium |
| Fruit Curd | Fruit juice, eggs, sugar, butter | Lemon, lime, passionfruit, raspberry | Medium |
| Chocolate Ganache | Chocolate, heavy cream | Dark, milk, white, hazelnut, orange | Easy |
| Cream Cheese | Cream cheese, powdered sugar, vanilla | Plain, berry, cinnamon, maple | Easy |
| Jam or Preserves | Store-bought or homemade preserves | Any fruit variety | Very Easy |
| Nut Butter | Almond, peanut, or other nut butter | Plain or with honey/maple | Very Easy |
Troubleshooting Common Cruffin Problems
Even experienced bakers can encounter issues when making laminated pastries like cruffins. Here are some common problems and how to fix them:
Butter Leaking Out During Baking
Problem: You notice puddles of butter in your muffin tin or on your baking sheet.
Solutions:
- Your dough or butter was too warm. Keep everything cold throughout the process.
- Make sure your butter block is properly sealed within the dough.
- Roll with lighter pressure to avoid squeezing out the butter.
Dough Shrinking When Rolled
Problem: The dough keeps springing back and won’t hold its shape when rolled out.
Solutions:
- The gluten needs to relax. Cover the dough and let it rest for 15-20 minutes before trying again.
- Make sure you’re not overworking the dough during the initial mixing.
Poorly Defined Layers
Problem: After baking, your cruffins don’t have distinct, visible layers.
Solutions:
- You may not have rolled the dough thin enough between folds.
- The butter might have been too warm and absorbed into the dough instead of creating separate layers.
- Make sure you’re doing enough folds to create multiple layers.
Dense or Heavy Texture
Problem: Your cruffins are heavy and doughy rather than light and airy.
Solutions:
- Your final proof might have been too short. Give them more time to rise before baking.
- Your oven temperature might be too low. Use an oven thermometer to verify.
- You might have overworked the dough, developing too much gluten.
Serving Suggestions
Once you’ve mastered the perfect cruffin, how should you serve it? Here are some of my favorite accompaniments:
- Fresh berries or sliced fruit
- A dusting of powdered sugar or cinnamon sugar
- Drizzle of honey or maple syrup
- Whipped cream on the side
- High-quality jam or preserves
- Rich hot chocolate or coffee
- Freshly brewed tea
For special occasions, I like to create a cruffin board with various fillings and toppings so guests can customize their own experience. It’s always a hit at brunches!
Make-Ahead and Storage Tips
Cruffins are best enjoyed fresh from the oven, but there are ways to work ahead and preserve their deliciousness:
Make-Ahead Options:
- The laminated dough can be frozen after the final fold for up to 1 month. Thaw overnight in the refrigerator before rolling and shaping.
- Shaped, unbaked cruffins can be refrigerated overnight for a slow rise. Bring to room temperature for 30 minutes before baking.
Storage Tips:
- Store baked, unfilled cruffins at room temperature in an airtight container for up to 2 days.
- Filled cruffins should be refrigerated and consumed within 24 hours.
- To refresh day-old cruffins, warm them in a 300°F (150°C) oven for 5-7 minutes.
Freezing:
- Baked cruffins can be frozen for up to 3 months. Thaw at room temperature and reheat in a 300°F oven for 5-10 minutes to restore some crispness.
Variations on the Classic Cruffin
While traditional cruffins are delightful, there are many creative variations to try:
Savory Cruffins
Yes, cruffins can be savory too! Simply omit the sugar from the dough and fill with options like:
- Herb-infused cream cheese
- Pesto and ricotta
- Caramelized onion and gruyère
- Sundried tomato and feta
Mini Cruffins
Use a mini muffin tin to create bite-sized cruffins—perfect for parties or when you want just a little sweet treat.
Whole Grain Cruffins
Substitute up to 25% of the all-purpose flour with whole wheat flour for a nuttier flavor and added nutrition.
Vegan Cruffins
Replace the butter with a high-quality vegan butter (one with at least 80% fat content) and use plant milk for the egg wash. The technique remains the same, though you might need to adjust the hydration slightly.
Seasonal Flavors
Adapt your cruffins to celebrate seasonal ingredients:
- Spring: Rhubarb compote or strawberry filling
- Summer: Fresh berry fillings or peach preserves
- Fall: Apple butter or pumpkin spice pastry cream
- Winter: Gingerbread-spiced dough or peppermint chocolate filling
Expert Tips for Cruffin Success
After making countless batches of cruffins (and having my fair share of failures!), I’ve gathered some professional tips that make a huge difference:
- Temperature Control: This is the most critical factor. Your butter should be pliable but cold (around 60°F/15°C). Your dough should always feel cool to the touch.
- Rest Periods: Never rush the resting periods between folds or before baking. These rests allow the gluten to relax and the butter to chill properly.
- Even Pressure: When rolling, apply even pressure with your rolling pin to ensure uniform thickness across the dough.
- Clean Cuts: Use a sharp knife or pastry wheel to make clean cuts when trimming dough. Dull tools can seal the edges of your layers together.
- High Initial Heat: Start baking at a slightly higher temperature (400°F/200°C) for the first 5 minutes, then reduce to 375°F/190°C. This helps create an initial burst of steam that lifts the layers.
- Patience with Filling: Wait until your cruffins are completely cool before filling them to prevent the filling from melting or being absorbed.
- Quality Ingredients: I can’t stress this enough—use the best quality ingredients you can afford, especially butter.
Frequently Asked Questions
Q: Can I make cruffins without a stand mixer?
Yes, you can make the dough by hand, but be prepared for a workout! Mix the ingredients in a large bowl with a wooden spoon until combined, then turn out onto a lightly floured surface and knead for approximately 10-12 minutes until smooth and elastic. The key is to avoid overworking the dough, which can develop too much gluten and make your cruffins tough.
Q: Why did my butter break through the dough during rolling?
This typically happens when either your butter is too cold and hard (causing it to crack) or too warm (causing it to ooze). The ideal butter for lamination should be cool but pliable – similar to the consistency of the dough itself. If you notice butter breaking through, immediately stop rolling, patch any holes with a small piece of dough, and refrigerate for 15-20 minutes before continuing.
Q: How do I know when my cruffins are properly proofed before baking?
Properly proofed cruffins will look puffy and increased in size by about 50%. When you gently press a finger into the dough, it should slowly spring back but leave a slight indentation. If it springs back completely, they need more time. If the indentation remains without springing back at all, they may be overproofed.
Q: Can I make the dough and then finish the cruffins the next day?
Absolutely! In fact, an overnight rest in the refrigerator after the final fold can improve the flavor and texture of your cruffins. Simply pick up where you left off the next day, allowing the dough to sit at room temperature for about 10 minutes before rolling it out.
Q: Why aren’t my cruffins as flaky as bakery versions?
Creating very distinct layers requires practice and attention to temperature. Make sure you’re creating enough layers through multiple folds, keeping everything cold, and not pressing too hard when rolling (which can meld layers together). Also, be sure you’re baking at a high enough temperature to create the steam that separates the layers.
Q: How can I prevent my cruffins from becoming soggy after filling?
Fill cruffins as close to serving time as possible. If you must fill them in advance, choose thicker fillings that won’t easily soak into the pastry, like pastry cream or ganache. Avoid very liquid fillings for make-ahead cruffins.
Q: Can I use cold butter straight from the refrigerator for lamination?
Cold butter straight from the refrigerator will likely be too hard and brittle for proper lamination. Instead, take your butter out about 15-20 minutes before you plan to use it, or pound it between parchment paper to make it pliable while still keeping it cool.
Q: My kitchen is very warm. How can I keep everything cold enough?
Working in a warm kitchen can be challenging for laminated pastries. Some tips include: working on a marble surface if possible (it stays cooler), chilling your rolling pin before use, working in short bursts with frequent refrigeration breaks, and even chilling your flour and bowl before starting.
Final Thoughts
Creating cruffins at home might seem intimidating at first, but I promise that with practice and patience, you’ll be rewarded with one of the most impressive and delicious pastries you can make in your own kitchen. There’s something incredibly satisfying about breaking into those flaky layers and discovering the delicious filling inside—a true testament to your baking skills!
I still remember the first time I successfully made cruffins at home. After several failed attempts and butter-soaked disasters, seeing those beautiful spiral layers emerge from the oven felt like winning a gold medal in the Baking Olympics. My kitchen smelled like a Parisian bakery, and for a moment, I felt like a professional pastry chef.
Whether you’re making them to impress guests at brunch or simply treating yourself to something special on a weekend morning, cruffins are well worth the effort. So put on your favorite music, clear your kitchen counters, and prepare for a rewarding baking adventure!
If you do try making cruffins at home, I’d love to hear about your experience. Did you stick with a classic vanilla filling, or did you experiment with something more adventurous? What challenges did you face, and how did you overcome them? The beauty of baking is that each batch teaches us something new—each failure brings us closer to perfection.
Now, go forth and create some cruffin magic in your kitchen!