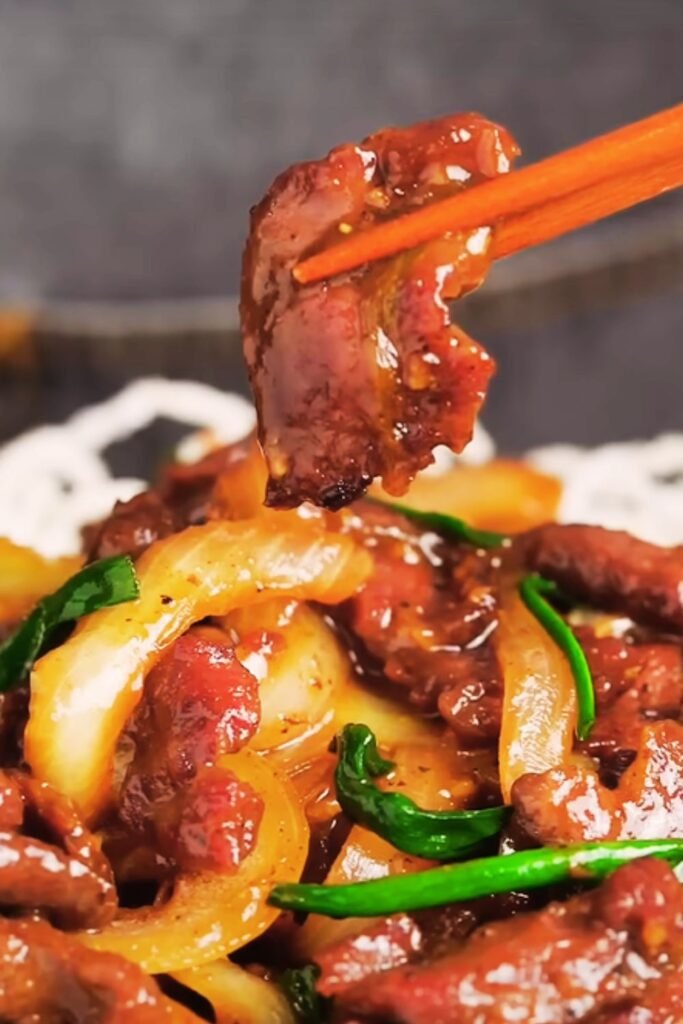
I’ve been perfecting this Mongolian beef recipe for years, and I can confidently say it rivals the famous P.F. Chang’s version that so many of us crave. The beauty of this dish lies in its simplicity – tender strips of beef coated in a glossy, savory-sweet sauce that clings perfectly to every piece. What makes this recipe special is how it transforms ordinary ingredients into something extraordinary, creating that restaurant-quality experience right in your own kitchen.
Mongolian beef isn’t actually from Mongolia, despite its name. This beloved dish originated in Chinese-American restaurants and has become a staple of American Chinese cuisine. The key to achieving that authentic P.F. Chang’s taste is understanding the balance of flavors and the proper technique for achieving that signature tender texture that makes each bite melt in your mouth.
Understanding Mongolian Beef
Mongolian Beef: A Chinese-American dish featuring tender beef strips stir-fried with scallions and onions in a savory-sweet sauce made primarily from soy sauce, brown sugar, and garlic.
Velvet Coating: A Chinese cooking technique where meat is coated in cornstarch and briefly blanched or fried to create an incredibly tender texture.
Wok Hei: The distinctive flavor imparted by cooking over high heat in a wok, creating those slightly charred edges and smoky notes.
Maillard Reaction: The browning process that occurs when proteins and sugars are heated together, creating complex flavors and appealing colors.
Essential Ingredients Breakdown
The magic of this recipe lies in using the right ingredients in the perfect proportions. I’ve tested countless variations, and this combination delivers that authentic P.F. Chang’s flavor profile every time.
For the Beef and Coating
| Ingredient | Amount | Purpose | Substitutions |
|---|---|---|---|
| Flank Steak | 1 lb | Primary protein, ideal texture | Sirloin, ribeye (more expensive) |
| Cornstarch | 1/2 cup | Creates tender coating | Potato starch, arrowroot powder |
| Egg White | 1 large | Binding agent for coating | 2 tbsp water + 1 tsp cornstarch |
| Soy Sauce | 2 tbsp | Flavor base for marinade | Tamari for gluten-free |
| Vegetable Oil | 2 cups | For frying | Canola oil, peanut oil |
For the Signature Sauce
| Ingredient | Amount | Flavor Profile | Notes |
|---|---|---|---|
| Low-sodium Soy Sauce | 1/2 cup | Umami base | Reduces saltiness |
| Brown Sugar | 1/2 cup | Sweetness balance | Dark brown preferred |
| Fresh Garlic | 6 cloves | Aromatic foundation | Minced fine |
| Fresh Ginger | 2 tbsp | Warm spice notes | Grated or minced |
| Rice Wine | 2 tbsp | Depth of flavor | Dry sherry substitute |
| Cornstarch | 1 tbsp | Sauce thickener | Mixed with water |
Fresh Aromatics and Garnishes
| Ingredient | Amount | Purpose | Preparation |
|---|---|---|---|
| Green Onions | 6-8 stalks | Color and mild onion flavor | Cut into 2-inch pieces |
| Yellow Onion | 1 medium | Sweetness and texture | Sliced thin |
| Sesame Seeds | 2 tbsp | Nutty finish | Toasted for best flavor |
| Red Pepper Flakes | 1/2 tsp | Heat (optional) | Adjust to taste |
Step-by-Step Preparation Method
Preparing the Beef
I always start by selecting the right cut of beef. Flank steak is my go-to choice because it has the perfect balance of flavor and texture. The key is slicing it correctly against the grain, which breaks down the muscle fibers and ensures tender bites.
Place the flank steak in the freezer for 30 minutes before slicing – this firms up the meat and makes it easier to achieve those paper-thin slices that are crucial for the dish’s success. Remove the steak and slice it against the grain into strips about 1/4 inch thick and 2 inches long.
In a large bowl, combine the sliced beef with 2 tablespoons of soy sauce and the egg white. Mix thoroughly until every piece is coated. This initial marinade begins the tenderizing process and helps the cornstarch coating adhere better.
Add the cornstarch gradually while tossing the beef with your hands. The goal is to coat each piece evenly without creating clumps. The beef should look slightly glossy and feel tacky to the touch. Let this rest for 15 minutes while you prepare the sauce and aromatics.
Creating the Perfect Sauce
The sauce is where this recipe truly shines. I’ve refined this combination over countless attempts to match that distinctive P.F. Chang’s flavor. In a medium bowl, whisk together the low-sodium soy sauce, brown sugar, minced garlic, grated ginger, and rice wine.
The brown sugar needs to dissolve completely – I often warm the mixture slightly to help this process. In a separate small bowl, mix the cornstarch with 2 tablespoons of cold water to create a slurry. This will be added at the end to thicken the sauce to that perfect glossy consistency.
The Cooking Process
Heat the vegetable oil in a large wok or heavy-bottomed pan to 350°F. This temperature is crucial – too hot and the coating burns before the beef cooks through; too cool and you’ll get greasy, soggy results.
Working in batches to avoid overcrowding, carefully add the coated beef strips to the oil. Fry for 2-3 minutes until the coating is golden brown and crispy. The beef should float to the surface when done. Remove with a slotted spoon and drain on paper towels.
Remove all but 2 tablespoons of oil from the pan. Return the pan to high heat and add the sliced onions. Stir-fry for 1-2 minutes until they begin to soften but still retain some crunch. Add the white parts of the green onions and cook for another 30 seconds.
Pour in the prepared sauce and bring it to a vigorous boil. The sauce should bubble enthusiastically – this is where the magic happens. Add the cornstarch slurry while stirring constantly. The sauce will thicken within 30 seconds to that perfect glossy consistency.
Return the fried beef to the pan and toss everything together for 1-2 minutes until the beef is heated through and every piece is coated with the glossy sauce. Add the green parts of the scallions and toss once more.
Cooking Techniques and Tips
Temperature Control Mastery
Temperature control is absolutely critical for this dish. I use a thermometer to ensure the oil reaches exactly 350°F for frying. At this temperature, the coating crisps up quickly while keeping the beef tender inside. If you don’t have a thermometer, test with a small piece of coated beef – it should sizzle vigorously and float within 30 seconds.
Timing is Everything
The entire cooking process happens quickly once you start. I prepare all ingredients beforehand and arrange them in the order they’ll be used. This mise en place approach ensures nothing overcooks while you’re scrambling to find ingredients.
Achieving the Perfect Texture
The contrast between the crispy coating and tender beef interior is what makes this dish special. Don’t skip the velvet coating process – it’s what creates that restaurant-quality texture. The cornstarch coating should be thick enough to protect the beef but not so thick that it becomes doughy.
Nutritional Information and Dietary Considerations
| Nutrient | Per Serving (4 servings) | Daily Value % |
|---|---|---|
| Calories | 485 | 24% |
| Protein | 32g | 64% |
| Carbohydrates | 38g | 13% |
| Fat | 22g | 34% |
| Sodium | 1,240mg | 54% |
| Sugar | 26g | 29% |
| Fiber | 2g | 8% |
| Iron | 4mg | 22% |
Dietary Modifications
For those watching their sodium intake, I’ve found that using low-sodium soy sauce and reducing the amount by 2 tablespoons while adding a tablespoon of rice vinegar maintains the flavor balance. The dish can be made gluten-free by substituting tamari for soy sauce and ensuring your cornstarch is certified gluten-free.
To reduce calories, you can use the air-frying method instead of deep-frying. Spray the coated beef with cooking spray and air-fry at 400°F for 8-10 minutes, shaking the basket halfway through.
Serving Suggestions and Pairings
I serve this Mongolian beef over steamed jasmine rice, which perfectly absorbs the flavorful sauce. The neutral rice balances the rich, savory-sweet flavors of the beef. For added nutrition and color, I often include steamed broccoli or snow peas on the side.
The dish also pairs beautifully with lo mein noodles or fried rice for a more substantial meal. For a lighter option, serve it over cauliflower rice or with a simple cucumber salad dressed with rice vinegar and sesame oil.
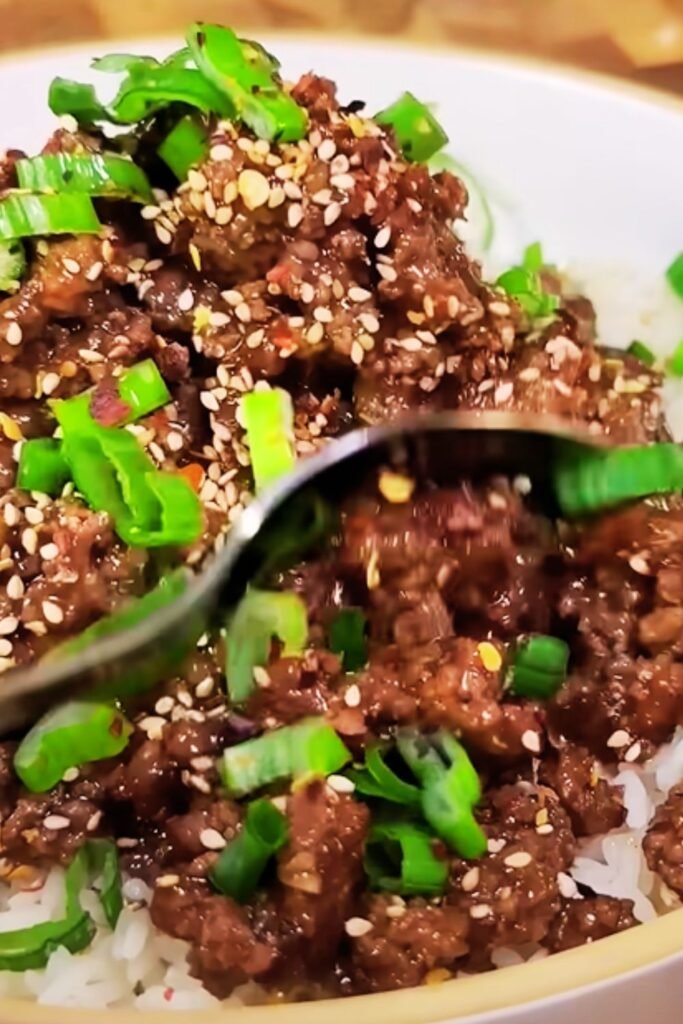
Presentation Tips
Garnish with toasted sesame seeds and additional sliced green onions for color and texture contrast. A sprinkle of red pepper flakes adds both visual appeal and a hint of heat for those who enjoy spicier food.
Storage and Reheating Guidelines
| Storage Method | Duration | Quality Notes |
|---|---|---|
| Refrigerator | 3-4 days | Best texture within 2 days |
| Freezer | Up to 3 months | Sauce may separate slightly |
| Room Temperature | 2 hours maximum | Food safety concern |
Reheating Instructions
For best results, reheat in a wok or large skillet over medium-high heat with a splash of water or broth. This method helps restore the sauce’s glossy consistency and prevents the beef from becoming tough. Microwave reheating is possible but may result in uneven heating and texture changes.
Troubleshooting Common Issues
Problem: Beef Turns Out Tough
Solution: This usually happens when the beef is overcooked or not sliced properly against the grain. Ensure you’re slicing against the grain and not overcooking during the initial frying phase.
Problem: Sauce Too Thin or Too Thick
Solution: If the sauce is too thin, mix additional cornstarch with cold water and add gradually while stirring. If too thick, add a tablespoon of warm water or broth.
Problem: Coating Falls Off
Solution: Make sure the beef is properly coated and the oil temperature is correct. The coating should set quickly in properly heated oil.
Variations and Adaptations
Spicy Mongolian Beef
Add 1-2 teaspoons of chili garlic sauce or sriracha to the sauce mixture for heat. Fresh sliced jalapeños can be added with the onions for extra spice and crunch.
Vegetarian Version
Replace the beef with firm tofu or cauliflower florets. The coating and sauce preparation remain the same, though cooking times may vary slightly.
Mongolian Chicken
This sauce works beautifully with chicken thighs cut into strips. The preparation method is identical, though chicken may need an extra minute of cooking time.
Expert Tips for Restaurant-Quality Results
After years of perfecting this recipe, I’ve learned that success lies in the details. Always use fresh garlic and ginger rather than pre-minced versions – the flavor difference is substantial. Toast your sesame seeds in a dry pan until golden for the best nutty flavor.
The sauce should coat the back of a spoon when properly thickened. If it runs off immediately, it needs more cornstarch slurry. If it’s too thick, it will become gummy as it cools.
Don’t skip the resting time after coating the beef – this allows the cornstarch to hydrate properly and creates a better coating that won’t fall off during cooking.
Questions and Answers
Q: Can I make this recipe ahead of time? A: While the dish is best served immediately, you can prepare the beef coating and sauce separately up to 4 hours ahead. Keep the coated beef refrigerated and bring the sauce to room temperature before cooking.
Q: What’s the best cut of beef for this recipe? A: Flank steak is my top choice due to its flavor and texture when sliced against the grain. Sirloin also works well but is more expensive. Avoid lean cuts like eye of round as they can become tough.
Q: Can I use a regular pan instead of a wok? A: Yes, a large, heavy-bottomed skillet works well. The key is having enough surface area to avoid overcrowding and maintaining high heat throughout the cooking process.
Q: How do I know when the oil is the right temperature? A: Use a thermometer for accuracy (350°F), or test with a small piece of coated beef. It should sizzle immediately and float within 30 seconds when the temperature is correct.
Q: Can I reduce the sugar in the sauce? A: You can reduce the brown sugar by up to half, but this will change the characteristic sweet-savory balance. Consider adding a tablespoon of rice vinegar to maintain flavor complexity.
Q: What if I don’t have rice wine? A: Dry sherry is the best substitute, or you can use an additional tablespoon of low-sodium soy sauce mixed with a teaspoon of sugar.
Q: How long should I marinate the beef? A: The initial 15-minute rest with soy sauce and egg white is sufficient. Longer marinating times can actually make the meat mushy due to the cornstarch coating.
Q: Can I freeze the coated raw beef? A: Yes, freeze the coated beef on a baking sheet until solid, then transfer to freezer bags. Cook directly from frozen, adding 1-2 minutes to the frying time.
Q: Why is my sauce not glossy like restaurant versions? A: The glossy finish comes from the cornstarch slurry added at the end and proper emulsification. Make sure to whisk the slurry well and add it while the sauce is boiling vigorously.
Q: Can I make this dish less salty? A: Use low-sodium soy sauce and reduce the amount by 2 tablespoons. Add 1 tablespoon of rice vinegar to maintain flavor depth. You can also rinse the beef after marinating to remove excess salt.
This Mongolian beef recipe has become my go-to when I want to recreate that P.F. Chang’s experience at home. The combination of tender beef, crispy coating, and that perfect glossy sauce creates a dish that’s both comforting and impressive. With practice, you’ll find that this recipe becomes second nature, and you’ll be able to adjust the flavors to suit your family’s preferences perfectly.