🧄 Biscuit Garlic Butter Cheese Bombs – Easy Cooking Ideas
I’ll be honest—sometimes I crave comfort food that’s not only delicious but also impressive-looking, yet easy enough to whip up without a culinary degree. Biscuit Garlic Butter Cheese Bombs check every single box for me.
If you’re imagining fluffy biscuit dough stuffed with molten cheese, bathed in garlicky butter, and baked into little golden pillows of joy… you’re absolutely right. These cheese bombs are my secret weapon for parties, game days, or even just quiet evenings when I want something cheesy, buttery, and impossible to resist.
🍽️ What Are Biscuit Garlic Butter Cheese Bombs?
Let’s define exactly what we’re working with:
- Biscuit Dough: Pre-made or homemade dough that bakes up light, fluffy, and slightly flaky.
- Garlic Butter: A mixture of melted butter and minced garlic, often with herbs like parsley for extra flavor.
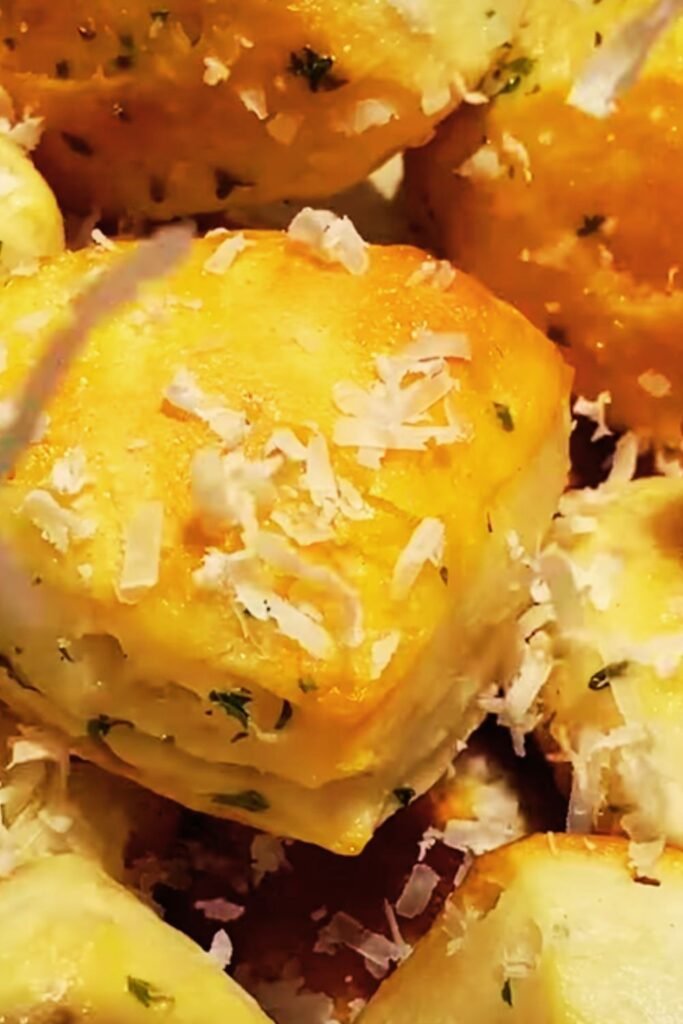
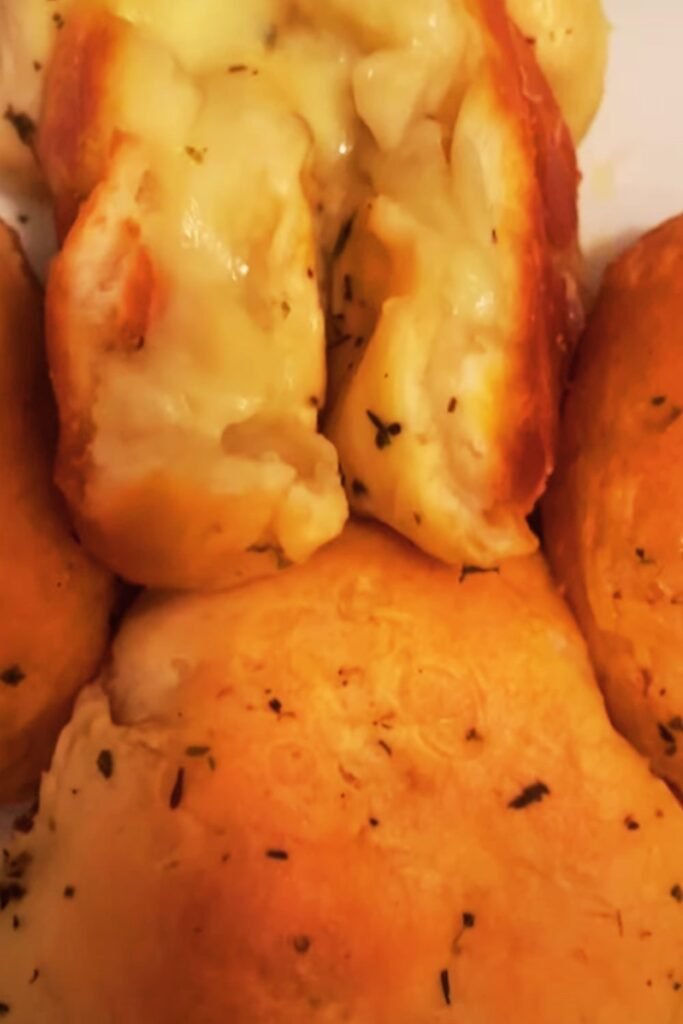
- Cheese Bombs: Small, dough-wrapped parcels stuffed with cheese that melts when baked, creating a gooey center.
So when I talk about Biscuit Garlic Butter Cheese Bombs, I mean pillowy biscuit dough wrapped around cubes of cheese, baked until golden, and brushed with fragrant garlic butter.
❤️ Why I Love Biscuit Garlic Butter Cheese Bombs
There are so many reasons these bombs make frequent appearances in my kitchen:
- Quick to make, even with store-bought dough.
- Perfect for any gathering—from casual game nights to fancy dinner parties.
- Customizable with different cheeses or seasonings.
- Freezer-friendly, so I can prep ahead for busy days.
- They’re basically irresistible—people devour them in minutes.
🛒 Ingredients You’ll Need
Here’s my typical shopping list:
- Biscuit Dough – canned, refrigerated, or homemade.
- Cheese – mozzarella, cheddar, or Monterey Jack all melt beautifully.
- Unsalted Butter – for making garlic butter.
- Garlic – minced or finely grated.
- Parsley or Italian Herbs – optional but adds color and freshness.
- Salt + Pepper – basic seasoning.
🔪 How to Make Biscuit Garlic Butter Cheese Bombs
Here’s how I transform these simple ingredients into gooey perfection:
- Preheat oven to 375°F (190°C).
- Melt butter in a small saucepan over medium-low heat, add garlic, and sauté for about a minute. Remove from heat.
- Flatten each biscuit slightly into a round disk.
- Place a cube of cheese in the center of each biscuit.
- Fold and pinch the edges around the cheese tightly to seal.
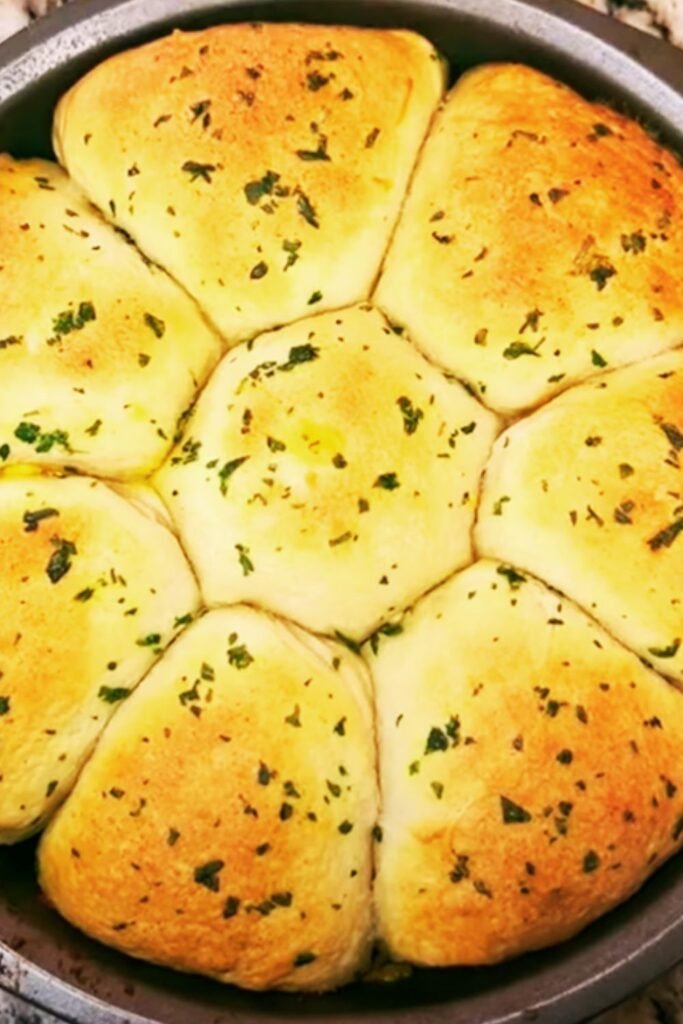
- Arrange bombs seam-side down in a greased baking dish or on a lined baking sheet.
- Brush generously with garlic butter.
- Bake for 12-15 minutes until golden brown.
- Brush again with garlic butter and sprinkle with herbs if desired.
🔥 My Personal Tips for Cheese Bomb Success
- Seal the dough well around the cheese so it doesn’t leak out during baking.
- Use cold cheese cubes so they stay firm while wrapping.
- Don’t skimp on garlic butter—it’s what makes these bombs shine.
- Space bombs slightly apart so they bake evenly.
- For extra crispiness, bake on a parchment-lined sheet rather than in a tight dish.
🧀 Flavor Variations I’ve Tried (And Loved)
These bombs are wonderfully versatile. Here’s how I’ve switched them up:
Jalapeño Popper Bombs
- Add a slice of pickled jalapeño and a dab of cream cheese inside each biscuit before sealing.
Italian Style
- Use mozzarella and sprinkle bombs with grated parmesan and dried oregano before baking.
Everything Bagel Style
- Brush with garlic butter and sprinkle with everything bagel seasoning for crunch and flavor.
Bacon Bombs
- Add a few pieces of cooked, crumbled bacon inside each biscuit for smoky goodness.
📊 Nutrition Facts Table
Because indulgence still deserves transparency, here’s a data-rich look at one cheese bomb (using canned biscuit dough and mozzarella):
| Component | Amount (per bomb) | Calories | Carbs (g) | Protein (g) | Fat (g) |
|---|---|---|---|---|---|
| Biscuit dough | ~28 g | 90 | 13 | 2.0 | 3.5 |
| Mozzarella cheese | ~14 g | 80 | 1.0 | 5.5 | 6.0 |
| Garlic butter (½ tsp) | ~2.5 ml | 20 | 0 | 0 | 2.2 |
| Totals | 190 | 14 | 7.5 | 11.7 |
Values approximate and will vary based on specific brands or homemade dough.
🍽️ How I Love to Serve Biscuit Garlic Butter Cheese Bombs
These bombs are so versatile! Here’s how I like to serve them:
- As an appetizer at parties or potlucks.
- With a marinara dipping sauce for an Italian vibe.
- Alongside a simple salad for lunch.
- Paired with a hearty soup or stew for a cozy dinner.
- As a fun snack board component with other finger foods.
I also love them slightly warm, so the cheese is extra gooey.
🧩 Common Mistakes (And How I Avoid Them)
- Overstuffing – Too much cheese makes them burst. I stick to ~½-inch cubes.
- Not sealing edges tightly – This leads to melted cheese oozing out during baking.
- Burning garlic – Garlic scorches fast. I remove garlic butter from heat after a minute.
- Overbaking – I check at 12 minutes; baking too long dries them out.
❓ Q&A Section
Q: Can I make these cheese bombs ahead of time?
Yes! I often assemble them and freeze them unbaked on a tray. Once frozen, I store them in a zip-top bag. Bake from frozen, adding 2-3 extra minutes to the time.
Q: What other cheeses work well?
Almost any cheese that melts smoothly! Try sharp cheddar, Monterey Jack, gouda, or even pepper jack for a spicy kick.
Q: Can I make these without garlic for picky eaters?
Absolutely. Just use plain melted butter or add other herbs like rosemary instead.
Q: Are these kid-friendly?
100%! Kids love these because they’re handheld and full of melty cheese. I sometimes skip the garlic for milder palates.
Q: How do I keep the bottoms from getting soggy?
I use a parchment-lined sheet and bake bombs spaced apart. Avoid over-buttering the bottoms before baking.
✨ My Final Thoughts
Biscuit Garlic Butter Cheese Bombs might sound fancy, but they’re one of the easiest—and most crowd-pleasing—snacks or sides I’ve ever made. Whether you’re hosting friends, feeding your family, or just craving a bit of melty, cheesy joy, these little golden bombs hit the spot every time.
I hope you give them a try and make them your own with fun fillings and toppings. Let me know how yours turn out!
Let me know if you’d like any adjustments, more images, or additional variations!