When I first tasted this loaded butterscotch cheesecake at my friend’s dinner party three years ago, I knew my life had changed forever. The creamy, rich texture combined with that deep, caramelized butterscotch flavor created an experience that haunted my dreams for weeks. After countless attempts to recreate it, I finally perfected what I now confidently call the best cheesecake recipe ever created.
This isn’t just another dessert recipe – it’s a masterpiece that combines the classic elegance of New York-style cheesecake with the irresistible allure of butterscotch. Every bite delivers layers of flavor that dance on your tongue, from the buttery graham cracker crust to the silky smooth filling topped with luscious butterscotch sauce and crunchy toffee bits.
What Makes This Butterscotch Cheesecake Special
Butterscotch: A confection made by heating butter and brown sugar together until caramelized, creating a rich, complex flavor profile with notes of vanilla and slight saltiness.
Loaded: In baking terms, this refers to a dessert packed with multiple complementary ingredients and toppings that enhance the primary flavor.
Cheesecake Texture: The perfect balance between creamy and firm, achieved through precise temperature control and ingredient ratios.
My butterscotch cheesecake stands apart from ordinary recipes because it incorporates butterscotch in three distinct ways: within the filling itself, as a swirled ribbon throughout the cake, and as a glossy topping. This triple-layer approach ensures that every single bite bursts with that beloved butterscotch flavor.
The secret lies in making homemade butterscotch sauce from scratch. Store-bought versions simply cannot match the depth and complexity you achieve when you carefully caramelize butter and brown sugar in your own kitchen. The aroma alone will have your neighbors knocking on your door.
Essential Ingredients Breakdown
| Ingredient | Purpose | Quality Tips | Substitutions |
|---|---|---|---|
| Cream Cheese (32 oz) | Base structure and creaminess | Must be full-fat and room temperature | None recommended |
| Brown Sugar (1 cup) | Sweetness and butterscotch base | Use dark brown for richer flavor | Light brown sugar |
| Heavy Cream (1 cup) | Texture and richness | 35% fat content minimum | Half-and-half (less rich) |
| Eggs (4 large) | Binding and structure | Room temperature for smooth mixing | 2 egg yolks + 2 whole eggs |
| Butter (1/2 cup) | Flavor and moisture | European-style for best taste | Margarine (not recommended) |
| Graham Crackers (1.5 cups) | Crust foundation | Honey grahams work best | Digestive biscuits |
| Vanilla Extract (2 tsp) | Flavor enhancement | Pure vanilla only | Vanilla bean paste |
| Butterscotch Chips (1 cup) | Texture and flavor bursts | High-quality brands preferred | Toffee bits |
The quality of your cream cheese makes or breaks this recipe. I always use Philadelphia brand because it has the perfect fat content and consistency. Never use low-fat or whipped varieties – they’ll compromise both texture and flavor.
Step-by-Step Preparation Guide
Preparing the Graham Cracker Crust
Creating the perfect crust requires attention to detail. I crush my graham crackers by hand in a sealed bag using a rolling pin rather than using a food processor. This method gives me better control over the texture, ensuring some slightly larger pieces that add delightful crunch.
- Preheat your oven to 350°F (175°C)
- Crush 1.5 cups of graham crackers until you have fine crumbs with some small chunks
- Melt 6 tablespoons of butter completely
- Mix the crumbs with melted butter and 2 tablespoons of brown sugar
- Press the mixture firmly into the bottom of a 9-inch springform pan
- Use the bottom of a measuring cup to create an even, compact layer
- Bake for 10 minutes until lightly golden
- Cool completely while preparing the filling
The key to preventing a soggy crust is ensuring it’s completely cooled before adding the filling. I usually prepare my crust the night before and let it chill in the refrigerator overnight.
Making Homemade Butterscotch Sauce
This sauce transforms an ordinary cheesecake into something extraordinary. The process requires patience, but the results are absolutely worth every minute of careful attention.
- Heat 1/2 cup of butter in a heavy-bottomed saucepan over medium heat
- Add 1 cup of packed dark brown sugar, stirring constantly
- Cook for 3-4 minutes until the mixture bubbles and darkens
- Slowly add 1/2 cup of heavy cream while whisking continuously
- Add 1 teaspoon of vanilla extract and 1/2 teaspoon of salt
- Continue cooking for 2-3 minutes until thickened
- Strain through a fine-mesh sieve to remove any lumps
- Cool to room temperature before using
The sauce should coat the back of a spoon when ready. If it becomes too thick, whisk in additional cream one tablespoon at a time.
Creating the Cheesecake Filling
Temperature control is absolutely crucial for achieving that perfect, silky texture. Every ingredient must be at room temperature before you begin mixing. I remove my cream cheese from the refrigerator at least 2 hours before baking.
- Beat 32 ounces of room-temperature cream cheese until completely smooth (3-4 minutes)
- Gradually add 3/4 cup of brown sugar, beating until combined
- Add eggs one at a time, beating just until incorporated after each addition
- Mix in 1/2 cup of cooled butterscotch sauce
- Add 2 teaspoons of vanilla extract and 1/4 teaspoon of salt
- Fold in 3/4 cup of butterscotch chips gently by hand
Overmixing creates air bubbles that can cause cracks during baking. Once you add the eggs, mix only until just combined. The filling should be smooth and creamy without being fluffy.
Baking Techniques for Perfect Results
Water Bath Method
Using a water bath (bain-marie) ensures even, gentle cooking that prevents cracks and creates that signature creamy texture. This technique might seem intimidating, but it’s actually quite simple once you understand the process.
- Wrap the bottom of your springform pan tightly with two layers of heavy-duty aluminum foil
- Place the pan in a large roasting pan
- Pour the filling over the prepared crust
- Dollop remaining butterscotch sauce on top and swirl with a knife
- Add hot water to the roasting pan until it reaches halfway up the sides of the springform pan
- Bake at 325°F (163°C) for 55-65 minutes
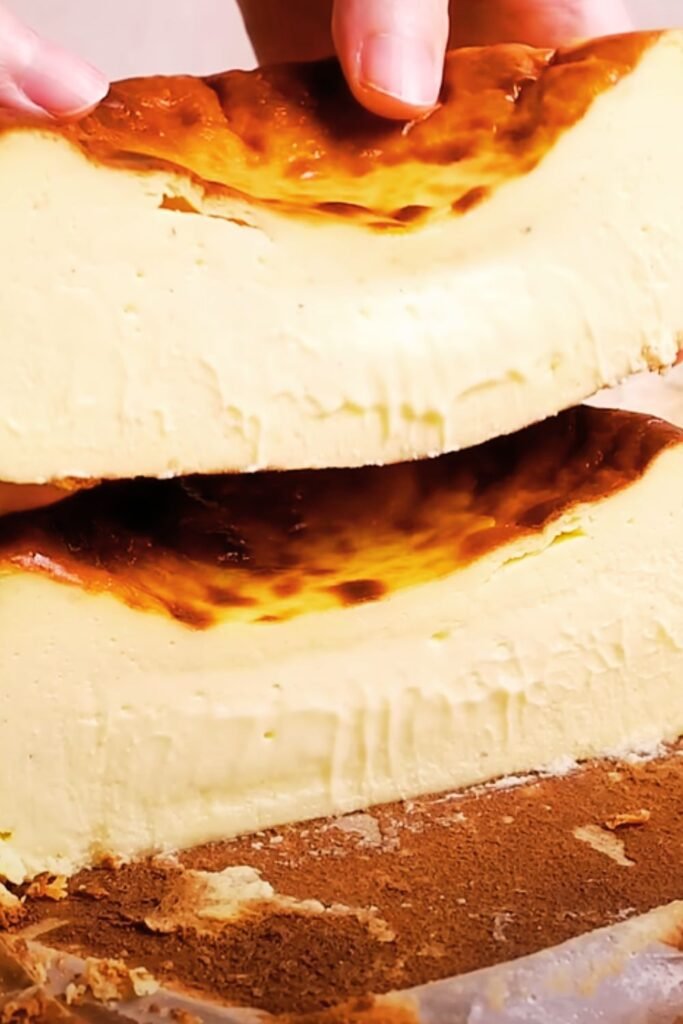
The cheesecake is done when the center is almost set but still slightly jiggly when gently shaken. The internal temperature should reach 150°F (66°C) when measured with an instant-read thermometer.
Cooling Process
Proper cooling prevents cracks and ensures the perfect texture. I learned this lesson the hard way after several cracked cheesecakes in my early baking days.
- Turn off the oven and crack the door open slightly
- Let the cheesecake cool in the oven for 1 hour
- Remove from oven and run a knife around the edges to loosen
- Cool at room temperature for 2 hours
- Refrigerate for at least 8 hours or overnight before serving
The gradual temperature change prevents thermal shock that causes unsightly cracks across the surface.
Nutritional Information and Serving Details
| Nutrient | Per Slice (12 servings) | Daily Value % |
|---|---|---|
| Calories | 485 | 24% |
| Total Fat | 32g | 41% |
| Saturated Fat | 19g | 95% |
| Cholesterol | 145mg | 48% |
| Sodium | 380mg | 17% |
| Total Carbohydrates | 42g | 15% |
| Dietary Fiber | 1g | 4% |
| Sugars | 38g | – |
| Protein | 8g | 16% |
| Calcium | 120mg | 9% |
| Iron | 1.2mg | 7% |
While this cheesecake is undeniably indulgent, it also provides protein and calcium. I recommend serving smaller portions alongside fresh berries to add fiber and vitamins while balancing the richness.
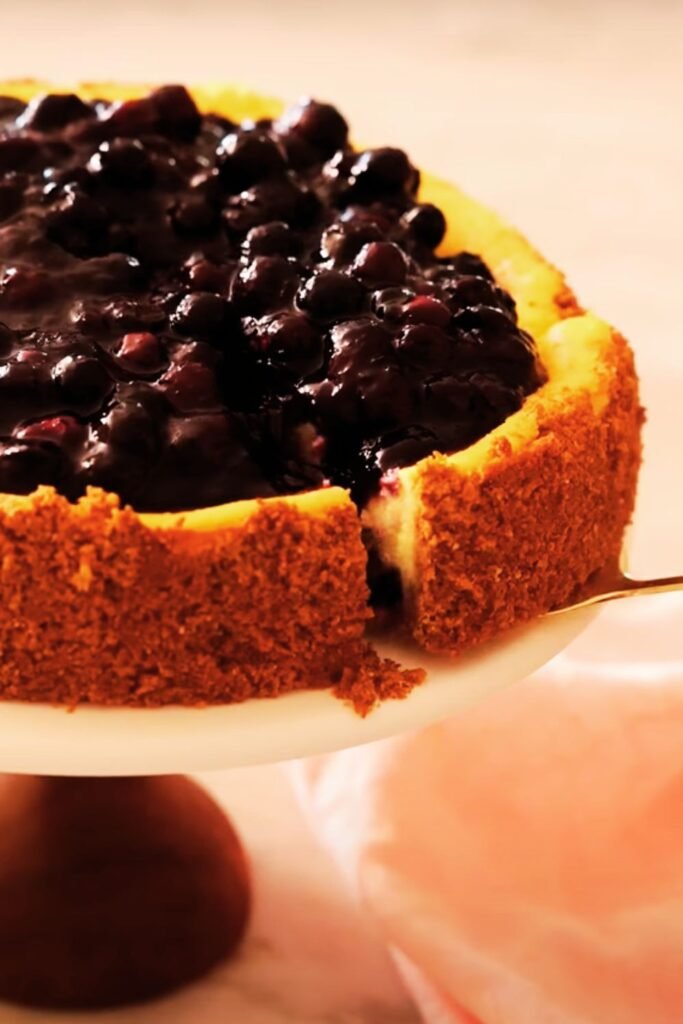
Topping and Presentation Ideas
The beauty of this butterscotch cheesecake lies not only in its incredible taste but also in its stunning presentation possibilities. I love experimenting with different toppings that complement the butterscotch flavor without overwhelming it.
Classic Presentation
- Drizzle additional warm butterscotch sauce in decorative patterns
- Sprinkle crushed toffee bits around the edges
- Add a dollop of lightly sweetened whipped cream
- Garnish with a single butterscotch chip
Elegant Variations
- Pipe rosettes of butterscotch-flavored whipped cream
- Create chocolate shavings using a vegetable peeler on dark chocolate
- Dust with powdered sugar through a decorative stencil
- Add toasted pecans for extra crunch and nutty flavor
Seasonal Adaptations
During autumn, I incorporate warm spices like cinnamon and nutmeg into the whipped cream. For winter holidays, I add a touch of bourbon to the butterscotch sauce for sophisticated depth. Spring calls for fresh strawberry slices that provide a tart contrast to the sweet butterscotch.
Storage and Make-Ahead Tips
| Storage Method | Duration | Quality Notes |
|---|---|---|
| Refrigerator (covered) | 5-7 days | Best within first 3 days |
| Freezer (wrapped) | 2-3 months | Thaw overnight in refrigerator |
| Individual slices | 3-4 days | Wrap each slice separately |
| Unbaked filling | 24 hours | Assemble and bake within 1 day |
This cheesecake actually improves with time as the flavors meld together. I often make it two days before serving for special occasions. The texture becomes even more luxurious, and the butterscotch flavor deepens beautifully.
For freezing, I wrap the entire cheesecake (minus toppings) in plastic wrap, then aluminum foil. Individual frozen slices make perfect single servings – just thaw at room temperature for 30 minutes before enjoying.
Troubleshooting Common Issues
Preventing Cracks
Temperature shock causes most cracks in cheesecakes. Beyond using a water bath, ensure all ingredients are at room temperature and avoid opening the oven door during baking. If cracks do appear, don’t despair – they’ll be hidden under your beautiful butterscotch sauce topping.
Achieving Smooth Texture
Lumpy cheesecake filling usually results from cold cream cheese or overmixing. I beat the cream cheese alone for several minutes before adding other ingredients, ensuring it’s completely smooth. If lumps persist, press the mixture through a fine-mesh sieve.
Butterscotch Sauce Consistency
If your sauce becomes too thick, whisk in warm cream one tablespoon at a time. If it’s too thin, return it to the heat and cook for an additional minute or two. The sauce should flow smoothly but coat a spoon.
Serving Suggestions and Pairings
The rich, sweet nature of this butterscotch cheesecake pairs beautifully with various beverages and accompaniments. I’ve discovered that contrasting flavors and textures create the most memorable dessert experiences.
Beverage Pairings
- Freshly brewed coffee with its bitter notes cuts through the sweetness perfectly
- Earl Grey tea provides citrusy undertones that complement butterscotch
- Cold milk offers a classic, comforting combination
- Sparkling water with lemon cleanses the palate between bites
Accompaniment Ideas
- Fresh berries add tartness and vibrant color
- Toasted nuts provide textural contrast
- A small portion of vanilla ice cream creates a delightful temperature contrast
- Thin almond cookies offer additional crunch
I love serving this cheesecake at dinner parties because it’s impressive enough for special occasions yet comforting enough for casual gatherings. The make-ahead nature means I can focus on my guests instead of worrying about dessert preparation.
Variations and Customizations
Chocolate Butterscotch Fusion
Replace 1/4 cup of the cream cheese with melted dark chocolate for a mocha-butterscotch hybrid. Swirl chocolate ganache alongside the butterscotch sauce for stunning visual appeal.
Salted Caramel Twist
Add 1 teaspoon of sea salt to your butterscotch sauce and sprinkle flaky salt on top before serving. The salt enhances the caramel flavors and adds sophisticated complexity.
Bourbon Butterscotch
Incorporate 2 tablespoons of bourbon into the butterscotch sauce for an adult version. The alcohol cooks off during preparation, leaving behind rich, complex flavors.
Mini Cheesecake Version
Divide the recipe among 12 muffin cups lined with paper liners. Reduce baking time to 18-22 minutes. These individual portions are perfect for parties and portion control.
The Science Behind Perfect Cheesecake
Understanding the science helps you achieve consistent results every time. Cheesecake is essentially a custard, relying on gentle protein coagulation for structure. The cream cheese provides fat and protein, eggs act as binders, and sugar tenderizes the mixture.
Temperature control prevents the proteins from overcooking and becoming rubbery. The water bath maintains steady, moist heat that prevents the surface from drying out. Gradual cooling prevents rapid contraction that causes cracks.
The butterscotch component adds complexity through the Maillard reaction – the browning that occurs when sugars and proteins heat together. This reaction creates hundreds of flavor compounds that give butterscotch its distinctive taste.
Questions and Answers
Q: Can I make this cheesecake without a springform pan?
I strongly recommend using a springform pan for best results, but you can use a regular 9-inch cake pan. Line it with parchment paper extending up the sides for easy removal. The presentation won’t be as clean, but the taste will be identical.
Q: Why does my butterscotch sauce crystallize?
Crystallization happens when sugar crystals form during cooking. Avoid stirring once the mixture begins boiling, and make sure your pan and utensils are completely clean. If crystals form, add a tablespoon of corn syrup and reheat gently.
Q: Can I substitute the brown sugar with white sugar?
Brown sugar is essential for authentic butterscotch flavor because of its molasses content. White sugar will create a different flavor profile entirely. If necessary, mix white sugar with 2 tablespoons of molasses per cup.
Q: How do I know when the cheesecake is properly baked?
The center should be almost set with just a slight jiggle when gently shaken. An instant-read thermometer should register 150°F (66°C) in the center. Overbaking creates a dense, rubbery texture.
Q: Can I make this recipe dairy-free?
Dairy-free versions require significant modifications and won’t achieve the same texture or flavor. You’d need to substitute the cream cheese, heavy cream, and butter with dairy alternatives, which changes the fundamental character of the dessert.
Q: What’s the best way to cut clean slices?
Use a sharp, thin knife dipped in warm water and wiped clean between each cut. This prevents the creamy filling from sticking to the blade and ensures professional-looking slices.
Q: Can I add alcohol to this recipe?
Yes, 2-3 tablespoons of bourbon, rum, or butterscotch schnapps can be added to the filling. Reduce other liquids slightly to maintain proper consistency. The alcohol won’t completely cook off, so consider your guests.
Q: How far in advance can I make this cheesecake?
This cheesecake can be made up to 3 days ahead and actually improves with time. Keep it covered in the refrigerator and add toppings just before serving for best presentation.
Q: Why did my crust become soggy?
Soggy crusts result from not pre-baking long enough or adding filling while the crust is still warm. Ensure your crust is completely cooled and has developed a light golden color during pre-baking.
Q: Can I freeze individual slices?
Absolutely! Wrap each slice individually in plastic wrap, then aluminum foil. Frozen slices keep for 2-3 months and thaw beautifully at room temperature in about 30 minutes.
This loaded butterscotch cheesecake represents everything I love about baking – the perfect marriage of technique and creativity, the joy of sharing something homemade, and the satisfaction of creating a dessert that brings people together. Every time I serve this cheesecake, I watch faces light up with that first bite, and I’m reminded why I fell in love with baking in the first place.
The combination of creamy texture, rich butterscotch flavor, and stunning presentation makes this recipe a showstopper for any occasion. Whether you’re celebrating a birthday, hosting a dinner party, or simply treating yourself to something special, this cheesecake delivers an unforgettable experience that will have everyone asking for the recipe.