There’s something magical about the combination of chocolate and peanut butter. The rich, decadent sweetness of chocolate paired with the salty, nutty flavor of peanut butter creates a marriage of flavors that’s simply irresistible. When I first discovered no-bake chocolate peanut butter bars, I knew I had found my new favorite treat to make when I’m craving something sweet but don’t want to turn on the oven.
These bars are my go-to dessert for so many reasons. They require minimal ingredients, come together in minutes, and disappear even faster! The best part? No baking required—perfect for hot summer days, busy weeknights, or when you just need a quick chocolate fix.
What Makes These Bars Special
What I love most about these bars is their versatility. The basic recipe is incredibly simple, but you can customize them in countless ways to suit your taste preferences. Think of them as a blank canvas for your culinary creativity!
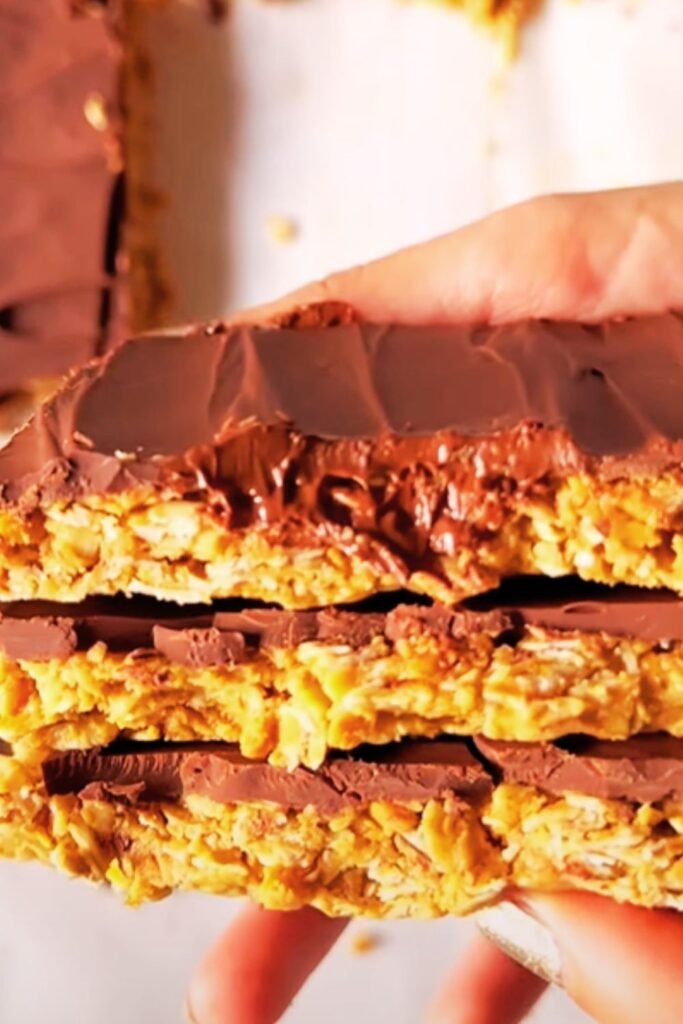
I’ve been making these bars for years, tweaking the recipe along the way, and I’m excited to share my perfected version with you. The bottom layer provides a sturdy, peanut buttery base, while the top chocolate layer adds that perfect snap when you bite into it. The texture contrast is simply divine—creamy, slightly crumbly peanut butter layer topped with smooth, velvety chocolate.
Let’s dive into everything you need to know to make these irresistible treats at home!
Essential Ingredients
For these no-bake chocolate peanut butter bars, quality ingredients make all the difference. Here’s what you’ll need:
For the Peanut Butter Layer:
- 1 cup (226g) unsalted butter, melted
- 2 cups (250g) graham cracker crumbs
- 2 cups (240g) powdered sugar
- 1 cup (250g) creamy peanut butter
- 1 teaspoon vanilla extract
- ¼ teaspoon salt
For the Chocolate Layer:
- 2 cups (350g) semisweet chocolate chips
- ¼ cup (62g) creamy peanut butter
Ingredient Notes and Substitutions
I’ve experimented with numerous variations of this recipe over the years, so I can offer some tried-and-true substitutions:
- Peanut Butter: For the best texture, I recommend using a commercial creamy peanut butter like Jif or Skippy rather than natural peanut butter, which can separate and affect the consistency of your bars. If you have a peanut allergy, almond butter, cashew butter, or sunflower seed butter make excellent substitutions.
- Graham Crackers: No graham crackers? No problem! You can substitute digestive biscuits, vanilla wafers, or even crushed pretzels for a sweet-salty twist.
- Butter: While I prefer unsalted butter to control the saltiness, salted butter works too—just omit the additional salt. For a dairy-free option, coconut oil creates a slightly different but equally delicious flavor profile.
- Chocolate: Semisweet chocolate chips are my go-to, but feel free to use milk chocolate for a sweeter bar or dark chocolate for a more intense flavor. For an extra-luxurious touch, use high-quality chocolate bars instead of chips.
- Powdered Sugar: This ingredient is crucial for the proper texture, but you can reduce it slightly if you prefer less sweetness. I wouldn’t recommend substituting granulated sugar as it will create a gritty texture.
Essential Equipment
One of the beauties of this recipe is that it requires minimal equipment:
- 9×13-inch baking pan (or 8×8-inch for thicker bars)
- Parchment paper or aluminum foil
- Large mixing bowl
- Microwave-safe bowl (for melting chocolate)
- Spatula
- Measuring cups and spoons
Step-by-Step Instructions
These bars come together in just a few simple steps:
- Prepare Your Pan: Line your 9×13-inch baking pan with parchment paper, leaving some overhang on the sides to make the bars easier to remove later.
- Make the Peanut Butter Base: In a large bowl, combine the melted butter, graham cracker crumbs, powdered sugar, 1 cup peanut butter, vanilla extract, and salt. Mix until well combined. The mixture should hold together when pressed between your fingers.
- Form the Base Layer: Press the peanut butter mixture firmly and evenly into the prepared pan. I find using the bottom of a measuring cup helps create a smooth, even surface.
- Prepare the Chocolate Layer: In a microwave-safe bowl, combine the chocolate chips and ¼ cup peanut butter. Microwave in 30-second intervals, stirring between each, until fully melted and smooth. Be careful not to overheat!
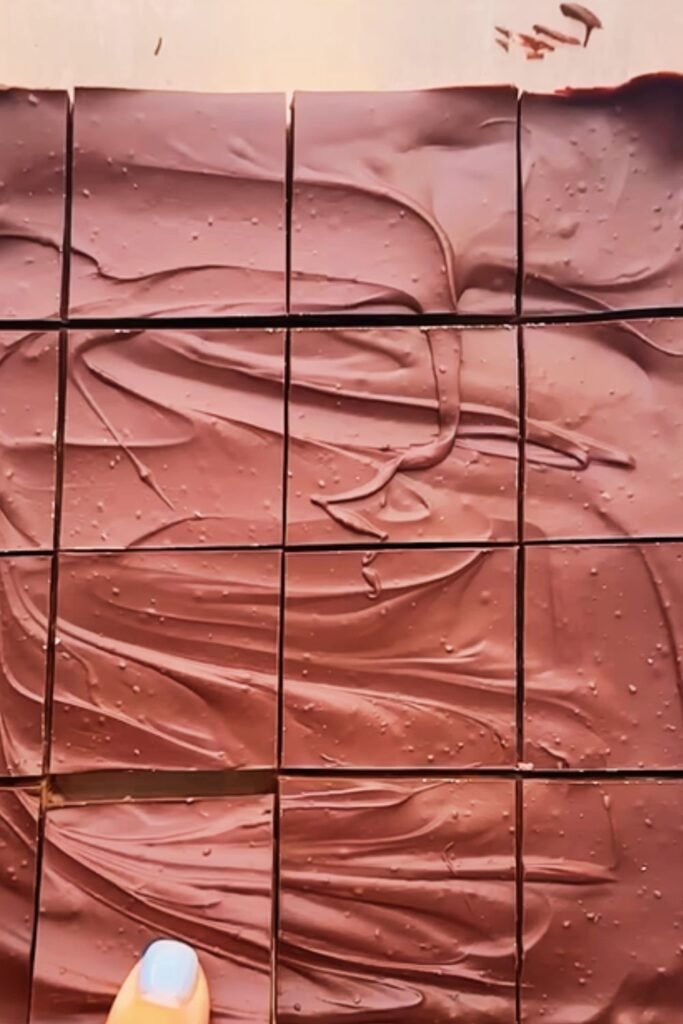
- Add the Chocolate Topping: Pour the melted chocolate mixture over the peanut butter layer and spread it evenly with a spatula.
- Chill: Refrigerate the bars for at least 1 hour, or until the chocolate layer is set.
- Slice and Serve: Remove the bars from the pan using the parchment paper overhang. With a sharp knife, cut into squares or rectangles. For clean cuts, I like to run my knife under hot water, then quickly dry it before slicing.
Pro Tips for Perfect Bars Every Time
Over the years, I’ve learned a few tricks that make a big difference in the final result:
- Temperature Matters: Make sure your peanut butter is at room temperature for easier mixing.
- The Perfect Cut: For professional-looking bars, chill them completely before cutting, then use a warm knife for clean edges. I like to wipe the knife clean between cuts.
- Texture Control: For a firmer peanut butter layer, add an extra ¼ cup of graham cracker crumbs. For a softer, more fudgy texture, reduce the crumbs slightly.
- Even Layers: Take your time pressing the peanut butter layer firmly and evenly into the pan. This creates a sturdy base that won’t crumble when you bite into it.
- Preventing Chocolate Bloom: To avoid the white streaks that can appear on chocolate (known as “bloom”), make sure to melt your chocolate gently and don’t refrigerate the bars for too long before serving.
Nutritional Information
These bars are definitely an indulgent treat! Here’s the approximate nutritional information per bar (assuming you cut the 9×13-inch pan into 24 bars):
| Nutrient | Amount per Serving |
|---|---|
| Calories | 290 |
| Total Fat | 19g |
| Saturated Fat | 9g |
| Cholesterol | 25mg |
| Sodium | 150mg |
| Total Carbohydrates | 28g |
| Dietary Fiber | 2g |
| Sugars | 22g |
| Protein | 5g |
Storage and Make-Ahead Tips
One of the reasons I love making these bars is that they store beautifully:
- Refrigerator: Store in an airtight container for up to 1 week. I recommend placing parchment paper between layers to prevent sticking.
- Freezer: These bars freeze exceptionally well! Wrap them tightly in plastic wrap, then aluminum foil, and freeze for up to 3 months. Thaw in the refrigerator overnight before serving.
- Make-Ahead: You can prepare these bars several days before serving, making them perfect for party planning or holiday gift-giving.
Delicious Variations to Try
While the classic recipe is absolutely perfect on its own, I love experimenting with different variations:
1. Crunchy Delight
Add ½ cup of crispy rice cereal to the peanut butter layer for a delightful textural contrast.
2. Nutty Chocolate Swirl
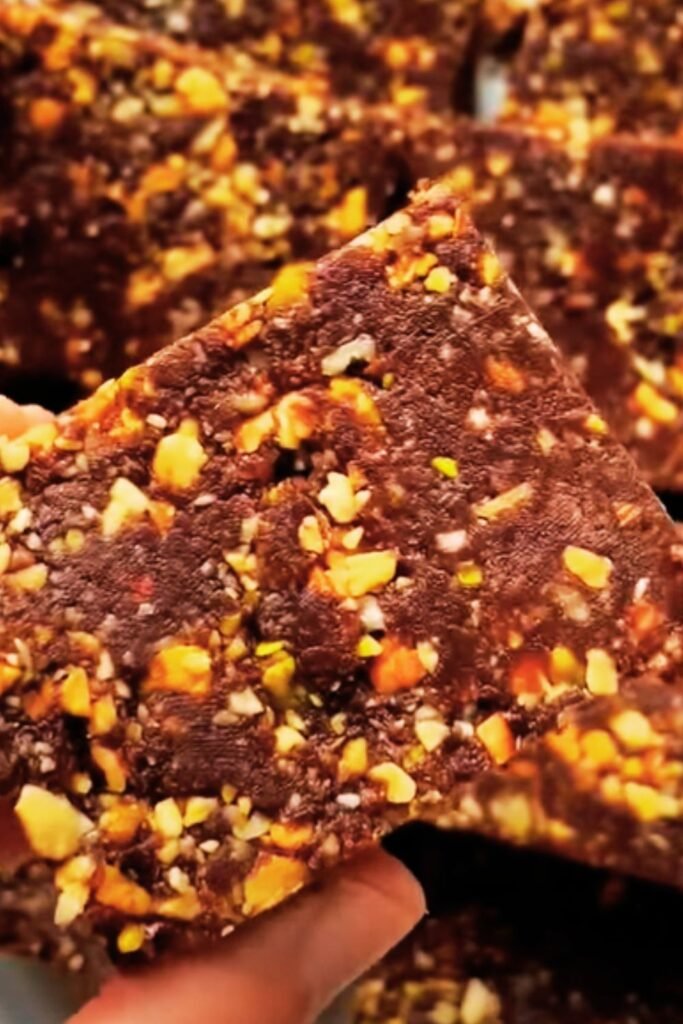
Mix ½ cup of chopped nuts (walnuts, pecans, or almonds) into the melted chocolate before spreading it on top.
3. Salted Chocolate Version
Sprinkle flaky sea salt over the chocolate layer before it sets for a sophisticated sweet-and-salty flavor profile.
4. Cookie Crust Twist
Substitute Oreo cookie crumbs for the graham crackers to create a chocolate cookie base.
5. Double Chocolate
Add 2 tablespoons of cocoa powder to the peanut butter layer for a double chocolate experience.
Serving Suggestions
These versatile bars can be enjoyed in numerous ways:
- Serve them as a decadent dessert with a cold glass of milk
- Cut into tiny squares for a bite-sized treat on dessert platters
- Crumble them over vanilla ice cream for an extraordinary sundae
- Package them in decorative boxes as homemade gifts
- Include them on a dessert board alongside fresh berries and whipped cream
- Serve with hot coffee or tea for an afternoon pick-me-up
Troubleshooting Common Issues
Even experienced bakers can run into challenges. Here’s how to solve common problems:
Problem: Crumbly Peanut Butter Layer
Solution: If your peanut butter layer seems too dry and crumbly, add an extra tablespoon of peanut butter or melted butter to help bind the ingredients.
Problem: Chocolate Layer Cracks When Cutting
Solution: Let the bars sit at room temperature for 10-15 minutes before cutting, or use a knife dipped in hot water and dried between cuts.
Problem: Layers Separate When Serving
Solution: Press the peanut butter layer very firmly into the pan, and make sure the chocolate layer isn’t too thick. Also, cutting the bars when they’re fully chilled helps maintain the integrity of both layers.
Problem: Chocolate Seized During Melting
Solution: If your chocolate becomes grainy or stiff when melting, it may have come into contact with water or been overheated. Start fresh with new chocolate and melt it very gently.
Why This Recipe Works So Well
What makes this recipe a consistent success is the perfect balance of ingredients:
- The ratio of graham cracker crumbs to peanut butter creates a texture that holds together without being too dry or too oily.
- The combination of butter and peanut butter provides richness without becoming greasy.
- The powdered sugar adds sweetness while also helping to bind the mixture.
- Adding a bit of peanut butter to the chocolate layer helps it adhere to the base and prevents it from becoming too brittle when chilled.
Frequently Asked Questions
Q: Can I use natural peanut butter in this recipe? A: While you can use natural peanut butter, it may affect the texture of your bars. If using natural peanut butter, make sure it’s well-stirred and consider adding an extra tablespoon of powdered sugar to help bind the ingredients.
Q: How do I know when the peanut butter layer has the right consistency? A: The perfect consistency is when the mixture holds together when pressed between your fingers but isn’t too sticky. It should be somewhat similar to wet sand that can be packed.
Q: Can I make these bars vegan? A: Absolutely! Substitute the butter with coconut oil or vegan butter, and make sure to use vegan chocolate chips. The rest of the ingredients are typically vegan-friendly.
Q: Why did my chocolate layer develop white streaks after refrigeration? A: Those white streaks are called “bloom” and happen when chocolate is exposed to temperature fluctuations. It’s completely safe to eat and doesn’t affect the taste, just the appearance. To prevent this, make sure your chocolate is melted gently and avoid drastic temperature changes.
Q: My bars are too sweet. How can I adjust the recipe? A: You can reduce the powdered sugar by up to ½ cup without significantly affecting the texture. You can also use dark chocolate for the top layer instead of semisweet or milk chocolate.
Q: Can I double the recipe? A: Yes! Simply double all ingredients and use two 9×13-inch pans or one larger sheet pan. The chilling time may need to be increased slightly.
Perfect Occasions for These Bars
These no-bake chocolate peanut butter bars are perfect for:
- Bake sales (ironically, since no baking is required!)
- Holiday cookie exchanges
- After-school snacks
- Office potlucks
- Weekend family treats
- Summer gatherings when you don’t want to use the oven
- Homemade food gifts
- Late-night sweet cravings
Final Thoughts
There’s something truly special about a dessert that combines simplicity with irresistible flavor. These no-bake chocolate peanut butter bars represent the perfect marriage of convenience and indulgence—ready in minutes, but impressive enough to serve to guests.
I’ve shared these bars with friends, family, and colleagues over the years, and they’re always met with rave reviews and requests for the recipe. There’s something delightful about watching someone’s face light up when they take their first bite of these bars—that moment of pure dessert bliss is why I love making and sharing them.
Whether you’re an experienced baker looking for a quick treat or a novice in the kitchen intimidated by traditional baking, these bars are foolproof and guaranteed to impress. The combination of creamy peanut butter and rich chocolate creates a flavor experience that’s truly greater than the sum of its parts.
So gather your ingredients, clear some space in your refrigerator, and prepare to discover your new favorite no-bake dessert. I promise these chocolate peanut butter bars will become a staple in your recipe collection—they certainly have in mine!
Reader Interactions
I’d love to hear about your experience making these bars! Did you try any of the variations? Do you have your own twist on this classic treat? Share your thoughts and questions in the comments below!