When I first encountered pavlova at a dinner party years ago, I was absolutely mesmerized by its ethereal beauty and divine taste. This cloud-like dessert, with its crispy meringue shell and pillowy soft interior, topped with billowy cream and vibrant fruits, has since become my go-to showstopper for special occasions. Let me share with you everything I’ve learned about creating this masterpiece that never fails to impress.
What Makes Pavlova So Special
Pavlova is more than just a dessert – it’s an experience. Named after the Russian ballerina Anna Pavlova, this confection captures the grace and elegance of its namesake. The contrast between the crisp exterior and marshmallow-like interior creates a textural symphony that dancing on your palate.
What I love most about pavlova is its versatility. While the base remains consistent – that perfect meringue foundation – the toppings can be adapted to showcase seasonal fruits, personal preferences, or dietary requirements. I’ve served it at summer barbecues with berries and stone fruits, at winter gatherings with citrus and pomegranate, and even at elegant dinner parties with exotic tropical fruits.
Understanding the Science Behind Perfect Pavlova
Creating the perfect pavlova requires understanding the science behind meringue. When egg whites are whipped, proteins unfold and trap air, creating foam. Adding sugar gradually stabilizes this foam, while a touch of acid (like vinegar or lemon juice) and cornstarch creates that signature chewy interior that distinguishes pavlova from other meringues.
The key differences between pavlova and regular meringue lie in these additions:
Cornstarch: Creates the soft, marshmallow-like center Acid: Stabilizes the meringue and prevents weeping Lower temperature baking: Ensures the interior stays soft while the exterior crisps
Essential Ingredients for Success
| Ingredient | Quantity | Purpose | Quality Tips |
|---|---|---|---|
| Egg whites | 4 large | Meringue base | Use room temperature, completely clean |
| Caster sugar | 250g (1¼ cups) | Sweetening and structure | Superfine sugar dissolves better |
| Cornstarch | 1 tablespoon | Chewy interior texture | Sift to avoid lumps |
| White vinegar | 1 teaspoon | Stabilizes meringue | Or use lemon juice |
| Vanilla extract | 1 teaspoon | Flavor enhancement | Pure extract preferred |
| Heavy cream | 300ml (1¼ cups) | Topping base | 35% fat content minimum |
| Powdered sugar | 2 tablespoons | Sweetening cream | Adjust to taste |
| Fresh fruits | 2-3 cups mixed | Visual appeal and flavor | Seasonal varieties work best |
Step-by-Step Pavlova Creation
Preparing Your Kitchen
Before I begin any pavlova, I ensure my kitchen is set up for success. I preheat my oven to 150°C (300°F), then immediately reduce it to 120°C (250°F) once the pavlova goes in. I line my baking sheet with parchment paper and draw a 23cm (9-inch) circle as my guide.
The most crucial aspect is ensuring everything is spotlessly clean. Even a trace of grease or egg yolk can prevent the whites from whipping properly. I wipe down my mixing bowl and whisk with lemon juice or vinegar to guarantee they’re grease-free.
Creating the Perfect Meringue Base
I start by separating my eggs when they’re cold, then let the whites come to room temperature for about 30 minutes. This temperature is crucial – cold whites won’t whip properly, but warm whites can become grainy.
Using my stand mixer on medium speed, I whip the whites until soft peaks form. This usually takes about 3-4 minutes. The peaks should hold their shape but still bend over when the whisk is lifted.
Now comes the critical part – adding sugar. I add it gradually, about one tablespoon at a time, beating well between each addition. This process takes patience; I spend about 8-10 minutes total. The meringue is ready when it’s glossy, thick, and forms stiff peaks that don’t bend when the whisk is lifted.
Finally, I gently fold in the cornstarch, vinegar, and vanilla using a large spoon, being careful not to deflate the mixture.
Shaping and Baking
I spoon the meringue onto my prepared baking sheet, using the circle as a guide. Rather than creating a flat disk, I build up the edges slightly to create a natural bowl shape for holding the cream and fruit later.
Using the back of a spoon, I create gentle swirls and peaks around the surface – this isn’t just decorative, it also helps create more texture contrast when baked.
The baking process requires patience. I place the pavlova in the preheated oven, immediately reduce the temperature to 120°C (250°F), and bake for 1 hour and 15 minutes. The pavlova is done when it sounds hollow when tapped on the base and can be easily lifted from the parchment.
Here’s my crucial tip: I turn off the oven and let the pavlova cool completely inside with the door slightly ajar. This prevents sudden temperature changes that could cause cracking.
Whipping the Perfect Cream
While my pavlova cools, I prepare the cream topping. I chill my mixing bowl and whisk in the freezer for 15 minutes – this helps the cream whip faster and more stable.
I pour the cold heavy cream into the chilled bowl and begin whipping on medium speed. As it starts to thicken, I gradually increase the speed. When soft peaks form, I add the powdered sugar and continue whipping until I achieve firm peaks that hold their shape but aren’t overbeaten.
The key is stopping at the right moment. Overwhipped cream becomes grainy and eventually turns to butter. I watch carefully and stop as soon as the cream holds its shape when the whisk is lifted.
Selecting and Preparing Fruits
The fruit selection can make or break your pavlova. I choose fruits that complement each other in color, texture, and flavor. My favorite combinations include:
Summer Selection: Strawberries, raspberries, blueberries, and kiwi Tropical Mix: Mango, passion fruit, pineapple, and lime zest Winter Citrus: Orange segments, grapefruit, pomegranate seeds, and mint Stone Fruit Medley: Peaches, nectarines, plums, and cherries
I prepare fruits just before serving to prevent them from releasing too much juice. Berries get a gentle rinse and pat dry, stone fruits are sliced, and citrus fruits are segmented with membranes removed.
Assembly: The Final Masterpiece
Assembly happens just before serving – this is crucial because the cream will soften the meringue over time. I carefully transfer my cooled pavlova to a serving plate, handling it gently as meringue can be fragile.
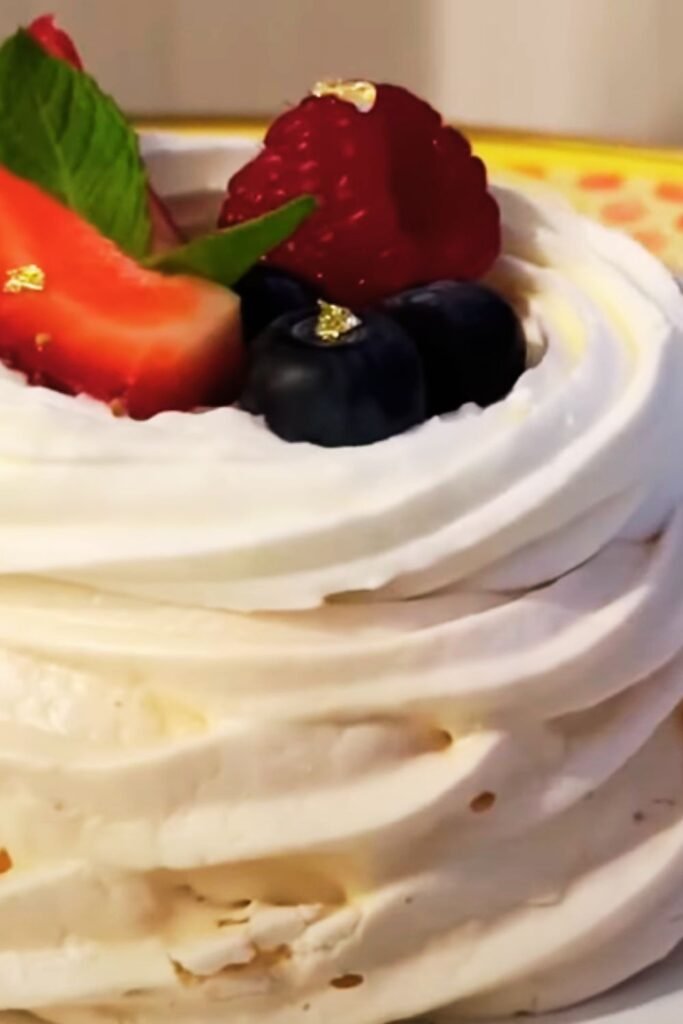
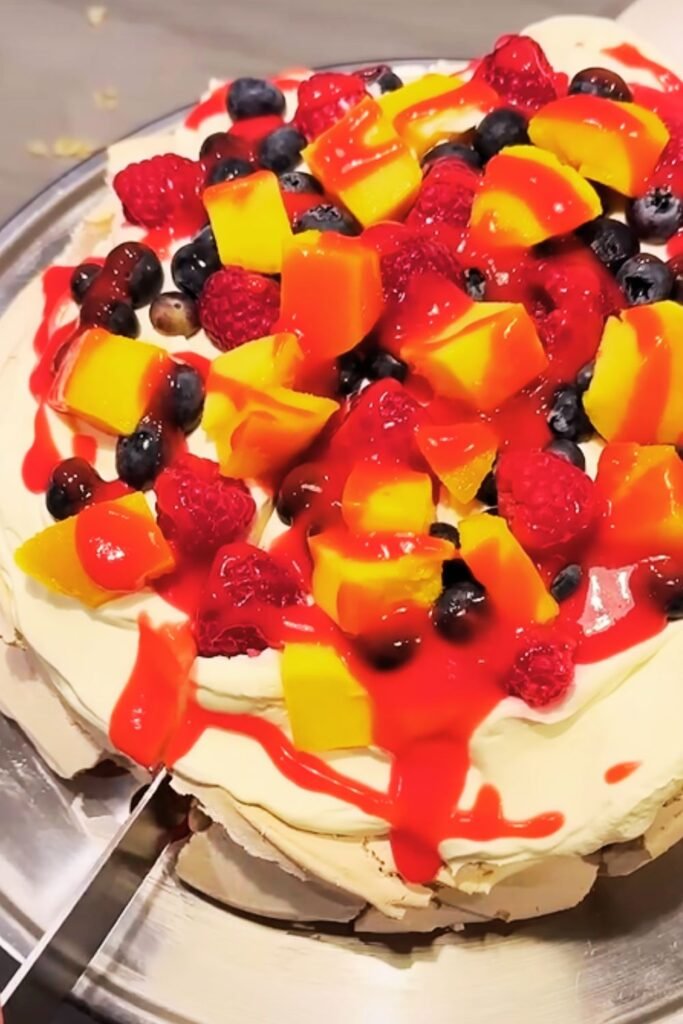
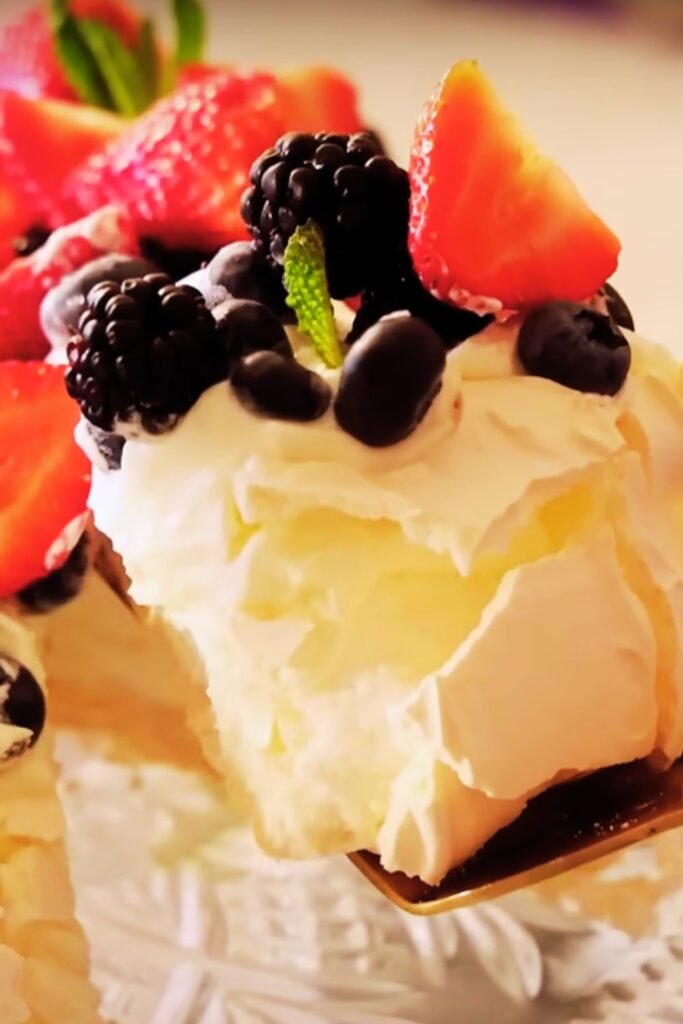
I spread the whipped cream evenly over the surface, leaving a small border around the edges. Then comes the fun part – arranging the fruits. I like to create height and visual interest by layering different fruits and creating color patterns.
For the finishing touch, I might add a drizzle of passion fruit pulp, a sprinkle of toasted nuts, or fresh mint leaves. The key is not to overload it – the beauty of pavlova lies in its elegant simplicity.
Troubleshooting Common Issues
| Problem | Cause | Solution |
|---|---|---|
| Meringue weeps | Humidity, underbeaten whites | Ensure dry day, beat longer |
| Cracks during baking | Temperature too high | Use lower temperature, gradual cooling |
| Soft base | Underbaked | Bake longer, test with tap |
| Won’t hold shape | Overbeaten or contaminated | Start fresh, ensure clean equipment |
| Grainy texture | Sugar not dissolved | Add sugar more gradually |
Nutritional Information Per Serving
| Nutrient | Amount (per serving, 8 servings total) |
|---|---|
| Calories | 285 |
| Carbohydrates | 45g |
| Protein | 4g |
| Fat | 11g |
| Fiber | 2g |
| Sugar | 42g |
| Sodium | 45mg |
Seasonal Variations I Love
Spring Pavlova
During spring, I celebrate the season with strawberries, rhubarb compote, and edible flowers. The tart rhubarb balances the sweet meringue beautifully, while edible flowers add an elegant touch.
Summer Celebration
Summer pavlova features an abundance of berries, stone fruits, and a drizzle of berry coulis. I sometimes add a layer of lemon curd beneath the cream for extra richness.
Autumn Harvest
For autumn, I might incorporate poached pears, figs, and a sprinkle of cinnamon. The warm spices complement the season perfectly.
Winter Elegance
Winter pavlova showcases citrus fruits, pomegranate seeds, and perhaps some candied orange peel. The bright flavors provide a refreshing contrast to heavy winter meals.
Make-Ahead Tips
While pavlova is best assembled just before serving, I can prepare components ahead:
Meringue Base: Can be made up to 2 days ahead and stored in an airtight container Whipped Cream: Best made fresh, but can be prepared 2-3 hours ahead Fruit Preparation: Most fruits can be prepared a few hours ahead
I never recommend assembling pavlova more than 30 minutes before serving, as the cream will soften the meringue base.
Serving Suggestions
I serve pavlova family-style, bringing the whole dessert to the table for everyone to admire before cutting. Using a sharp knife, I cut through the meringue with a gentle sawing motion, ensuring each portion has cream and fruit.
For special occasions, I might create individual mini pavlovas, which are adorable and ensure everyone gets the perfect ratio of meringue to toppings.
Storage and Leftover Tips
Leftover pavlova doesn’t store well assembled, but unassembled meringue bases can be stored in airtight containers for up to a week. If I have assembled pavlova left over, I cover it loosely and refrigerate for up to one day, though the texture will be softer.
Cultural Significance and History
The pavlova holds special significance in both Australian and New Zealand cuisine, with both countries claiming its invention. Regardless of its origins, this dessert represents celebration, elegance, and the joy of sharing beautiful food with loved ones.
I’ve learned that in its traditional form, pavlova is often served during holidays and special occasions, particularly Christmas in the Southern Hemisphere when summer fruits are at their peak.
Questions and Answers
Q: Why does my pavlova base crack during baking? The most common cause is temperature shock. Ensure your oven temperature is correct (use an oven thermometer to verify), and allow the pavlova to cool gradually in the oven with the door slightly open.
Q: Can I make pavlova on a humid day? Humidity is the enemy of meringue. If possible, avoid making pavlova on very humid days. If you must, ensure your kitchen is as dry as possible and consider using a dehumidifier.
Q: How do I know when my meringue is ready? The meringue should be glossy, thick, and hold stiff peaks that don’t bend when the whisk is lifted. When you rub a bit between your fingers, it should feel smooth, not gritty.
Q: Can I use frozen fruits on pavlova? Fresh fruits are always preferable, but if using frozen, ensure they’re completely thawed and drained. Pat them dry to prevent excess moisture from making the pavlova soggy.
Q: What’s the difference between pavlova and Eton mess? While both use meringue, cream, and fruit, pavlova maintains the meringue’s structure as a base, while Eton mess deliberately breaks up the meringue and folds it through the cream and fruit.
Q: Can I make pavlova without cornstarch? Cornstarch is essential for that characteristic chewy interior. Without it, you’ll have a regular meringue that’s crisp throughout rather than the soft center that defines pavlova.
Q: How long does pavlova last? An unassembled meringue base can last up to a week in an airtight container. Once assembled, pavlova should be consumed within a few hours for the best texture.
Q: Can I make dairy-free pavlova? Absolutely! The meringue base is naturally dairy-free. For the topping, use coconut cream (the thick part from chilled coconut milk) or other dairy-free whipping alternatives.
Q: Why is my pavlova base soft all the way through? This usually indicates underbaking. The base should sound hollow when tapped. If it’s still soft, return it to the low oven for additional time.
Q: Can I add chocolate to my pavlova? Yes! Try folding cocoa powder into the meringue for a chocolate base, or drizzle melted chocolate over the finished pavlova. Dark chocolate pairs beautifully with berries.
Creating the perfect pavlova is both an art and a science, requiring patience, attention to detail, and a willingness to learn from each attempt. Every time I make one, I’m reminded of why this dessert has captured hearts around the world. The combination of textures, the canvas for seasonal fruits, and the sheer joy it brings to the table make every moment of preparation worthwhile.
Whether you’re celebrating a special occasion or simply want to create something beautiful for your family, pavlova offers that perfect blend of elegance and comfort that makes any meal memorable. The key is to embrace the process, learn from any imperfections, and most importantly, enjoy sharing this heavenly creation with the people you love.