When autumn arrives with its crisp air and golden leaves, I find myself drawn to the warm, comforting flavors that define the season. Among all the pumpkin desserts I’ve crafted over the years, pumpkin panna cotta holds a special place in my heart. This silky, sophisticated Italian dessert transforms humble pumpkin into something truly extraordinary – a creamy, spiced masterpiece that melts on your tongue and captures the essence of fall in every spoonful.
I discovered panna cotta during my culinary adventures in northern Italy, where I learned that the name literally means “cooked cream.” The traditional version is elegant in its simplicity, but when I began experimenting with seasonal flavors back home, pumpkin emerged as the perfect autumn companion. The natural sweetness and velvety texture of pumpkin puree blend seamlessly with the classic panna cotta base, creating a dessert that’s both familiar and surprising.
What makes this pumpkin panna cotta truly special is its versatility. I’ve served it at intimate dinner parties where guests swooned over its sophisticated presentation, and I’ve also made it for casual family gatherings where even the pickiest eaters cleaned their plates. The gentle spicing – a careful balance of cinnamon, nutmeg, and ginger – enhances rather than overwhelms the pumpkin flavor, creating a dessert that feels both indulgent and refined.
Understanding Panna Cotta Fundamentals
Before diving into the pumpkin variation, I want to share what I’ve learned about creating the perfect panna cotta base. The key lies in understanding gelatin and achieving the right balance of firmness and creaminess.
Gelatin Types and Usage:
- Unflavored gelatin powder: Most common and reliable
- Gelatin sheets: Preferred by professional chefs for smoother texture
- Agar-agar: Plant-based alternative for vegetarian versions
Texture Considerations:
- Too much gelatin: Rubbery, bouncy texture
- Too little gelatin: Won’t set properly or hold shape
- Perfect balance: Creamy, silky, just firm enough to unmold
The magic happens when you bloom the gelatin properly – this step is crucial for achieving that signature silky texture. I’ve made the mistake of rushing this process early in my panna cotta journey, and the results were disappointing. Now I always give gelatin the time it needs to fully hydrate and dissolve.
The Perfect Pumpkin Selection
Choosing the right pumpkin makes all the difference in your panna cotta. I’ve experimented with various types over the years, and each brings its own character to the dessert.
Fresh Pumpkin vs. Canned: While I appreciate the convenience of canned pumpkin puree, nothing quite matches the depth of flavor you get from roasting your own pumpkin. When I have the time, I prefer using sugar pumpkins or pie pumpkins – they’re smaller, sweeter, and have less water content than their jack-o’-lantern cousins.
Roasting Technique: My preferred method involves halving the pumpkin, scooping out the seeds, and roasting cut-side down at 400°F until the flesh is tender. The caramelization that occurs during roasting adds complexity to the final dessert that you simply can’t achieve with canned puree.
Pumpkin Puree Consistency: Whether using fresh or canned, the puree should be smooth and not too watery. I often strain my homemade puree through a fine-mesh sieve to remove any fibrous bits and achieve that silky consistency essential for panna cotta.
Essential Ingredients Breakdown
Creating exceptional pumpkin panna cotta requires understanding how each ingredient contributes to the final result. Here’s my detailed breakdown of the essential components:
| Ingredient | Quantity | Purpose | Quality Notes |
|---|---|---|---|
| Heavy Cream | 2 cups | Base richness and texture | Use 35-40% fat content for best results |
| Pumpkin Puree | 1 cup | Primary flavor and color | Smooth, not chunky; fresh or high-quality canned |
| Unflavored Gelatin | 2 packets (14g) | Setting agent | Bloom properly for smooth texture |
| Granulated Sugar | 1/2 cup | Sweetness and texture | Dissolves completely when heated |
| Whole Milk | 1/2 cup | Smoothness and pourability | Full-fat preferred over low-fat |
| Vanilla Extract | 2 teaspoons | Flavor enhancement | Pure extract, not imitation |
| Ground Cinnamon | 1 teaspoon | Warm spice foundation | Freshly ground for best flavor |
| Ground Nutmeg | 1/2 teaspoon | Complex spice note | Fresh grated preferred |
| Ground Ginger | 1/4 teaspoon | Subtle warmth | Complements pumpkin beautifully |
| Salt | Pinch | Flavor enhancement | Brings out sweetness and spice |
Step-by-Step Preparation Process
Preparing Your Workspace
Before I begin any panna cotta preparation, I ensure my workspace is organized and all equipment is ready. This dessert requires precise timing, especially when working with gelatin, so having everything at hand is crucial.
Equipment Needed:
- 6-8 ramekins or serving glasses
- Medium saucepan
- Whisk
- Fine-mesh strainer
- Small bowl for blooming gelatin
- Measuring cups and spoons
Blooming the Gelatin
I start by sprinkling the gelatin over 1/4 cup of cold milk in a small bowl. This blooming process is essential – the gelatin needs about 5 minutes to fully hydrate and become spongy. I’ve learned that rushing this step leads to lumpy panna cotta, so patience is key.
Creating the Base
In my medium saucepan, I combine the heavy cream, remaining milk, and sugar. I heat this mixture over medium heat, stirring constantly until the sugar dissolves completely. The mixture should be hot but not boiling – I look for small bubbles around the edges as my indicator.
Incorporating the Pumpkin
Once the cream mixture is properly heated, I remove it from heat and whisk in the pumpkin puree. This is where the magic begins – watching the pale cream transform into that beautiful autumn orange never fails to delight me. I add the vanilla extract and all the spices at this stage, whisking until everything is perfectly combined.
Adding the Gelatin
Here’s where technique matters most. I add a small amount of the hot pumpkin mixture to the bloomed gelatin, whisking constantly to prevent lumps. Then I gradually incorporate this mixture back into the saucepan, whisking continuously. The key is maintaining movement – any pausing can result in gelatin strings or lumps.
Straining and Dividing
I always strain the mixture through a fine-mesh sieve to ensure absolute smoothness. Any small lumps or spice particles get caught here, leaving me with a perfectly silky mixture. Then I divide it evenly among my prepared ramekins or glasses.
Mastering the Setting Process
The setting process is where patience truly pays off. I’ve learned through experience that rushing this step results in disappointment.
Cooling Stages:
- Room Temperature (30 minutes): I let the panna cotta cool slightly before refrigerating to prevent condensation
- Initial Chill (2 hours): The mixture begins to set but remains soft
- Full Set (4-6 hours): Complete setting for perfect texture
- Overnight (Ideal): Best results come from overnight chilling
Temperature Considerations: I maintain my refrigerator at 38-40°F for optimal setting. Too cold, and the texture becomes too firm; too warm, and it won’t set properly.
Flavor Variations and Customizations
Over the years, I’ve developed several variations of my basic pumpkin panna cotta recipe. Each brings its own personality to the dessert while maintaining that essential silky texture.
Spiced Maple Pumpkin: I replace 2 tablespoons of sugar with pure maple syrup and add a pinch of cardamom. The maple flavor complements the pumpkin beautifully while adding complexity.
Pumpkin Chai: My chai version includes additional spices: 1/2 teaspoon ground cardamom, 1/4 teaspoon ground cloves, and a pinch of black pepper. I also steep a chai tea bag in the warm cream mixture for 10 minutes before straining.
Bourbon Pumpkin: For adult gatherings, I add 2 tablespoons of bourbon to the mixture after it’s cooled slightly. The alcohol adds depth and warmth that pairs perfectly with the pumpkin.
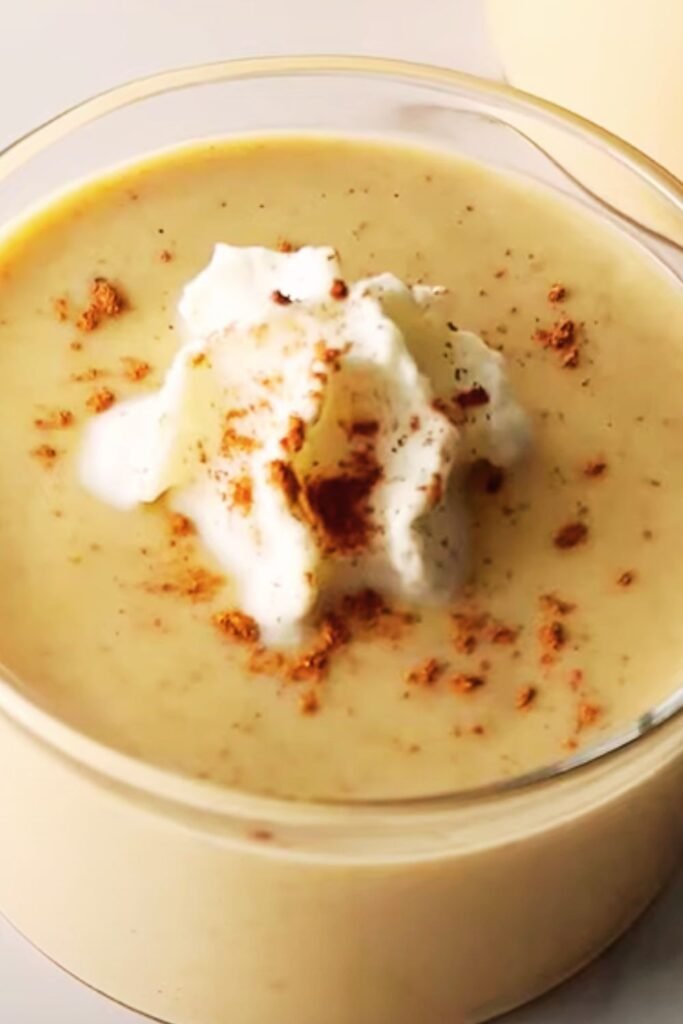
Lighter Version: I sometimes substitute half the heavy cream with Greek yogurt for a lighter texture and tangy note. The yogurt should be whisked in after the mixture has cooled to prevent curdling.
Troubleshooting Common Issues
Through years of making panna cotta, I’ve encountered and solved various challenges. Here are the most common issues and my solutions:
| Problem | Cause | Solution |
|---|---|---|
| Lumpy texture | Gelatin not properly bloomed or incorporated | Always bloom gelatin fully; whisk constantly when adding |
| Too firm/rubbery | Excess gelatin | Reduce gelatin by 1/4 packet next time |
| Won’t set | Insufficient gelatin or not chilled long enough | Increase chilling time; add more gelatin if needed |
| Grainy texture | Sugar not fully dissolved | Heat cream mixture until sugar completely dissolves |
| Separated layers | Temperature too high when adding gelatin | Keep mixture below 180°F when incorporating gelatin |
| Bland flavor | Insufficient spices or vanilla | Taste mixture before setting; adjust seasonings |
Presentation and Serving Suggestions
Presentation transforms panna cotta from a simple dessert into an elegant finale to any meal. I’ve developed several presentation styles that never fail to impress.
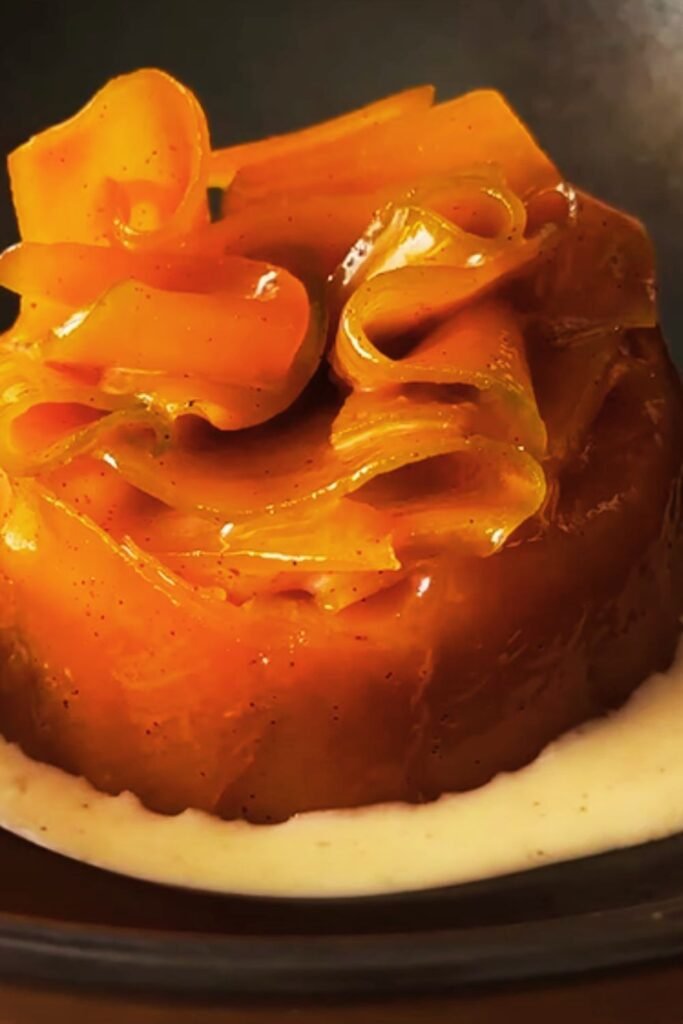
Classic Unmolded Presentation: To unmold, I briefly dip the bottom of each ramekin in warm water for 10-15 seconds, then run a thin knife around the edges. A gentle shake releases the panna cotta onto the serving plate.
Garnish Options:
- Candied pumpkin seeds for crunch
- Whipped cream rosettes
- Cinnamon dust
- Caramel sauce drizzle
- Toasted chopped pecans
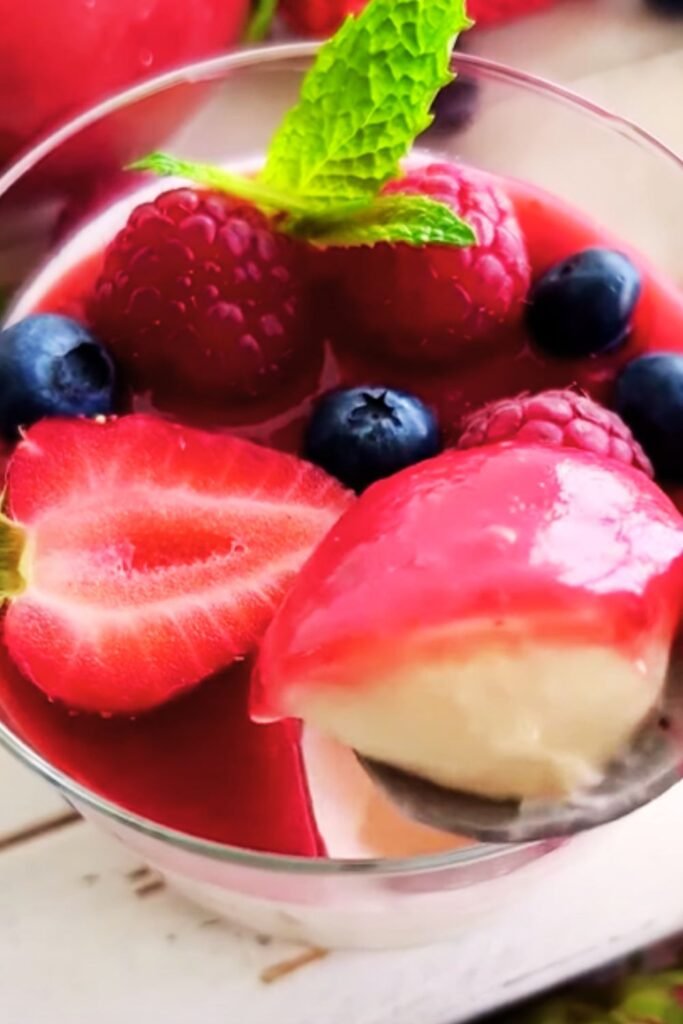
- Fresh berries for color contrast
Serving Temperature: I serve panna cotta chilled but not ice-cold. Removing it from the refrigerator 15-20 minutes before serving allows the flavors to bloom and the texture to soften slightly.
Nutritional Information and Dietary Adaptations
Understanding the nutritional profile helps in making informed serving decisions and adaptations for different dietary needs.
| Nutrient | Per Serving (1/6 recipe) | Daily Value % |
|---|---|---|
| Calories | 285 | 14% |
| Total Fat | 22g | 28% |
| Saturated Fat | 14g | 70% |
| Cholesterol | 85mg | 28% |
| Sodium | 65mg | 3% |
| Total Carbohydrates | 18g | 7% |
| Dietary Fiber | 2g | 7% |
| Sugars | 16g | – |
| Protein | 4g | 8% |
| Vitamin A | 850 IU | 17% |
| Calcium | 120mg | 12% |
Dietary Adaptations:
Lactose-Free Version: I substitute coconut cream for heavy cream and use lactose-free milk. The coconut adds its own subtle flavor that complements the pumpkin beautifully.
Vegan Alternative: Using agar-agar instead of gelatin and coconut cream creates a completely plant-based version. I use 1 tablespoon of agar-agar powder per 2 cups of liquid.
Sugar-Free Option: I’ve successfully made versions using stevia or monk fruit sweetener, though the texture is slightly different. Start with half the recommended amount and adjust to taste.
Storage and Make-Ahead Tips
Panna cotta is an excellent make-ahead dessert, which makes it perfect for entertaining. I often prepare it 2-3 days before serving.
Storage Guidelines:
- Refrigerate covered for up to 5 days
- Can be frozen for up to 1 month (texture changes slightly)
- Individual portions store better than large batches
- Cover with plastic wrap directly on surface to prevent skin formation
Make-Ahead Strategy: I typically make panna cotta 1-2 days ahead of serving. This allows the flavors to meld and develop while ensuring the texture is perfect. The flavors actually improve with time, making it even more convenient for entertaining.
Pairing Suggestions
The versatility of pumpkin panna cotta makes it suitable for various occasions and pairings.
Complementary Desserts:
- Gingersnap cookies for textural contrast
- Shortbread for buttery richness
- Candied nuts for crunch
- Fresh fruit for brightness
Beverage Pairings:
- Espresso or strong coffee
- Chai tea or spiced tea
- Hot chocolate with cinnamon
- Sparkling cider
- Dessert coffee drinks
Menu Integration: I’ve served this dessert after various meals, from casual family dinners to formal holiday gatherings. It works particularly well after rich, savory meals as it provides a light, refreshing finish without being too heavy.
Seasonal Adaptations
While pumpkin panna cotta is quintessentially autumnal, I’ve adapted it for other seasons with great success.
Winter Version: I add warming spices like cloves and allspice, and serve it with candied orange peel and dark chocolate shavings.
Spring Adaptation: A lighter version using butternut squash instead of pumpkin, with cardamom and rose water, creates a more delicate flavor profile.
Summer Twist: I’ve even made a summer version using roasted yellow squash and serving it with fresh berries and mint.
Professional Tips and Techniques
After years of perfecting this recipe, I’ve developed several professional techniques that ensure consistent results.
Temperature Control: I use a candy thermometer to ensure the cream mixture doesn’t exceed 180°F, which can cause the gelatin to lose its setting power.
Timing Precision: I prepare all ingredients before starting and work quickly once the gelatin is bloomed. Having everything measured and ready prevents any timing issues.
Quality Ingredients: Using high-quality cream, fresh spices, and good vanilla extract makes a noticeable difference in the final product. I consider these investments in the dessert’s success.
Questions and Answers
Q: Can I make pumpkin panna cotta without gelatin? A: Yes, you can substitute agar-agar for gelatin. Use 1 tablespoon of agar-agar powder per 2 cups of liquid. Agar-agar sets at room temperature and creates a slightly firmer texture than gelatin. It’s also vegetarian-friendly, making it perfect for those avoiding animal products.
Q: How far in advance can I make pumpkin panna cotta? A: I recommend making it 1-3 days ahead of serving. The flavors actually improve with time, and the texture remains perfect. You can store it covered in the refrigerator for up to 5 days, though I find it’s at its peak within the first three days.
Q: Why did my panna cotta turn out lumpy? A: Lumpy texture usually results from improperly bloomed gelatin or adding the gelatin mixture too quickly. Always bloom gelatin in cold liquid for at least 5 minutes, and gradually incorporate the hot cream mixture while whisking constantly. Straining the final mixture through a fine-mesh sieve also helps ensure smoothness.
Q: Can I use fresh pumpkin instead of canned puree? A: Absolutely! I actually prefer fresh pumpkin when I have the time. Roast sugar pumpkins or pie pumpkins until tender, then puree the flesh until smooth. You may need to strain it to remove excess water and achieve the right consistency. Fresh pumpkin often has a more complex, nuanced flavor.
Q: What’s the best way to unmold panna cotta? A: Dip the bottom of the ramekin in warm water for 10-15 seconds, then run a thin knife around the edges. Place your serving plate upside down over the ramekin, flip both together, and give a gentle shake. The panna cotta should release easily. If it doesn’t, repeat the warm water bath briefly.
Q: Can I make individual portions in different containers? A: Yes! I’ve successfully made panna cotta in wine glasses, small mason jars, and even silicone molds. The key is ensuring your containers are clean and lightly oiled if you plan to unmold. Different shapes and sizes add visual interest to your presentation.
Q: How do I know when the panna cotta is properly set? A: A properly set panna cotta will jiggle slightly when gently shaken but won’t be liquid. It should hold its shape when unmolded and have a smooth, creamy texture when eaten. If it’s too firm, reduce the gelatin next time; if too soft, increase it slightly.
Q: Can I make a lighter version with less cream? A: Yes, you can substitute some of the heavy cream with milk or even Greek yogurt for a lighter texture. However, this will change the richness and mouthfeel. I recommend starting with a 50/50 substitution and adjusting based on your preferences.
Q: What spices work best with pumpkin panna cotta? A: Classic pumpkin pie spices work wonderfully: cinnamon, nutmeg, ginger, and allspice. I also love adding cardamom for complexity or a tiny pinch of white pepper for subtle heat. Start with small amounts and taste as you go – you can always add more, but you can’t take it out.
Q: How should I store leftover panna cotta? A: Cover each portion with plastic wrap, pressing it directly onto the surface to prevent a skin from forming. Store in the refrigerator for up to 5 days. I don’t recommend freezing as it changes the texture, though it’s still edible after thawing.
This pumpkin panna cotta has become one of my signature desserts, and I hope it brings as much joy to your table as it has to mine. The silky texture, warm spices, and elegant presentation make it perfect for any autumn occasion, from casual family dinners to formal holiday celebrations. With practice, you’ll develop your own techniques and preferences, making this recipe truly your own.