There’s something magical about the aroma of freshly baked cinnamon rolls wafting through my kitchen on a weekend morning. But when I discovered the heavenly combination of tart raspberries, warm cinnamon, and bright lemon glaze, my breakfast game changed forever. These raspberry cinnamon rolls aren’t just a treat – they’re an experience that transforms ordinary mornings into something extraordinary.
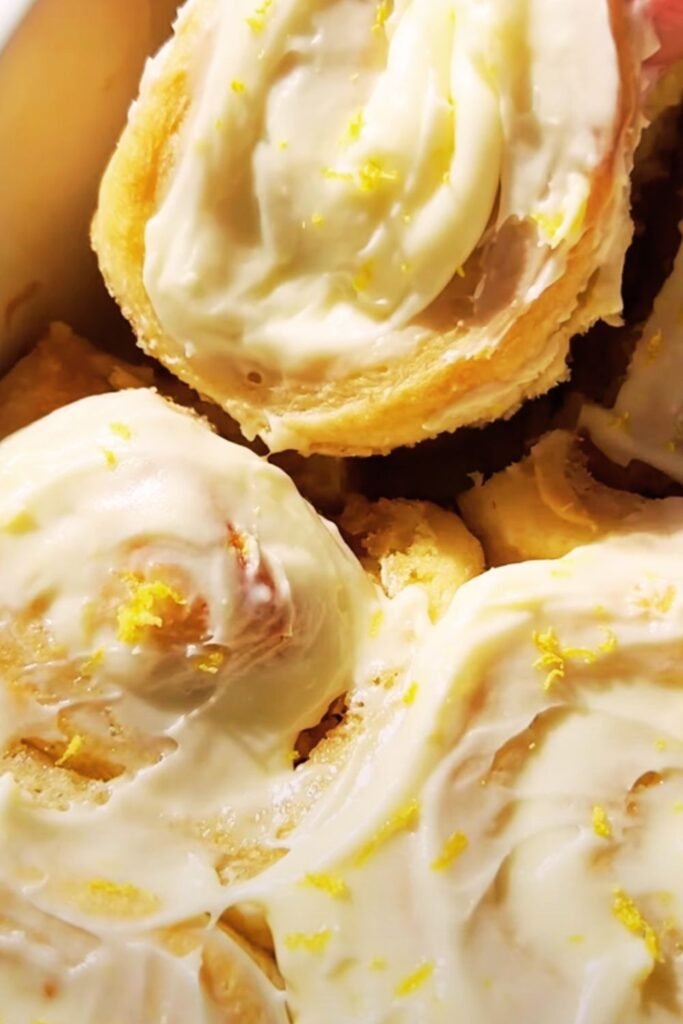
I’ve been perfecting this recipe for years, tweaking the balance of flavors until I achieved what I consider the ultimate breakfast indulgence. The soft, pillowy dough cradles bursts of juicy raspberries while cinnamon weaves its aromatic spell throughout each layer. Then comes the crowning glory – a tangy lemon glaze that cuts through the sweetness and adds a sophisticated brightness that makes these rolls irresistible.
What sets these apart from traditional cinnamon rolls is the careful interplay of flavors and textures. The raspberries provide little pockets of tartness that contrast beautifully with the sweet cinnamon filling, while the lemon glaze adds a citrusy finish that prevents the overall sweetness from becoming overwhelming. It’s a sophisticated twist on a beloved classic that never fails to impress guests and family alike.
Understanding the Key Components
Enriched Dough : A yeasted dough containing eggs, butter, and milk that creates the characteristic soft, tender texture of cinnamon rolls. The enrichment provides richness and helps create the perfect balance between structure and tenderness.
Cinnamon Filling : A mixture of butter, brown sugar, and ground cinnamon that forms the classic flavor base. The butter helps distribute the spices evenly while the brown sugar caramelizes during baking.
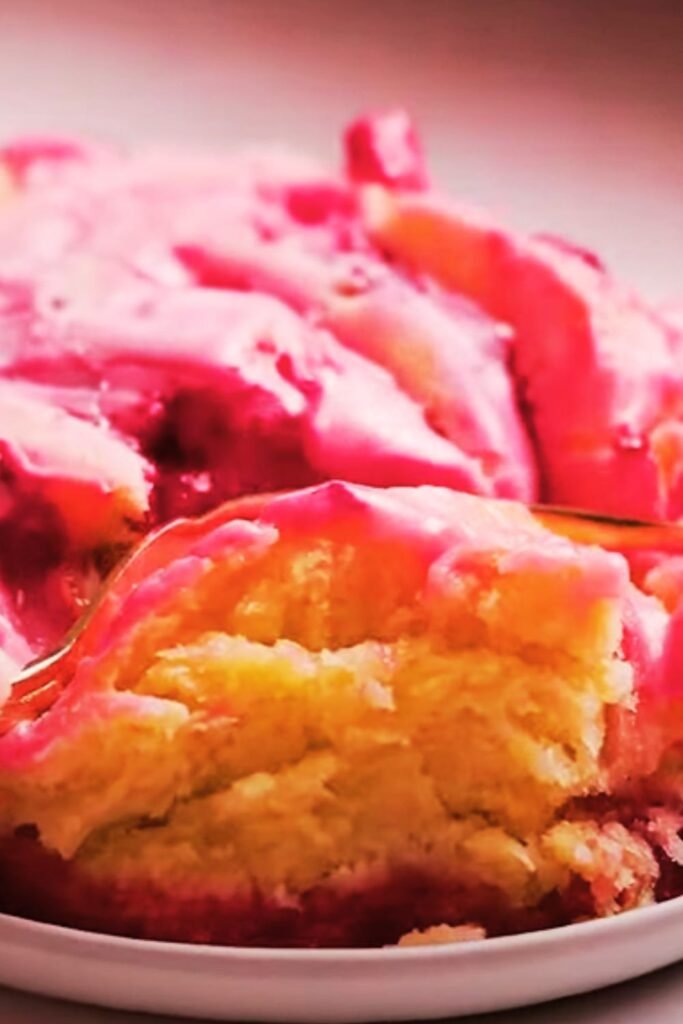
Fresh Raspberries : These delicate berries add bursts of tartness and natural moisture. Their pectin content helps bind the filling while their acidity balances the sweetness.
Lemon Glaze : A simple combination of powdered sugar, lemon juice, and zest that provides a bright, tangy contrast to the rich rolls.
Essential Ingredients and Their Roles
| Ingredient | Quantity | Function | Quality Tips |
|---|---|---|---|
| All-purpose flour | 4 cups | Provides structure and texture | Use unbleached for better flavor |
| Active dry yeast | 2¼ tsp | Leavening agent for rise | Check expiration date; proof before using |
| Whole milk | 1 cup | Adds richness and moisture | Use whole milk for best texture |
| Unsalted butter | ½ cup + 6 tbsp | Fat for tenderness and flavor | European-style butter preferred |
| Large eggs | 2 | Enrichment and binding | Room temperature works best |
| Granulated sugar | ¼ cup | Sweetness and yeast food | Standard white sugar is fine |
| Brown sugar | ¾ cup | Filling sweetness and moisture | Light or dark both work well |
| Ground cinnamon | 2 tbsp | Primary spice flavor | Use Ceylon cinnamon for best taste |
| Fresh raspberries | 1½ cups | Tartness and texture | Frozen can substitute if needed |
| Powdered sugar | 2 cups | Glaze base | Sift if lumpy |
| Fresh lemon juice | 3-4 tbsp | Glaze flavor and consistency | Always use fresh, not bottled |
| Lemon zest | 1 tbsp | Intense citrus flavor | Organic lemons preferred |
Step-by-Step Preparation Method
Preparing the Dough
I start by warming the milk to about 110°F – it should feel comfortably warm against my wrist, like a baby’s bath water. This temperature activates the yeast without killing it. I sprinkle the yeast over the warm milk along with a pinch of sugar, then let it sit for about 5 minutes until it becomes foamy and fragrant. This proofing step ensures my yeast is alive and ready to work its magic.
In my large mixing bowl, I combine the flour and salt, creating a well in the center. I melt 6 tablespoons of butter and let it cool slightly before whisking it with the eggs and remaining sugar. The key here is making sure the butter isn’t too hot, as it could cook the eggs or kill the yeast when combined.
I pour the yeast mixture and egg mixture into the flour well, then use a wooden spoon to gradually incorporate the flour from the edges. The dough will look shaggy at first, but that’s perfectly normal. Once it comes together roughly, I turn it out onto a lightly floured surface for kneading.
Kneading is where the magic happens. I knead the dough for about 8-10 minutes until it becomes smooth, elastic, and slightly tacky but not sticky. The dough should pass the windowpane test – when I stretch a small piece thin enough to see light through it without tearing, I know the gluten has developed properly.
First Rise and Shaping

I place the kneaded dough in a greased bowl, turning it once to coat all surfaces with oil. Covering it with a damp kitchen towel, I let it rise in a warm, draft-free place for about 1 to 1½ hours until doubled in size. I’ve found that placing the bowl on top of my refrigerator or in an oven with just the light on creates the perfect environment.
While the dough rises, I prepare my filling by mixing the brown sugar and cinnamon in a small bowl. I also rinse and gently pat dry my raspberries, being careful not to crush these delicate berries.
Once the dough has doubled, I punch it down gently to release the gases, then turn it out onto a lightly floured surface. Using a rolling pin, I roll it into a large rectangle, approximately 18×12 inches. The key is maintaining even thickness throughout – about ¼ inch thick works perfectly.
Assembly and Second Rise
I brush the dough rectangle with the remaining melted butter, leaving about a ½-inch border along one long edge. This border will help seal the roll when I roll it up. Next, I sprinkle the cinnamon-sugar mixture evenly over the buttered surface, then gently distribute the raspberries on top.
Starting from the long edge opposite the border, I carefully roll the dough into a tight log. The raspberries might try to escape, but I gently coax them back in as I roll. Once rolled, I pinch the seam closed and position the log seam-side down.
Using a sharp knife or dental floss, I cut the log into 12 equal pieces. The dental floss trick works wonderfully – I slide it under the log, cross the ends over the top, and pull to slice cleanly through without compressing the rolls.
I arrange the cut rolls in a greased 9×13-inch baking dish, leaving small spaces between them for expansion. Covering them with a clean kitchen towel, I let them rise again for about 45 minutes until they’re puffy and touching each other.
Baking and Glazing Techniques
Optimal Baking Conditions
| Factor | Specification | Importance |
|---|---|---|
| Oven Temperature | 350°F (175°C) | Ensures even cooking without burning |
| Baking Time | 25-30 minutes | Allows interior to cook while browning top |
| Pan Position | Center rack | Promotes even heat circulation |
| Doneness Test | Golden brown top, internal temp 190°F | Ensures proper cooking throughout |
| Cooling Time | 10 minutes before glazing | Prevents glaze from melting completely |
I preheat my oven to 350°F while the rolls complete their second rise. The timing usually works out perfectly – by the time the oven reaches temperature, the rolls are ready to bake.
I bake the rolls for 25-30 minutes until they’re golden brown on top and sound hollow when tapped. The internal temperature should reach about 190°F if I want to be precise. The raspberries will have released some of their juices, creating beautiful pockets of color throughout the rolls.
Creating the Perfect Lemon Glaze
While the rolls bake, I prepare the lemon glaze. I start by zesting my lemon directly into a medium bowl – the oils from the zest are incredibly aromatic and provide intense flavor. Then I add the powdered sugar and whisk in the fresh lemon juice gradually until I achieve the perfect consistency.
The glaze should be thick enough to coat the back of a spoon but thin enough to drizzle smoothly. If it’s too thick, I add lemon juice a teaspoon at a time. If too thin, I whisk in more powdered sugar. The beauty of this glaze is its adaptability – I can adjust the tartness by varying the amount of lemon juice.
I let the rolls cool for about 10 minutes after removing them from the oven. This brief cooling period is crucial – if I glaze them too hot, the glaze will melt and disappear into the rolls. Too cool, and it won’t penetrate slightly into the surface for optimal flavor integration.
Nutritional Profile and Serving Information
| Nutrient | Per Roll (1/12 recipe) | Daily Value % |
|---|---|---|
| Calories | 385 | 19% |
| Total Fat | 12g | 18% |
| Saturated Fat | 7g | 35% |
| Cholesterol | 55mg | 18% |
| Sodium | 320mg | 13% |
| Total Carbohydrates | 65g | 22% |
| Dietary Fiber | 3g | 12% |
| Sugars | 28g | – |
| Protein | 7g | 14% |
| Vitamin C | 8mg | 10% |
| Calcium | 85mg | 8% |
These rolls are undeniably an indulgent treat, but they also provide some nutritional benefits. The raspberries contribute vitamin C, fiber, and antioxidants, while the enriched flour provides B vitamins and iron. The eggs and milk add protein and calcium to the mix.
I find that one roll is quite satisfying due to the rich, dense nature of the bread and the filling. They’re perfect for special occasions, weekend brunches, or when I want to treat my family to something extraordinary.
Storage and Reheating Guidelines
Proper storage ensures these rolls maintain their quality and flavor for several days. I store them covered at room temperature for up to 2 days, or in the refrigerator for up to a week. For longer storage, I wrap individual rolls tightly and freeze them for up to 3 months.
For reheating, I prefer the oven method. I wrap the rolls in foil and warm them at 300°F for about 10 minutes. This gentle reheating restores their soft texture without drying them out. If I’m in a hurry, 20-30 seconds in the microwave works, though the texture won’t be quite as perfect.
I’ve found that these rolls are actually delicious cold too – the flavors meld beautifully overnight, and the firm texture makes them perfect for grabbing on busy mornings.
Troubleshooting Common Issues
Dense, Heavy Rolls : This usually indicates inactive yeast, insufficient kneading, or not enough rising time. Always proof yeast before using and ensure dough doubles in size during rises.
Filling Leaking Out : Often caused by rolling too loosely or overfilling. Leave that border and roll firmly but not aggressively tight.
Uneven Browning : Check oven temperature with a thermometer and ensure proper rack positioning. Rotate the pan halfway through baking if your oven has hot spots.
Glaze Too Runny or Thick : Adjust consistency with additional powdered sugar or lemon juice as needed. The humidity in your kitchen can affect the glaze consistency.
Creative Variations and Substitutions
I love experimenting with different berry combinations. Blueberries work wonderfully, as do blackberries or a mixture of berries. For a more tropical twist, I sometimes substitute diced mango for the raspberries and use lime instead of lemon in the glaze.
For dietary modifications, I’ve successfully made these with plant-based milk and vegan butter, though the texture is slightly different. Gluten-free flour blends work too, though the dough requires more careful handling and the texture will be denser.
The glaze is endlessly adaptable. Orange juice and zest create a bright citrus variation, while vanilla and a splash of milk make a classic sweet glaze. I’ve even experimented with cream cheese glazes that complement the berry flavors beautifully.
Serving Suggestions and Pairings
These rolls shine brightest at brunch gatherings, paired with fresh fruit salads, crispy bacon, or breakfast sausages. I love serving them alongside scrambled eggs with herbs or a colorful vegetable frittata. The contrast between the sweet rolls and savory elements creates a perfectly balanced meal.
For beverages, I find that freshly brewed coffee or tea complements the flavors beautifully. Hot chocolate works wonderfully for a more indulgent pairing, while fresh orange juice provides a bright citrus contrast that echoes the lemon glaze.
When entertaining, I often prepare the rolls through the shaping stage the night before, then refrigerate them overnight. In the morning, I let them come to room temperature and complete their final rise before baking – this allows me to serve fresh, warm rolls without the early morning preparation rush.
Questions and Answers
Q. Can I prepare these rolls completely ahead of time?
Absolutely! I often make them the day before serving. You can prepare them completely, including baking and glazing, then store covered at room temperature. Reheat gently in a 300°F oven wrapped in foil for about 10 minutes. Alternatively, you can prepare them through the shaping stage, refrigerate overnight, then let them rise and bake fresh in the morning.
Q. What’s the best way to prevent the raspberries from sinking or making the dough soggy?
I gently pat the raspberries dry with paper towels before using them, and I avoid thawing frozen raspberries completely – using them while still slightly frozen helps maintain their shape. Also, don’t overfill with berries, as too many can release excess moisture during baking.
Q. Can I use a stand mixer to make the dough?
Yes! I use the dough hook attachment and mix on low speed until the dough comes together, then knead on medium-low speed for about 6-8 minutes until smooth and elastic. The mixer makes the process much easier, especially when making multiple batches.
Q. How do I know when the dough has risen enough?
The dough should double in size, which typically takes 1 to 1½ hours depending on room temperature. I test by gently pressing two fingers into the dough – if the indentation remains and doesn’t spring back, it’s ready. For the second rise after shaping, the rolls should look puffy and touch each other in the pan.
Q. Why is my lemon glaze separating or looking grainy?
This usually happens when the powdered sugar isn’t fully dissolved or when the proportions are off. Make sure to whisk thoroughly and add the lemon juice gradually. If it’s still grainy, try adding a tiny amount of warm water to help dissolve the sugar completely.
Q. Can I freeze the unbaked rolls?
Yes! After shaping the rolls and placing them in the pan, cover tightly with plastic wrap and freeze for up to 3 months. When ready to bake, thaw in the refrigerator overnight, then let them come to room temperature and complete their final rise before baking. This adds about 30-45 minutes to the rising time.
Q. What’s the secret to getting perfectly even rolls when cutting?
I use unflavored dental floss to cut through the dough log. Slide it underneath, cross the ends over the top, and pull to slice cleanly through without compressing the roll. A very sharp knife works too, but use a sawing motion rather than pressing straight down.
Q. How can I tell when the rolls are perfectly baked?
Look for a golden brown color on top and tap the center roll – it should sound hollow. The internal temperature should reach about 190°F if you want to be precise. The rolls will also pull slightly away from the edges of the pan when done.
These raspberry cinnamon rolls with lemon glaze represent everything I love about homemade baking – the process is meditative and rewarding, while the results bring pure joy to everyone who tastes them. The combination of techniques I’ve shared here, from proper yeast handling to achieving the perfect glaze consistency, will help you create bakery-quality rolls in your own kitchen. Whether you’re hosting a special brunch or simply want to elevate your weekend morning routine, these rolls deliver an unforgettable experience that’s well worth the effort.