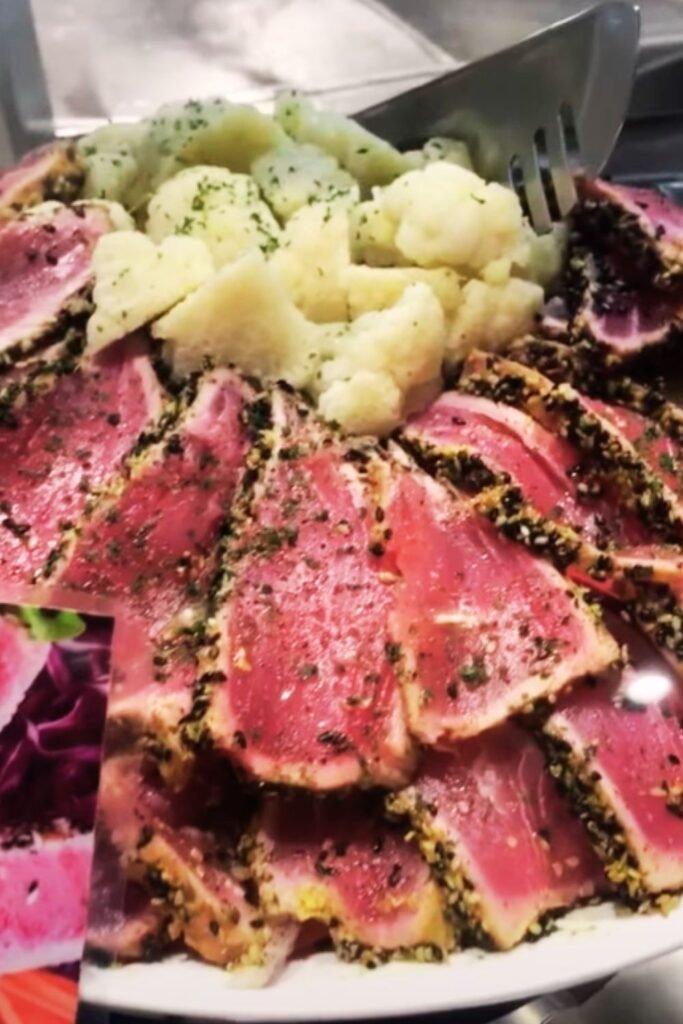
There’s something magical about the moment when you slice into perfectly seared tuna and see that beautiful pink center surrounded by a golden sesame crust. I’ve been perfecting this sesame crusted seared tuna salad bowl for years, and I can honestly say it’s become one of my absolute favorite dishes to prepare when I want to impress guests or treat myself to something special.
The combination of buttery, melt-in-your-mouth tuna with crunchy sesame seeds creates a textural symphony that never fails to delight. When paired with fresh, crisp vegetables and a tangy Asian-inspired dressing, this dish transforms from a simple salad into a gourmet experience that rivals anything you’d find in an upscale restaurant.
What I love most about this recipe is how it balances simplicity with sophistication. While the technique might seem intimidating at first, I’ve broken it down into manageable steps that anyone can follow. The key is understanding a few fundamental principles about searing tuna and building complementary flavors.
Understanding Your Ingredients
Before we dive into the cooking process, let me share what makes each component of this dish so special:
Tuna Selection: The foundation of any great seared tuna dish starts with quality fish. I always look for sushi-grade yellowfin or bigeye tuna that’s been properly handled and stored. The flesh should be deep red, firm to the touch, and have a clean ocean smell—never fishy.
Sesame Seeds: I use a combination of white and black sesame seeds for visual appeal and subtle flavor differences. White sesame seeds offer a nutty, mild flavor, while black sesame seeds provide a slightly more intense, earthy taste.
Fresh Vegetables: The supporting cast of vegetables should provide color, crunch, and nutritional balance. My go-to combination includes mixed greens, cucumber, radishes, and edamame.
Dressing Components: The dressing ties everything together with umami-rich ingredients like soy sauce, rice vinegar, and sesame oil.
Essential Equipment and Tools
Having the right tools makes all the difference in achieving professional results:
- Cast iron or stainless steel pan: These retain heat well and create the perfect sear
- Sharp knife: Essential for clean cuts through the tuna
- Small bowls: For organizing ingredients and creating the sesame coating
- Tongs: For safely handling the hot tuna
- Whisk: For emulsifying the dressing
Nutritional Profile Breakdown
Understanding the nutritional benefits of this dish helps me appreciate it even more:
| Nutrient Category | Primary Sources | Health Benefits |
|---|---|---|
| Protein | Tuna (25-30g per serving) | Muscle building, satiety, metabolism support |
| Healthy Fats | Sesame seeds, sesame oil, avocado | Heart health, brain function, nutrient absorption |
| Fiber | Mixed greens, vegetables | Digestive health, blood sugar regulation |
| Vitamins | Leafy greens (K, A, C), tuna (B12, D) | Immune function, bone health, energy metabolism |
| Minerals | Sesame seeds (calcium, magnesium), tuna (selenium) | Bone strength, antioxidant protection |
| Antioxidants | Colorful vegetables, sesame seeds | Anti-inflammatory, cellular protection |
Step-by-Step Preparation Guide
Preparing the Tuna
The tuna preparation is where precision matters most. I start by removing my tuna from the refrigerator about 15 minutes before cooking—this allows it to come closer to room temperature, ensuring more even cooking.
First, I pat the tuna completely dry with paper towels. Any surface moisture will prevent proper searing and create steam instead of that beautiful crust we’re after. I then season all surfaces generously with coarse sea salt and freshly cracked black pepper.
For the sesame coating, I combine equal parts white and black sesame seeds in a shallow dish. The key is pressing the seeds firmly into the tuna surface—I use my palms to really embed them into the flesh. This creates that stunning visual contrast and ensures the seeds won’t fall off during cooking.

The Perfect Searing Technique
Heat control is absolutely critical for searing tuna properly. I preheat my cast iron pan over medium-high heat until it’s smoking hot—this usually takes about 3-4 minutes. A drop of water should sizzle and evaporate immediately when the pan is ready.
I add a thin layer of neutral oil with a high smoke point, like grapeseed or avocado oil. The oil should shimmer but not smoke. Then comes the moment of truth—placing the tuna in the pan. I hear that satisfying sizzle and resist the urge to move it around.
The timing depends on the thickness of my tuna, but I typically sear for 1-2 minutes per side for a 1-inch thick piece. I’m looking for a golden-brown crust while keeping the center beautifully pink. Using tongs, I carefully flip the tuna and repeat on all sides if I have a thick piece.
Creating the Salad Base
While the tuna rests, I prepare my salad components. I prefer a mix of textures and colors:
- Greens: Baby spinach, arugula, and butter lettuce provide different flavors and textures
- Crunch: Thinly sliced cucumber, radishes, and snap peas add refreshing crispness
- Creaminess: Sliced avocado brings richness that complements the tuna
- Color: Shredded purple cabbage and julienned carrots make the bowl visually stunning
I arrange these components thoughtfully in my serving bowl, creating sections that showcase each ingredient while maintaining visual balance.
The Perfect Dressing Formula
My dressing recipe has evolved over years of experimentation. The base combines:
Umami Elements:
- 3 tablespoons soy sauce (low sodium preferred)
- 1 tablespoon rice vinegar
- 1 teaspoon sesame oil
Aromatics:
- 1 clove minced garlic
- 1 teaspoon fresh grated ginger
- 1 green onion, finely chopped
Balance Components:
- 1 tablespoon honey or maple syrup
- 1 teaspoon sriracha (optional, for heat)
- 1 tablespoon neutral oil
I whisk these ingredients vigorously until they emulsify into a glossy, cohesive dressing. The key is tasting and adjusting—sometimes I need more acid, sometimes more sweetness, depending on the other flavors in my bowl.
Assembly and Presentation Techniques
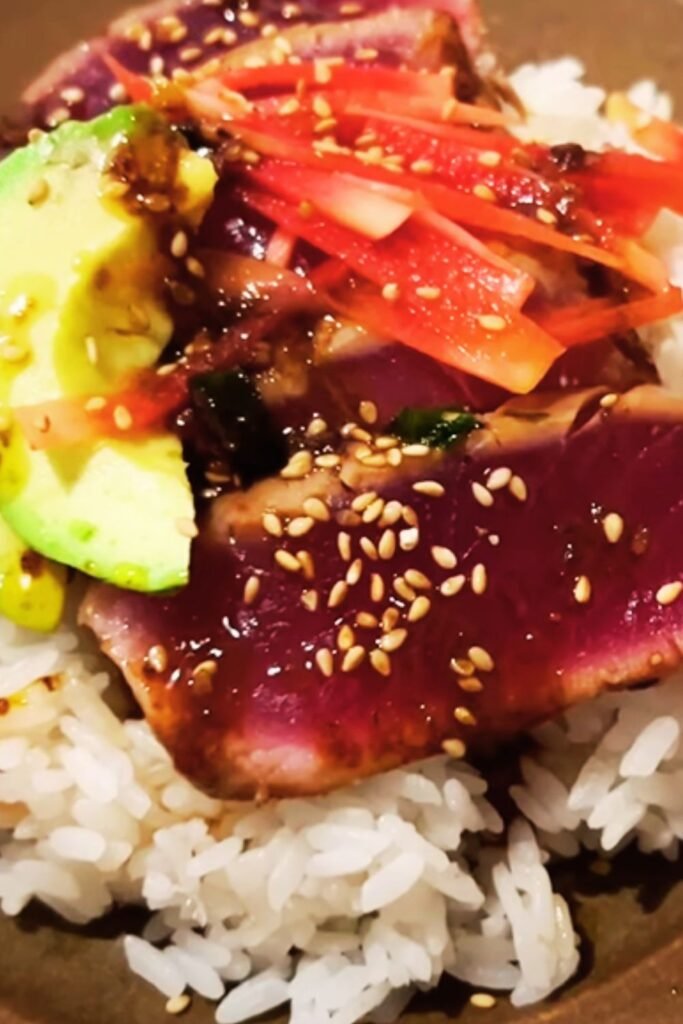
The final assembly is where this dish transforms from good to spectacular. I start with my prepared salad base, then slice the rested tuna into ½-inch thick pieces using a very sharp knife in one smooth motion—no sawing back and forth.
I fan the tuna slices across one section of the bowl, allowing the beautiful pink interior to show. Then I add final garnishes:
- Pickled vegetables: Quick-pickled cucumber or radish adds bright acidity
- Fresh herbs: Cilantro, mint, or shiso leaves provide aromatic freshness
- Nuts or seeds: Toasted pine nuts or additional sesame seeds for extra crunch
- Citrus: A few segments of orange or grapefruit for brightness
Advanced Variations and Customizations
Once you’ve mastered the basic recipe, there are countless ways to make it your own:
Protein Variations
| Alternative | Cooking Method | Key Differences |
|---|---|---|
| Salmon | Same searing technique | Fattier texture, pairs well with citrus |
| Tofu | Press and marinate first | Vegetarian option, absorbs flavors well |
| Chicken | Requires full cooking | Slice thin for quick cooking |
Seasonal Adaptations
Spring Version: I incorporate asparagus, peas, and fresh herbs like dill and chives. The dressing gets brightened with lemon zest.
Summer Version: Juicy tomatoes, corn, and basil take center stage. I sometimes add a touch of balsamic to the dressing.
Fall Version: Roasted butternut squash, pomegranate seeds, and toasted walnuts create warmth and richness.
Winter Version: Massaged kale, roasted beets, and orange segments provide hearty satisfaction.
Troubleshooting Common Issues
Through years of making this dish, I’ve encountered and solved several common problems:
Overcooked Tuna: This usually happens when the pan isn’t hot enough initially, causing longer cooking times. The solution is ensuring proper heat and having confidence in the timing.
Seeds Falling Off: This occurs when the tuna surface is too wet or the seeds aren’t pressed firmly enough. Pat the fish completely dry and really press those seeds in.
Bland Flavor: Under-seasoning is often the culprit. Don’t be shy with salt and pepper on the tuna, and taste your dressing multiple times during preparation.
Soggy Salad: Dress the greens just before serving, and keep wet ingredients like tomatoes separate until the last moment.
Meal Prep and Storage Guidelines
This dish works wonderfully for meal prep with a few modifications:
- Prepare components separately: Store seared tuna, prepared vegetables, and dressing in separate containers
- Refrigerate for up to 3 days: The tuna quality is best within 24 hours, but remains safe for 3 days
- Assembly tips: Add dressing and delicate ingredients just before eating
For the best results, I slice the tuna fresh each time rather than pre-slicing it for storage.
Wine and Beverage Pairings
The complex flavors in this dish pair beautifully with various beverages:
Non-Alcoholic Options:
- Green tea complements the Asian flavors
- Sparkling water with cucumber enhances the fresh elements
- Fresh ginger kombucha adds probiotic benefits
Light Options:
- Sake brings out the umami elements
- Light, citrusy cocktails like a cucumber gimlet
Cost Analysis and Budget Tips
| Component | Estimated Cost | Money-Saving Tips |
|---|---|---|
| Sushi-grade tuna | $15-20/lb | Buy when on sale, freeze properly |
| Sesame seeds | $3-4/container | Buy in bulk, store airtight |
| Fresh vegetables | $8-12 total | Use seasonal produce, grow herbs |
| Pantry ingredients | $2-3 per batch | Buy larger sizes of soy sauce, vinegar |
Total estimated cost per serving: $8-12, compared to $25-35 at restaurants.
Health Benefits Deep Dive
This dish packs impressive nutritional density:
Heart Health: The omega-3 fatty acids in tuna, combined with the monounsaturated fats from sesame oil and avocado, support cardiovascular health.
Brain Function: Tuna provides DHA, essential for cognitive function, while the variety of vegetables supplies antioxidants that protect against oxidative stress.
Weight Management: High protein content promotes satiety, while the fiber from vegetables helps regulate blood sugar and digestion.
Bone Health: Sesame seeds are surprisingly rich in calcium, and the vitamin K from leafy greens supports bone metabolism.
Cultural Context and History
The fusion of Japanese-inspired tuna preparation with Western salad concepts reflects our increasingly global culinary landscape. Seared tuna, or “tuna tataki,” has roots in Japanese cuisine, where the technique preserves the fish’s delicate texture while adding surface flavor.
The sesame crust adaptation draws from both Japanese and Middle Eastern culinary traditions, where sesame seeds play prominent roles in both savory and sweet applications.
Questions and Answers
Q: How do I know if my tuna is truly sushi-grade? A: Purchase from reputable fishmongers who specialize in sushi-grade fish. The tuna should be labeled as sushi or sashimi grade, have been flash-frozen to eliminate parasites, and display deep red color with no brown spots or strong odors.
Q: Can I use frozen tuna for this recipe? A: Yes, but thaw it properly in the refrigerator overnight. Never use a microwave or warm water, as this compromises texture. Pat completely dry before seasoning and coating.
Q: What if I don’t have a cast iron pan? A: A heavy-bottomed stainless steel pan works well. Avoid non-stick pans as they don’t get hot enough for proper searing. Carbon steel is another excellent option.
Q: How can I tell when the tuna is perfectly seared? A: Look for a golden-brown crust that’s about ⅛ inch thick. The center should remain pink to red. If you’re unsure, use an instant-read thermometer—the center should be around 115°F.
Q: Is it safe to eat tuna this rare? A: When using properly handled sushi-grade tuna, yes. The high-heat searing kills surface bacteria while preserving the interior. However, pregnant women, young children, and immunocompromised individuals should consult their healthcare providers.
Q: Can I make this dish vegetarian? A: Absolutely! Substitute firm tofu or tempeh for the tuna. Press the tofu well, marinate for extra flavor, and use the same searing technique. Watermelon “steaks” also work surprisingly well with the sesame coating.
Q: How far in advance can I prepare the components? A: The dressing improves when made a day ahead. Vegetables can be prepped morning-of, but sear the tuna just before serving for optimal texture and temperature.
Q: What’s the best way to slice the seared tuna? A: Use your sharpest knife and slice in one smooth motion—no sawing. Cut against the grain for the most tender texture, and aim for ½-inch thick slices to showcase the sear and interior.
Q: Can I use different types of sesame seeds? A: Yes! Try toasted sesame seeds for deeper flavor, or mix in some hemp hearts or poppy seeds for variation. Just ensure whatever you use will adhere well to the tuna surface.
Q: What should I do if my dressing separates? A: This happens when the oil isn’t properly emulsified. Add a small amount of Dijon mustard or mayonnaise as an emulsifier, then whisk vigorously while slowly adding the separated mixture back in.
This sesame crusted seared tuna salad bowl represents everything I love about cooking—it’s elegant yet approachable, healthy yet indulgent, and infinitely customizable to your preferences. The key is understanding the fundamental techniques and then making the dish your own through creative variations and personal touches.
Whether you’re preparing this for a special dinner party or treating yourself to a restaurant-quality meal at home, remember that confidence in the kitchen comes with practice. Don’t be afraid to adjust seasonings, try different vegetables, or experiment with the dressing components. The best dishes are the ones that reflect your personal taste preferences while honoring the integrity of quality ingredients.