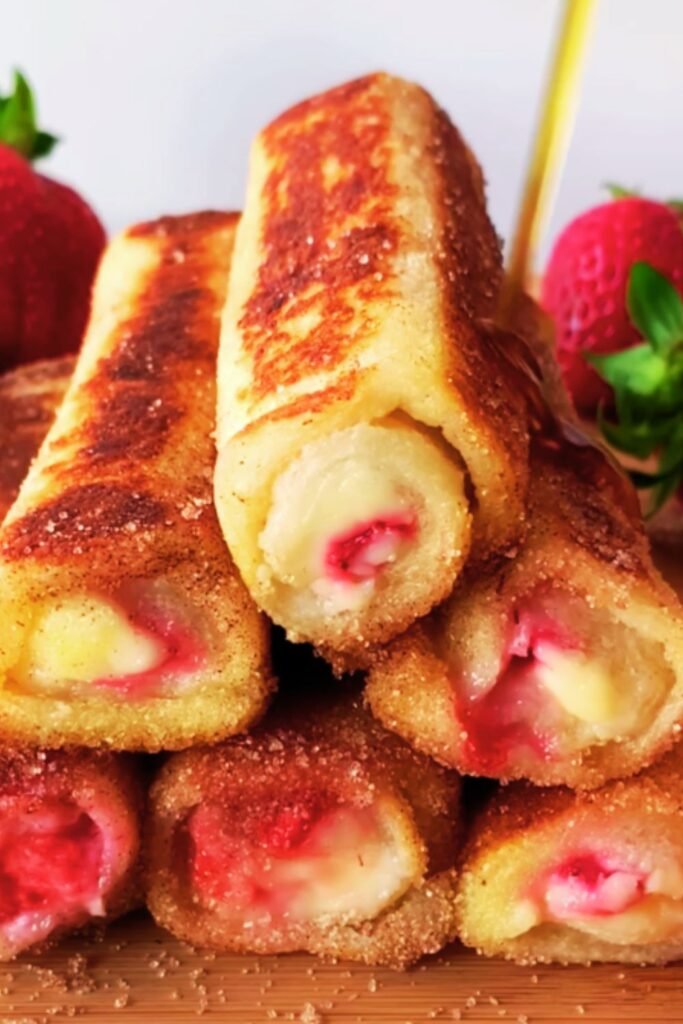
I’ve always been fascinated by how traditional recipes can be transformed into something completely new and exciting. When I first discovered vatrushka buns during my culinary adventures, I knew I had to create something special with them. That’s how my strawberry cheesecake vatrushka buns were born – a delightful marriage between the pillowy softness of Eastern European vatrushka and the creamy richness of American cheesecake.
These buns represent everything I love about fusion baking. The tender, slightly sweet yeast dough cradles a luscious cheesecake filling that’s been elevated with fresh strawberries and a hint of vanilla. Each bite delivers the comfort of homemade bread with the indulgence of your favorite dessert.
Understanding Vatrushka: The Foundation of Our Recipe
Vatrushka (also spelled Watrushka): A traditional Eastern European pastry consisting of a yeast-based dough shaped into a ring or well, typically filled with sweet cheese mixture, jam, or other sweet fillings.
Cheesecake Filling: A rich, creamy mixture made primarily from cream cheese, eggs, sugar, and flavorings, similar to traditional cheesecake but adapted for baking within pastry.
Proofing: The process of allowing yeast dough to rise, developing flavor and creating the characteristic light, airy texture.
The beauty of vatrushka lies in its versatility. While traditional versions often feature a simple cottage cheese filling, my adaptation incorporates the sophisticated flavors of cheesecake with the bright acidity of fresh strawberries. This combination creates a pastry that’s perfect for breakfast, afternoon tea, or as an elegant dessert.
Essential Ingredients and Their Roles
Creating the perfect strawberry cheesecake vatrushka requires understanding how each ingredient contributes to the final result. I’ve spent countless hours perfecting this recipe, and I can tell you that quality ingredients make all the difference.
| Ingredient Category | Ingredient | Quantity | Purpose | Quality Tips |
|---|---|---|---|---|
| Dough Base | Bread flour | 3½ cups | Provides structure and elasticity | Use high-protein flour for better texture |
| Active dry yeast | 2¼ tsp | Creates rise and airy texture | Check expiration date; proof before using | |
| Whole milk | 1 cup | Adds richness and tenderness | Use warm milk (110°F) for yeast activation | |
| Unsalted butter | 6 tbsp | Contributes flavor and moisture | Room temperature for easy mixing | |
| Large eggs | 2 | Binds ingredients, adds richness | Use room temperature eggs | |
| Granulated sugar | ¼ cup | Feeds yeast, adds sweetness | Fine granulation dissolves better | |
| Cheesecake Filling | Cream cheese | 16 oz | Primary base for filling | Full-fat, room temperature |
| Powdered sugar | ¾ cup | Sweetens without grittiness | Sift to prevent lumps | |
| Large egg | 1 | Binds and sets the filling | Room temperature for smooth mixing | |
| Vanilla extract | 2 tsp | Enhances overall flavor | Pure vanilla, not imitation | |
| Heavy cream | 3 tbsp | Creates silky texture | 35% fat content minimum | |
| Strawberry Component | Fresh strawberries | 2 cups | Provides fruity brightness | Firm, ripe berries |
| Granulated sugar | 2 tbsp | Balances strawberry acidity | Adjust based on berry sweetness | |
| Cornstarch | 1 tsp | Prevents excess moisture | Prevents soggy bottoms |
The key to success lies in temperature control. I always ensure my dairy ingredients are at room temperature before beginning. This simple step prevents lumps in both the dough and filling, creating that smooth, professional texture we’re after.
Step-by-Step Preparation Method
Preparing the Yeast Dough
My approach to making vatrushka dough focuses on developing flavor while maintaining the light, pillowy texture that makes these buns so special. I start by proofing the yeast to ensure it’s active and ready to work its magic.
- Activate the yeast: In a small bowl, combine warm milk (110°F) with a pinch of sugar and sprinkle the yeast over the surface. Let it sit for 5-10 minutes until foamy and fragrant.
- Create the dough base: In a large mixing bowl, whisk together the flour and remaining sugar. Create a well in the center and add the proofed yeast mixture, beaten eggs, and softened butter.
- Mix and knead: Using a wooden spoon, gradually incorporate the flour into the wet ingredients until a shaggy dough forms. Turn onto a floured surface and knead for 8-10 minutes until the dough becomes smooth, elastic, and slightly tacky.
- First rise: Place the dough in a greased bowl, cover with a damp towel, and let rise in a warm place for 1-2 hours until doubled in size.
The kneading process is crucial here. I look for the dough to pass the “windowpane test” – when stretched thin, it should be translucent without tearing. This indicates proper gluten development.
Crafting the Cheesecake Filling
The filling is where the magic happens. I’ve refined this recipe to achieve the perfect balance between richness and lightness, ensuring it complements rather than overwhelms the delicate dough.
- Prepare cream cheese: Ensure your cream cheese is completely at room temperature. I often cut it into cubes and let it sit for 30 minutes before using.
- Mix the base: In a medium bowl, beat the cream cheese with an electric mixer until completely smooth and fluffy, about 3-4 minutes.
- Add sweetness: Gradually add powdered sugar, beating until well incorporated and no lumps remain.
- Incorporate egg and flavorings: Beat in the egg, vanilla extract, and heavy cream until the mixture is silky and uniform.
Preparing the Strawberry Component
Fresh strawberries add a bright, acidic note that cuts through the richness of the cheesecake filling. I prepare them in a way that concentrates their flavor while preventing excess moisture from making the buns soggy.
- Prepare strawberries: Hull and dice the strawberries into small, uniform pieces (about ¼-inch).
- Macerate: Toss the diced strawberries with sugar and cornstarch. Let them sit for 15-20 minutes to draw out juices and create a light syrup.
- Strain if needed: If the strawberries release excessive liquid, strain them briefly, reserving the liquid for glazing if desired.
Assembly and Baking Techniques
The assembly process is where these buns truly come together. I’ve developed a technique that ensures even distribution of filling while maintaining the characteristic vatrushka shape.
Shaping the Buns
- Divide the dough: After the first rise, gently deflate the dough and divide it into 12 equal portions (approximately 3 oz each).
- Shape individual buns: Roll each portion into a smooth ball, then flatten into a 4-inch circle. Using your fingers or the bottom of a measuring cup, create a well in the center, leaving a ¾-inch border.
- Create the rim: Gently pinch and shape the edges to create a slight lip that will contain the filling.
Filling and Final Assembly
The order of assembly is crucial for achieving the perfect balance of flavors and textures in each bite.
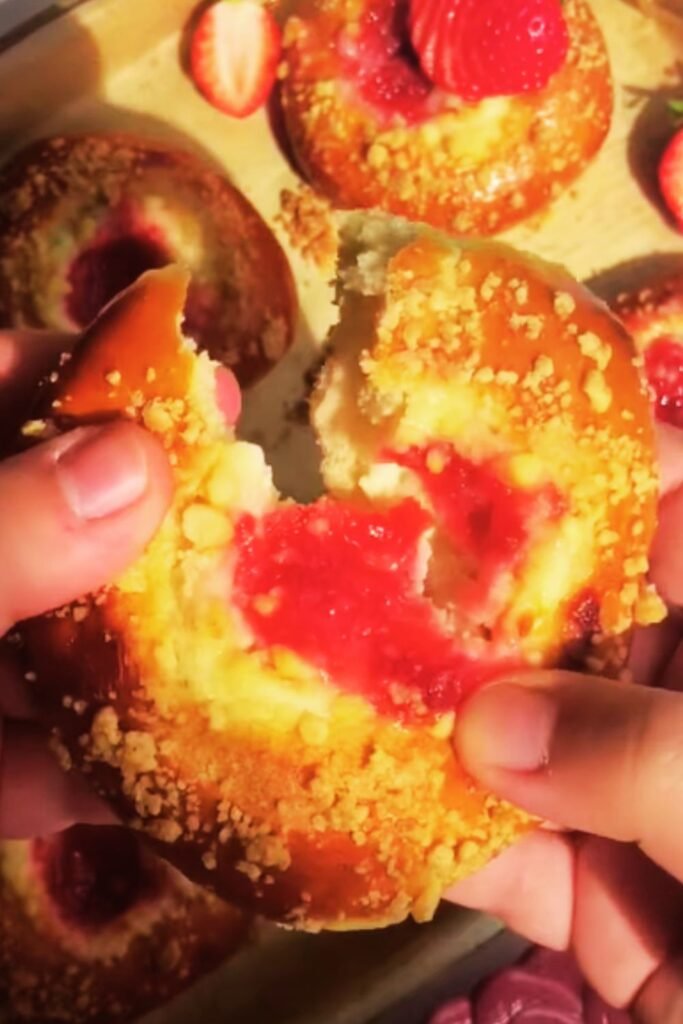
- Add cheesecake filling: Spoon approximately 2 tablespoons of cheesecake mixture into each well, spreading it evenly but not overfilling.
- Top with strawberries: Distribute the macerated strawberries evenly over the cheesecake filling, pressing them lightly into the surface.
- Final proof: Cover the assembled buns with a clean kitchen towel and let them rise for 30-45 minutes until slightly puffed.
Baking for Perfection
My baking technique ensures golden, evenly cooked buns with a perfectly set filling that won’t overflow or curdle.
Baking Parameters:
- Temperature: 350°F (175°C)
- Position: Middle rack
- Time: 18-22 minutes
- Visual cues: Golden brown edges, set filling that doesn’t jiggle
I always rotate the pan halfway through baking to ensure even browning. The buns are done when the dough is golden brown and the filling is set but still slightly soft in the center.
Nutritional Information and Dietary Considerations
Understanding the nutritional content helps you enjoy these treats as part of a balanced diet. Here’s a detailed breakdown per serving:
| Nutritional Component | Per Bun (1/12 recipe) | Daily Value % |
|---|---|---|
| Calories | 285 | 14% |
| Total Fat | 12g | 15% |
| Saturated Fat | 7g | 35% |
| Cholesterol | 65mg | 22% |
| Sodium | 180mg | 8% |
| Total Carbohydrates | 38g | 14% |
| Dietary Fiber | 2g | 7% |
| Sugars | 18g | – |
| Protein | 8g | 16% |
| Vitamin C | 15mg | 17% |
| Calcium | 95mg | 7% |
| Iron | 2mg | 11% |
Dietary Modifications
I’ve successfully adapted this recipe for various dietary needs:
Gluten-Free Version: Substitute the bread flour with a high-quality gluten-free flour blend containing xanthan gum. The texture will be slightly different but still delicious.
Reduced Sugar: You can reduce the sugar in both the dough and filling by up to 25% without significantly affecting the texture.
Dairy-Free Alternative: Use plant-based cream cheese and milk alternatives, though the texture and flavor will vary.
Storage and Serving Recommendations

Proper storage is essential for maintaining the quality and safety of these delicate pastries. I’ve developed storage methods that preserve both texture and flavor.
Short-term Storage (1-3 days)
Store cooled buns in an airtight container at room temperature for up to 2 days, or refrigerate for up to 3 days. The refrigerated buns can be gently warmed in a 300°F oven for 5-8 minutes before serving.
Long-term Storage (up to 3 months)
For longer storage, I recommend freezing the buns individually wrapped in plastic wrap, then placed in a freezer bag. Thaw overnight in the refrigerator and warm before serving.
Serving Suggestions
These versatile buns shine in various serving contexts:
- Morning treat: Serve warm with coffee or tea for a luxurious breakfast
- Afternoon dessert: Pair with fresh fruit and a dollop of whipped cream
- Special occasions: Dust with powdered sugar for an elegant presentation
- Picnic fare: Transport easily and serve at room temperature
Troubleshooting Common Issues
Throughout my years of making these buns, I’ve encountered and solved numerous challenges. Here are the most common issues and my proven solutions:
Dense or Heavy Texture
Causes: Over-kneading, inactive yeast, or insufficient rising time Solutions: Ensure yeast is fresh and properly activated; knead just until smooth; allow adequate rising time in a warm environment
Filling Overflow
Causes: Overfilling, inadequate dough rim, or filling too thin Solutions: Measure filling carefully; create a proper border; ensure filling has right consistency
Soggy Bottoms
Causes: Excess moisture from strawberries or underbaking Solutions: Drain macerated strawberries; bake on lower rack; ensure complete cooking
Uneven Browning
Causes: Oven hot spots or improper positioning Solutions: Rotate pan midway through baking; use center rack position
Advanced Variations and Flavor Combinations
Once you’ve mastered the basic recipe, I encourage experimenting with these delicious variations I’ve developed:
Seasonal Fruit Alternatives
Summer: Replace strawberries with fresh peaches, blueberries, or mixed berries Fall: Try diced apples with cinnamon, or pears with cardamom Winter: Cranberries with orange zest create a festive flavor
Flavor Enhancement Options
Lemon Twist: Add lemon zest to both dough and filling for bright citrus notes Chocolate Indulgence: Incorporate mini chocolate chips into the cheesecake filling Spiced Version: Add warm spices like cinnamon, nutmeg, or cardamom to the dough
The Cultural Heritage Behind Vatrushka
Understanding the cultural significance of vatrushka adds depth to our appreciation of this recipe. These traditional pastries have been beloved in Eastern European countries for generations, often served during celebrations and family gatherings.
My adaptation honors this heritage while creating something entirely new. The combination of traditional technique with contemporary flavors represents the beautiful evolution of culinary traditions as they travel across cultures and generations.
Professional Tips for Success
After making hundreds of these buns, I want to share some professional insights that will elevate your results:
Temperature is crucial: Use a thermometer for milk temperature and oven accuracy Timing matters: Don’t rush the rising process; good bread takes time Quality ingredients: Invest in high-quality vanilla and fresh strawberries Practice patience: Let the dough tell you when it’s ready, not the clock
The most rewarding aspect of making these strawberry cheesecake vatrushka buns is sharing them with others. There’s something magical about watching someone bite into that perfect combination of tender bread, creamy filling, and bright strawberry flavor for the first time.
Whether you’re baking for a special occasion or simply treating yourself to something extraordinary, these buns deliver an experience that goes beyond ordinary pastry. They represent the joy of baking, the pleasure of sharing, and the satisfaction of creating something beautiful with your own hands.
Frequently Asked Questions
Q: Can I make the dough ahead of time? Yes, you can prepare the dough and let it rise slowly in the refrigerator overnight. This actually improves the flavor. Bring to room temperature before shaping.
Q: What’s the best way to tell if my yeast is still active? Active yeast will foam and bubble within 5-10 minutes when mixed with warm liquid and sugar. If it doesn’t foam, your yeast is likely expired.
Q: Can I use frozen strawberries instead of fresh? I don’t recommend frozen strawberries as they release too much moisture when thawed. If you must use them, thaw completely and drain thoroughly before using.
Q: How do I prevent the cream cheese filling from curdling? Ensure all ingredients are at room temperature before mixing, and don’t overmix once the egg is added. Mix just until combined.
Q: Why did my buns turn out flat instead of puffy? This usually indicates over-proofed dough or inactive yeast. Make sure your yeast is fresh and don’t let the dough rise too long.
Q: Can I make mini versions of these buns? Absolutely! Divide the dough into 24 pieces instead of 12, reduce baking time to 12-15 minutes, and adjust filling quantities accordingly.
Q: What’s the best way to reheat leftover buns? Warm them in a 300°F oven for 5-8 minutes. Avoid microwaving as it can make the dough tough.
Q: Can I prepare the filling in advance? Yes, the cheesecake filling can be made up to 2 days ahead and stored covered in the refrigerator. Bring to room temperature before using.
Q: How do I know when the buns are perfectly baked? The dough should be golden brown and spring back lightly when touched. The filling should be set but still slightly soft in the center.
Q: What other fruits work well in this recipe? Blueberries, raspberries, diced peaches, or even apple pieces work beautifully. Adjust sugar content based on the fruit’s natural sweetness.