I still remember the first time I attempted to make a strawberry swirl cheesecake. What started as a simple dessert craving turned into an obsession with perfecting this stunning combination of tangy cream cheese, sweet strawberries, and buttery graham cracker crust. After countless trials, tweaks, and taste tests, I’ve mastered the art of creating a cheesecake that’s not only visually spectacular but also incredibly delicious.
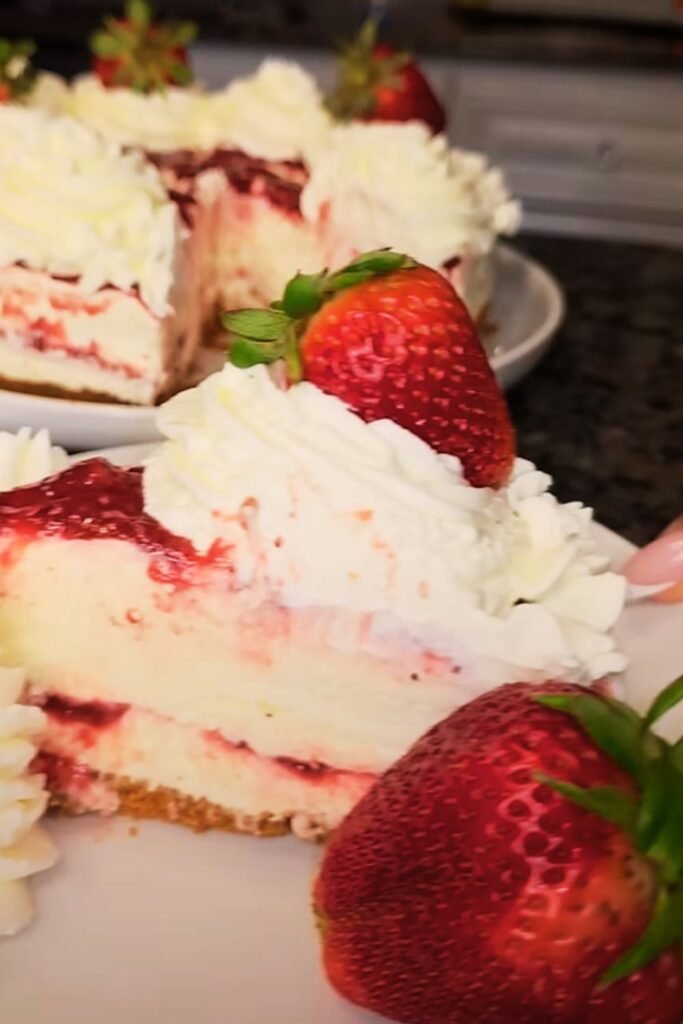
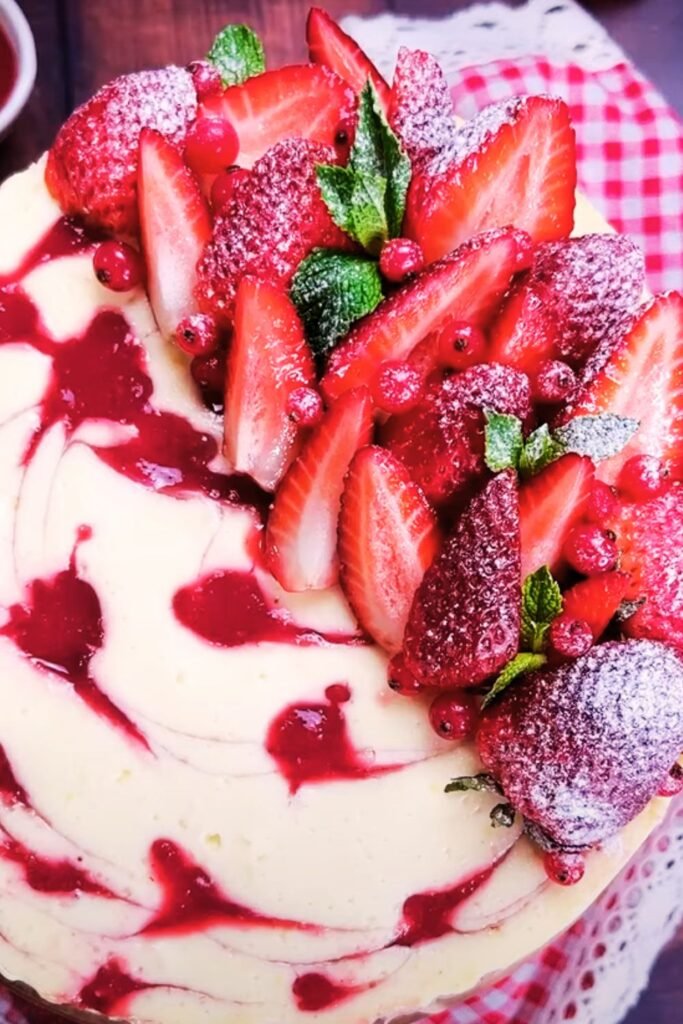
There’s something magical about the way fresh strawberry puree ribbons through rich, velvety cheesecake filling. The contrast of colors creates an Instagram-worthy dessert that tastes even better than it looks. Whether you’re planning a special celebration or simply want to treat yourself to something extraordinary, this strawberry swirl cheesecake will become your go-to showstopper dessert.
Understanding the Perfect Cheesecake Foundation
Before diving into the specifics of creating those beautiful strawberry swirls, I want to share what I’ve learned about building the perfect cheesecake base. The foundation of any exceptional cheesecake lies in understanding your ingredients and techniques.
Cream Cheese Quality: Always use full-fat cream cheese at room temperature. I cannot stress this enough – cold cream cheese will create lumps that no amount of mixing can eliminate. I typically remove my cream cheese from the refrigerator 2-3 hours before baking, or you can soften it quickly by placing unwrapped blocks in a microwave-safe bowl and microwaving on 50% power for 1-2 minutes.
Eggs at Room Temperature: Room temperature eggs incorporate more easily and create a smoother texture. If you forget to take them out early, place them in a bowl of warm water for 10-15 minutes.
Mixing Technique: The secret to a silky-smooth cheesecake is gentle mixing. I beat the cream cheese until completely smooth, then gradually add other ingredients, mixing just until combined. Overmixing incorporates too much air, which can cause cracks during baking.
Essential Ingredients Breakdown
| Ingredient | Quantity | Purpose | Quality Tips |
|---|---|---|---|
| Cream Cheese | 32 oz (4 packages) | Main base, provides richness | Use Philadelphia or similar high-quality brand |
| Fresh Strawberries | 2 cups | Swirl and garnish | Choose firm, bright red berries |
| Granulated Sugar | 1 cup | Sweetening filling | Regular white sugar works best |
| Large Eggs | 4 eggs | Binding and structure | Room temperature is crucial |
| Vanilla Extract | 2 teaspoons | Flavor enhancement | Pure vanilla, not imitation |
| Graham Crackers | 1½ cups crumbs | Crust foundation | Honey grahams add extra sweetness |
| Unsalted Butter | 6 tablespoons | Crust binding | European-style butter for richness |
| Sour Cream | ½ cup | Tangy balance | Full-fat for best texture |
| Heavy Cream | ¼ cup | Smooth consistency | 35% fat content minimum |
Creating the Perfect Graham Cracker Crust
The crust serves as more than just a foundation – it’s the textural contrast that makes each bite interesting. I’ve experimented with various crust combinations, and this graham cracker version consistently delivers the perfect balance of sweetness and crunch.
Preparation Steps:
- Preheat your oven to 350°F (175°C)
- Crush graham crackers into fine crumbs using a food processor or by placing them in a sealed bag and rolling with a rolling pin
- Mix crumbs with melted butter until the mixture resembles wet sand
- Press firmly into the bottom of a 9-inch springform pan
- Pre-bake for 10 minutes to set the crust
I learned through trial and error that pressing the crust too loosely results in a crumbly mess when slicing, while pressing too firmly creates a rock-hard base. The key is applying even, moderate pressure using the bottom of a measuring cup.
Mastering the Strawberry Swirl Component
The strawberry swirl is where this cheesecake truly shines. Creating the perfect swirl requires understanding how strawberries behave when cooked and how to achieve the ideal consistency for marbling.
Strawberry Puree Preparation:
- Select 2 cups of fresh, ripe strawberries
- Hull and quarter the berries
- Cook with 3 tablespoons sugar over medium heat for 8-10 minutes
- Strain through fine-mesh sieve to remove seeds (optional, but creates smoother swirls)
- Cool completely before adding to cheesecake batter
The cooking process concentrates the strawberry flavor while reducing excess moisture that could make your cheesecake soggy. I always taste the puree and adjust sweetness as needed – some strawberry batches are naturally sweeter than others.
Step-by-Step Cheesecake Assembly
Creating the perfect strawberry swirl cheesecake requires patience and attention to detail. I’ll walk you through each step of my tried-and-true method.
Filling Preparation:
- Beat softened cream cheese until completely smooth (3-4 minutes)
- Gradually add sugar, beating until well combined
- Add eggs one at a time, mixing on low speed after each addition
- Blend in vanilla extract, sour cream, and heavy cream
- Mix just until smooth – avoid overbeating
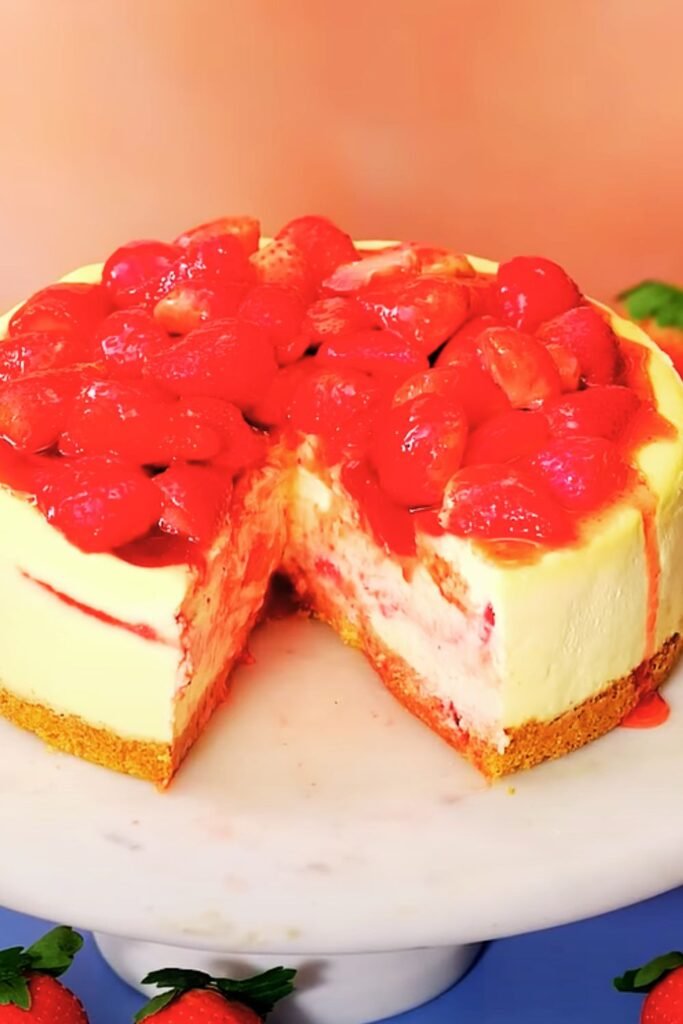
Creating the Swirl Effect: Pour half the cheesecake filling over the prepared crust. Drop spoonfuls of strawberry puree over the surface, then pour the remaining filling on top. Add more strawberry puree in dollops across the surface.
Using a knife or skewer, create swirl patterns by drawing the tip through the batter in figure-eight motions. Don’t overswirl – you want distinct ribbons of strawberry running through the cheesecake, not a uniformly pink mixture.
Baking Techniques for Success
The baking process is where many home bakers encounter challenges. I’ve perfected a foolproof method that prevents cracks and ensures even cooking throughout.
Water Bath Setup:
- Wrap the outside of your springform pan with heavy-duty aluminum foil
- Place the pan in a larger roasting pan
- Pour hot water halfway up the sides of the springform pan
- This gentle, humid heat prevents cracking and promotes even baking
Temperature and Timing:
- Bake at 325°F (163°C) for 55-65 minutes
- The center should still jiggle slightly when gently shaken
- Turn off the oven and crack the door open
- Let the cheesecake cool in the oven for 1 hour
This gradual cooling process prevents the dramatic temperature change that causes cracks. I learned this technique from a professional pastry chef, and it has revolutionized my cheesecake success rate.
Cooling and Chilling Guidelines
Patience during the cooling and chilling phases determines the final texture of your cheesecake. Rushing this process results in a dense, heavy dessert instead of the light, creamy texture we’re aiming for.
Cooling Protocol:
- Cool in turned-off oven with door ajar for 1 hour
- Remove from oven and cool completely at room temperature (2-3 hours)
- Refrigerate overnight (minimum 8 hours, preferably 12-24 hours)
The extended chilling time allows the flavors to meld and the texture to set properly. I often make my cheesecakes a day ahead of serving, which actually improves both flavor and texture.
Troubleshooting Common Issues
| Problem | Cause | Solution |
|---|---|---|
| Cracks on surface | Temperature shock, overbaking | Use water bath, gradual cooling |
| Dense, heavy texture | Overmixing, cold ingredients | Mix gently, room temp ingredients |
| Soggy crust | Moisture from filling | Pre-bake crust, proper sealing |
| Uneven swirls | Overswirling, thin puree | Gentle swirling, proper puree consistency |
| Sinking center | Underbaking, temperature issues | Proper baking time, oven thermometer |
Creative Variations and Flavor Combinations
Once you’ve mastered the basic strawberry swirl technique, the possibilities for customization become endless. I’ve experimented with numerous variations that build on this foundation.
Seasonal Adaptations:
- Summer: Mixed berry swirl using strawberries, blueberries, and raspberries
- Fall: Strawberry-apple swirl with cinnamon undertones
- Winter: Strawberry-chocolate swirl for holiday celebrations
- Spring: Strawberry-rhubarb combination for tangy complexity
Texture Variations: Adding small pieces of fresh strawberries to the filling creates delightful bursts of fruit throughout each slice. I dice about ½ cup of strawberries and fold them gently into the batter before adding the swirl component.
Professional Presentation Tips
The visual presentation of your strawberry swirl cheesecake can elevate it from homemade dessert to restaurant-quality masterpiece. I’ve learned several professional techniques that make a dramatic difference.
Slicing Technique:
- Use a sharp, thin-bladed knife
- Dip the blade in warm water between cuts
- Wipe clean after each slice
- Make confident, single strokes rather than sawing motions
Garnishing Options:
- Fresh strawberry fans
- Mint sprigs for color contrast
- Dusting of powdered sugar
- Drizzle of additional strawberry puree
- Whipped cream rosettes
Serving Suggestions and Pairings
The beauty of strawberry swirl cheesecake lies in its versatility. I’ve served this dessert at casual family dinners and elegant dinner parties with equal success.
Complementary Beverages:
- Fresh coffee or espresso
- Earl Grey or chamomile tea
- Sparkling water with lemon
- Fresh fruit smoothies
- Hot chocolate for younger guests
Accompaniment Ideas:
- Fresh berry medley
- Vanilla bean ice cream
- Homemade whipped cream
- Shortbread cookies
- Chocolate wafer cookies
Storage and Make-Ahead Instructions
One of the greatest advantages of cheesecake is its excellent keeping quality and make-ahead potential. Proper storage maintains both flavor and texture for several days.
Refrigerator Storage:
- Cover tightly with plastic wrap or aluminum foil
- Store for up to 5 days in refrigerator
- Keep away from strong-smelling foods that might affect flavor
Freezing Instructions:
- Wrap individual slices in plastic wrap, then aluminum foil
- Freeze for up to 3 months
- Thaw overnight in refrigerator before serving
- Texture remains excellent after proper freezing and thawing
Nutritional Considerations and Modifications
| Nutritional Aspect | Per Slice (1/12 of cake) | Modification Options |
|---|---|---|
| Calories | 485 | Use reduced-fat cream cheese |
| Fat | 32g | Greek yogurt substitution |
| Carbohydrates | 42g | Sugar alternatives available |
| Protein | 8g | Add protein powder to filling |
| Fiber | 2g | Graham cracker alternatives |
For those with dietary restrictions, I’ve successfully created modified versions using Greek yogurt in place of some cream cheese, and sugar alternatives work well in both the filling and strawberry puree.
Seasonal Shopping and Ingredient Selection
The quality of your strawberries dramatically impacts the final result. I’ve learned to select and prepare strawberries for optimal flavor and appearance.
Strawberry Selection Criteria:
- Bright red color with no white or green areas
- Fresh, green caps that aren’t wilted
- Firm texture without soft spots
- Sweet aroma at the stem end
- Medium to large size for easier processing
Storage Before Use: Store unwashed strawberries in the refrigerator and wash just before using. Remove any damaged berries immediately as they can affect the others.
Frequently Asked Questions
Q: Can I make this cheesecake without a springform pan? I don’t recommend it. The springform pan’s removable sides are essential for clean removal and professional presentation. A regular cake pan makes it nearly impossible to remove the cheesecake intact.
Q: Why did my cheesecake crack despite following the recipe? Cracking usually results from temperature shock or overbaking. Ensure you’re using a water bath, avoid opening the oven door during baking, and allow for gradual cooling.
Q: Can I use frozen strawberries for the swirl? Yes, but thaw and drain them thoroughly first. Frozen strawberries release more moisture, so you may need to cook the puree longer to achieve the proper consistency.
Q: How do I know when the cheesecake is properly baked? The center should still jiggle slightly when you gently shake the pan. The edges will be set and slightly puffed. A toothpick inserted near the center should come out with a few moist crumbs.
Q: Can I make individual mini cheesecakes using this recipe? Absolutely! Use a muffin tin lined with paper liners. Reduce baking time to 18-22 minutes and adjust cooling times accordingly.
Q: What’s the best way to fix a cracked cheesecake? If your cheesecake cracks, don’t panic. You can cover cracks with additional strawberry puree, whipped cream, or fresh berries. The taste won’t be affected.
Q: Why is my strawberry swirl sinking to the bottom? This happens when the strawberry puree is too thin or when it’s added to batter that’s too thick. Ensure your puree has the consistency of thick jam.
Q: Can I substitute the graham crackers in the crust? Yes! Try vanilla wafers, chocolate cookies, or even crushed shortbread. Adjust the butter quantity as needed to achieve the proper binding consistency.
Q: How far in advance can I make this cheesecake? I actually prefer making it 1-2 days ahead. The flavors develop and the texture improves with time. It can be made up to 3 days in advance when properly stored.
Q: What causes a dense, heavy texture instead of light and creamy? Dense texture usually results from overmixing the batter, using cold ingredients, or incorrect baking temperature. Follow mixing instructions carefully and ensure all ingredients are at room temperature.
This strawberry swirl cheesecake represents the perfect marriage of technique and creativity. The combination of rich, tangy filling with bright strawberry ribbons creates a dessert that’s both visually stunning and incredibly satisfying. Every time I serve this cheesecake, I’m reminded of why I fell in love with baking in the first place – the joy of creating something beautiful and delicious that brings people together around the table.