Have you ever bitten into a pastry that’s simultaneously crisp and fluffy, sweet yet subtly balanced? That’s the magic of melon pan, a Japanese sweet bread that has captured hearts worldwide. As someone who’s spent years perfecting this recipe, I’m excited to share everything I know about this delightful treat.
What is Melon Pan?
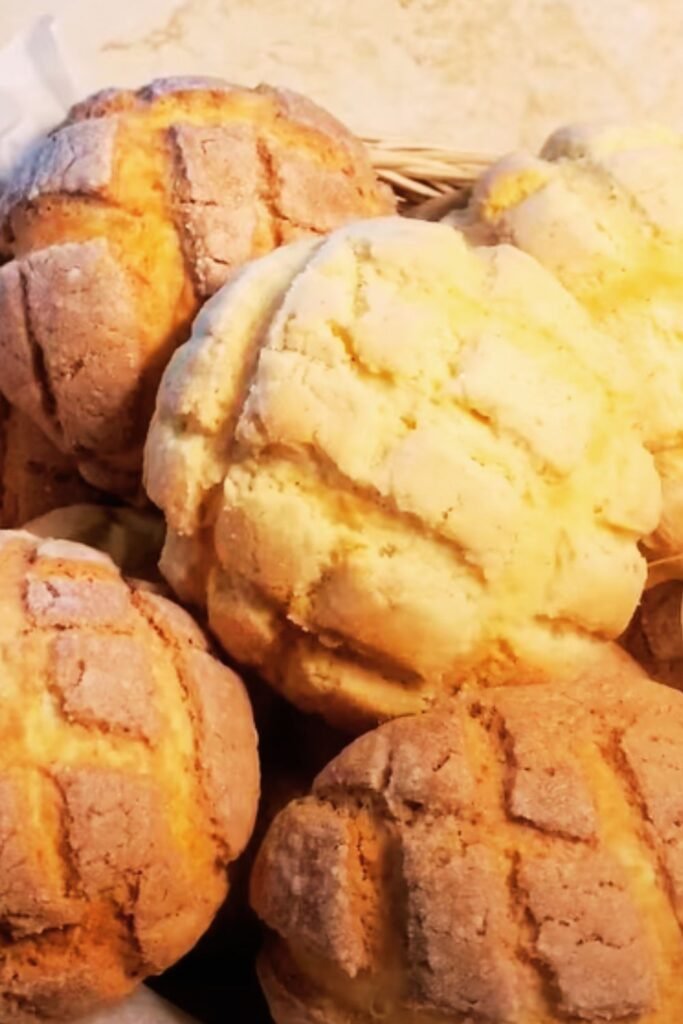
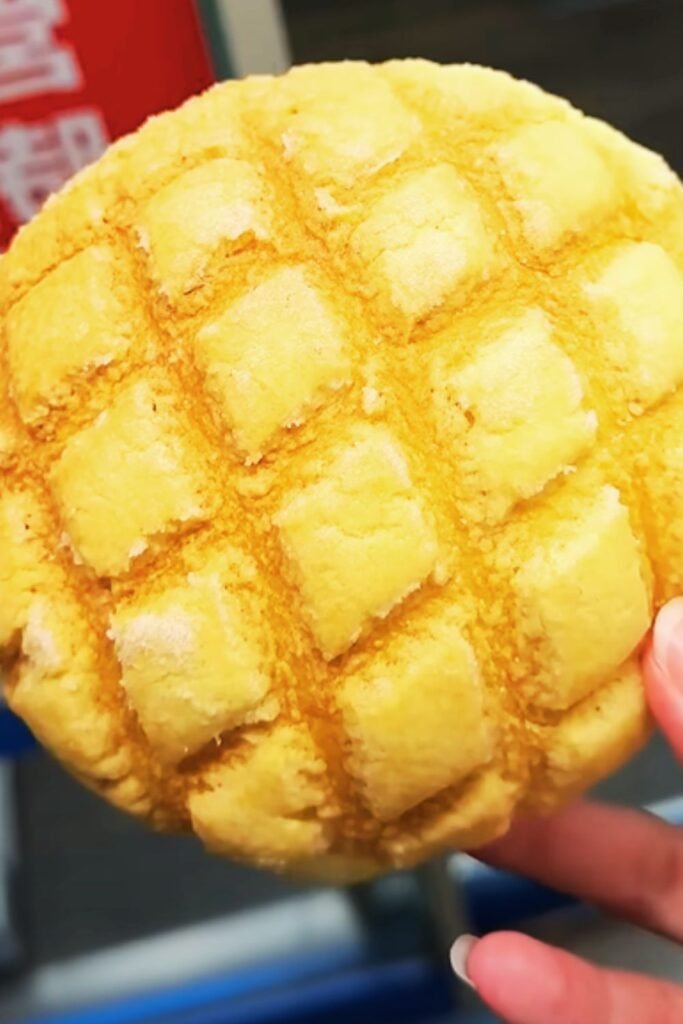
Melon pan (メロンパン) is an iconic Japanese sweet bread characterized by its distinctive cookie crust topping scored with a crosshatch pattern to resemble a melon’s rind. Despite its name, traditional melon pan doesn’t actually contain melon—the name comes solely from its appearance, though modern variations sometimes incorporate melon flavoring.
I first encountered melon pan during a trip to Tokyo, where I found myself joining the daily queue at a small bakery near Shinjuku station. The experience of that first bite—the contrast between the crispy cookie exterior and the pillowy soft bread underneath—was enough to spark a years-long obsession with recreating it at home.
The Rich History Behind This Sweet Treat
Melon pan has a fascinating history that dates back to the early 20th century. While sweet breads were introduced to Japan by Portuguese missionaries in the 16th century, melon pan as we know it today emerged during the Meiji era (1868-1912) when Japan opened its doors to Western influences.
The bread represents a beautiful fusion of European baking techniques with Japanese culinary sensibilities. Some historians believe it was inspired by the French “galette” or the British “rock cake,” but transformed into something uniquely Japanese.
Today, melon pan is an integral part of Japanese food culture, found in convenience stores, dedicated bakeries, and featured in anime and manga. Its popularity has spread globally, with specialized Japanese bakeries offering this treat in major cities worldwide.
Why Make Melon Pan at Home?
While you might find melon pan in specialty Asian bakeries, nothing compares to a freshly baked batch made in your own kitchen. Here’s why I believe making it at home is worthwhile:
- Freshness: Experience the perfect contrast between crisp topping and soft bread at its peak
- Customization: Adjust sweetness and add flavors according to your preference
- Satisfaction: There’s something magical about creating this complex-looking bread yourself
- Cost-effective: Make a batch of 8-10 buns for the price of 1-2 from a specialty bakery
- Impressive: Delight friends and family with this unique, Instagram-worthy creation
Essential Ingredients for Authentic Melon Pan
Creating authentic melon pan requires two distinct components: a soft, enriched bread dough and a sweet cookie-like topping. Let’s break down exactly what you’ll need:
For the Bread Dough
| Ingredient | Quantity | Notes |
|---|---|---|
| Bread flour | 2½ cups (320g) | Higher protein content (12-14%) for structure |
| Granulated sugar | ¼ cup (50g) | Provides sweetness and tenderness |
| Salt | ½ tsp (3g) | Enhances flavor |
| Instant dry yeast | 1 tbsp (9g) | Faster than active dry yeast |
| Whole milk | ½ cup (120ml) | Warmed to 110°F (43°C) |
| Eggs | 1 large, plus 1 for egg wash | Room temperature |
| Unsalted butter | 3 tbsp (42g) | Softened |
| Vanilla extract | 1 tsp | For subtle flavor |
For the Cookie Topping
| Ingredient | Quantity | Notes |
|---|---|---|
| All-purpose flour | 1 cup (125g) | Lower protein content for tender crust |
| Granulated sugar | ⅓ cup (67g) | Creates the sweet contrast |
| Baking powder | ¼ tsp | Provides slight lift |
| Salt | Pinch | Balances sweetness |
| Unsalted butter | 3 tbsp (42g) | Cold and cubed |
| Egg | 1 large | Room temperature |
| Vanilla extract | ½ tsp | Enhances flavor |
| Green food coloring (optional) | Few drops | For traditional melon appearance |
| Granulated sugar | 2 tbsp | For coating |
Essential Equipment
| Equipment | Purpose |
|---|---|
| Stand mixer with dough hook | Makes kneading easier |
| Digital kitchen scale | For precise measurements |
| Plastic bench scraper | Helps divide dough |
| Baking sheets | For baking the melon pan |
| Parchment paper | Prevents sticking |
| Plastic wrap | For covering dough while rising |
| Small knife or dough scorer | Creates the signature pattern |
Step-by-Step Melon Pan Recipe
Preparing the Bread Dough
- Activate the yeast: In a small bowl, combine warm milk (110°F/43°C) with 1 teaspoon of your measured sugar and the yeast. Let it sit for 5-10 minutes until foamy and activated.
- Mix dry ingredients: In the bowl of your stand mixer fitted with the dough hook, combine bread flour, remaining sugar, and salt.
- Combine wet ingredients: Once the yeast is activated, add it to the dry ingredients along with the egg and vanilla extract. Mix on low speed until roughly combined.
- Incorporate butter: With the mixer running on medium-low speed, add softened butter one tablespoon at a time, waiting until each piece is incorporated before adding the next.
- Develop the gluten: Increase speed to medium and knead for 8-10 minutes until the dough is smooth, elastic, and pulls away from the sides of the bowl. The dough should pass the “windowpane test” – when a small piece can be stretched thin enough to see light through without tearing.
- First rise: Shape the dough into a ball and place in a lightly greased bowl. Cover with plastic wrap and let rise in a warm place for 1-1.5 hours, or until doubled in size.
Making the Cookie Topping
While the bread dough is rising, prepare the cookie topping:
- Combine dry ingredients: In a medium bowl, whisk together the all-purpose flour, sugar, baking powder, and salt.
- Cut in butter: Add the cold, cubed butter to the dry ingredients and use your fingertips or a pastry cutter to work it in until the mixture resembles coarse crumbs.
- Add wet ingredients: Beat the egg with vanilla extract and optional food coloring, then add to the flour mixture.
- Form the dough: Stir until the mixture comes together to form a soft dough. If it’s too sticky, add a bit more flour, 1 tablespoon at a time.
- Chill: Form the dough into a disk, wrap in plastic, and refrigerate for at least 30 minutes while the bread dough completes its first rise.
Assembly and Baking
- Divide the doughs: Once the bread dough has doubled in size, punch it down and divide into 8 equal portions (about 65g each). Shape each into a smooth ball by tucking the edges underneath and rolling between your palms. Place on a parchment-lined baking sheet, cover, and let rest for 15 minutes.
- Prepare cookie topping: Remove the chilled cookie dough from the refrigerator and divide into 8 equal portions. Place each portion between two sheets of plastic wrap and roll into thin circles about 3.5 inches (9cm) in diameter.
- Combine the two doughs: Place each cookie dough circle on top of a bread dough ball, gently pressing to adhere. The cookie dough should drape over the sides of the bread dough.
- Create the pattern: Use a small knife or pastry cutter to score the cookie topping in a crosshatch pattern, being careful not to cut all the way through to the bread dough. Sprinkle each bun with granulated sugar to coat the top.
- Final rise: Cover the assembled buns loosely with plastic wrap and let rise for another 30-40 minutes until puffy.
- Bake: Preheat your oven to 350°F (175°C). Beat the remaining egg for egg wash and gently brush the sides (not the top) of each bun. Bake for 15-18 minutes until the tops are golden brown and crisp.
- Cool: Allow the melon pan to cool on the baking sheet for 5 minutes, then transfer to a wire rack to cool completely.
Troubleshooting Common Melon Pan Problems
| Problem | Possible Cause | Solution |
|---|---|---|
| Dense bread layer | Insufficient kneading or rising time | Knead dough until it passes the windowpane test and ensure proper rising time in a warm environment |
| Cookie topping too hard | Overbaking or too much flour in topping | Reduce baking time by 2-3 minutes and measure flour precisely |
| Cookie topping slides off | Too much egg wash or uneven application | Apply egg wash only to the sides, not where the cookie topping meets the bread |
| Cracks in the cookie layer | Dough rolled too thin or scored too deeply | Roll cookie dough to even thickness and score lightly |
| Bread dough too sticky | Insufficient flour or too much liquid | Add flour 1 tablespoon at a time during kneading until proper consistency is reached |
Flavor Variations To Try
While traditional melon pan doesn’t actually contain melon flavor, modern bakeries often offer creative variations. Here are some of my favorite twists on the classic recipe:
Actual Melon Flavored Melon Pan
Add 2 tablespoons of freeze-dried melon powder to the cookie dough for authentic melon flavor without additional moisture. Alternatively, add 1 teaspoon of melon extract to both doughs.
Matcha Melon Pan
Replace the green food coloring with 1-2 tablespoons of matcha powder in the cookie dough for a delightful earthy flavor and natural green color.
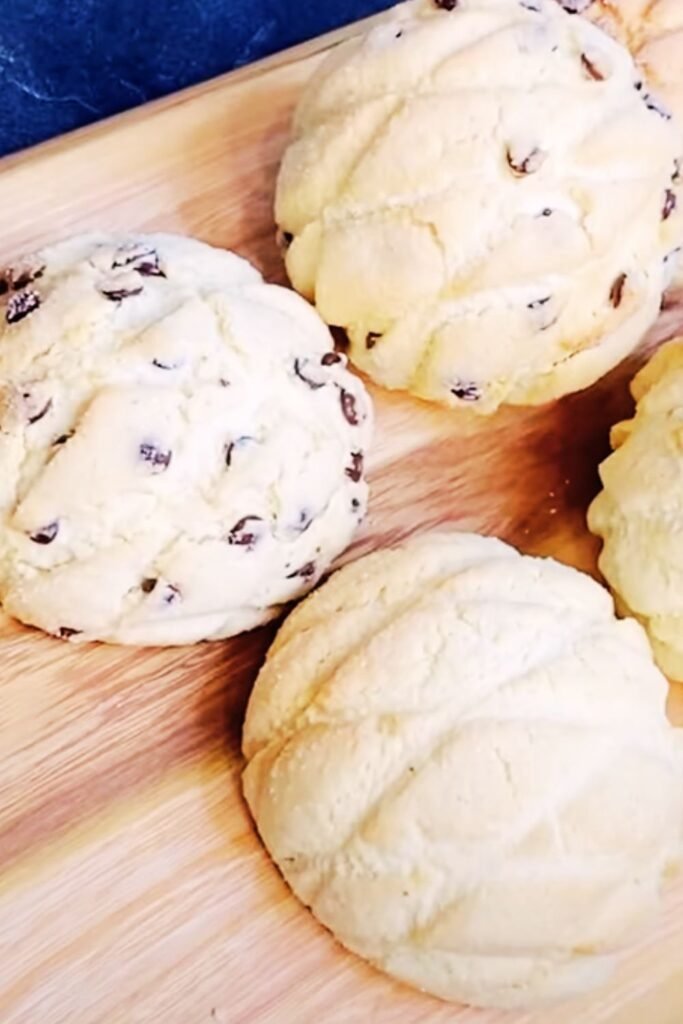
Chocolate Melon Pan
Add 2 tablespoons of cocoa powder to the cookie dough and fold mini chocolate chips into the bread dough for a double chocolate experience.
Strawberry Melon Pan
Mix 2 tablespoons of freeze-dried strawberry powder into the cookie dough for a fruity twist with a pretty pink color.
Kinako (Roasted Soybean Flour) Melon Pan
Add 2 tablespoons of kinako to the cookie dough for a nutty, distinctly Japanese flavor profile.
Storing and Freezing Tips
Melon pan is best enjoyed fresh on the day it’s baked, but here’s how to keep it delicious if you have leftovers:
Short-Term Storage
Store completely cooled melon pan in an airtight container at room temperature for up to 2 days. After this time, the cookie topping will begin to soften and lose its characteristic crispness.
Freezing Instructions
- Allow baked melon pan to cool completely
- Wrap each bun individually in plastic wrap, then place in a freezer-safe bag
- Freeze for up to 1 month
- To reheat, thaw at room temperature for 1 hour, then warm in a 300°F (150°C) oven for 5-7 minutes to restore some crispness
Make-Ahead Option
You can also prepare the dough ahead of time:
- Make both doughs and refrigerate separately (bread dough after first rise)
- The next day, let the bread dough come to room temperature for 30 minutes
- Proceed with shaping, assembly, final rise, and baking as directed
Serving Suggestions
Melon pan is traditionally enjoyed as a snack or breakfast item in Japan, but there are many delightful ways to enhance this sweet treat:
- Serve slightly warm with a glass of cold milk for a simple, comforting snack
- Pair with matcha or hojicha tea for an authentic Japanese experience
- Split and fill with a scoop of vanilla ice cream for an indulgent dessert
- Create a sophisticated dessert by serving with fresh fruit and whipped cream
- Use as the base for a unique bread pudding
Cultural Significance of Melon Pan
What fascinates me most about melon pan is how it represents Japan’s skill at adopting and transforming foreign concepts into something uniquely Japanese. Japanese bakeries, or “pan-ya,” revolutionized bread-making by creating lighter, sweeter varieties that appealed to local palates.
Melon pan belongs to a family of similar East Asian breads:
- Pineapple bun (Hong Kong): Similar concept but with a more crumbly top
- Conchas (Mexico): Sweet bread with a shell-patterned sugar topping
- Soboro-ppang (Korea): Sweet bread with a crumbly streusel topping
In Japanese pop culture, melon pan frequently appears in anime and manga as a beloved snack. It’s even inspired specialty melon pan-themed cafes in Tokyo and other major cities, where creative variations push the boundaries of this traditional treat.
My Personal Journey with Melon Pan
I remember my first attempt at making melon pan—it was a disaster. The bread was dense as a hockey puck, and the cookie topping slid right off. But with each batch, I learned something new: the importance of proper kneading, the right temperature for yeast activation, and the delicate balance of the two doughs.
After dozens of attempts and tweaks to the recipe, I finally achieved what I consider the perfect melon pan: a light, fluffy interior with just the right amount of sweetness, topped with a crisp, buttery cookie layer that shatters delightfully with each bite.
What I’ve come to love most about making melon pan is how it connects me to a culinary tradition spanning continents and centuries. Each time I score that crosshatch pattern on top, I feel like I’m participating in something greater than just baking—I’m keeping a piece of culinary history alive.

Frequently Asked Questions
Why is it called melon pan if it doesn’t contain melon?
The name comes purely from its appearance, which resembles the rind of a muskmelon with its crosshatch pattern. Traditional recipes don’t include melon flavoring, though modern variations sometimes do.
Can I make melon pan without a stand mixer?
Absolutely! While a stand mixer makes the process easier, you can mix the dough by hand. Combine ingredients with a wooden spoon until roughly mixed, then knead on a floured surface for about 15 minutes until smooth and elastic.
Why didn’t my bread rise properly?
This could be due to inactive yeast, insufficient kneading, or a too-cold environment. Ensure your yeast is fresh and properly activated (should foam after 5-10 minutes in warm liquid), knead until the dough passes the windowpane test, and let it rise in a warm place (75-80°F/24-27°C is ideal).
Can I make melon pan with whole wheat flour?
You can substitute up to 1/3 of the bread flour with whole wheat flour, but expect a denser result. The cookie topping should still be made with all-purpose flour for the right texture.
My cookie topping cracked too much during baking. What went wrong?
This usually happens when the cookie dough is rolled too thin or when the final rise is too long, causing excessive expansion of the bread dough underneath. Try rolling the cookie dough slightly thicker (about 2-3mm) and limiting the final rise to 30-40 minutes.
Is melon pan suitable for vegetarians?
Traditional melon pan contains eggs and dairy, making it suitable for vegetarians but not vegans. However, vegan versions can be made using plant-based milk, vegan butter, and egg replacers with good results.
Can I add fillings to melon pan?
While not traditional, you can absolutely add fillings like custard, chocolate, or red bean paste! After dividing the bread dough, flatten each piece, add 1-2 teaspoons of filling in the center, then seal and shape into a ball before topping with the cookie dough.
How do I know when melon pan is done baking?
Properly baked melon pan will have a golden brown cookie topping and will sound hollow when tapped on the bottom. If you’re unsure, an instant-read thermometer inserted into the bread part should read 190-200°F (88-93°C).
Final Thoughts
Melon pan represents what I love most about baking—the perfect marriage of technique and tradition. It’s a bread that challenges you to balance contrasting textures and flavors, resulting in something greater than the sum of its parts.
Whether you’re an experienced baker or a curious beginner, I encourage you to try your hand at this beloved Japanese treat. The process may seem involved, but the reward of biting into your own freshly baked melon pan—experiencing that magical moment when crisp cookie meets fluffy bread—is absolutely worth every minute spent.
And remember, like any traditional recipe, melon pan has endless variations and interpretations. Once you’ve mastered the basic technique, don’t be afraid to experiment and make it your own. After all, innovation within tradition is how delightful creations like melon pan come to exist in the first place.